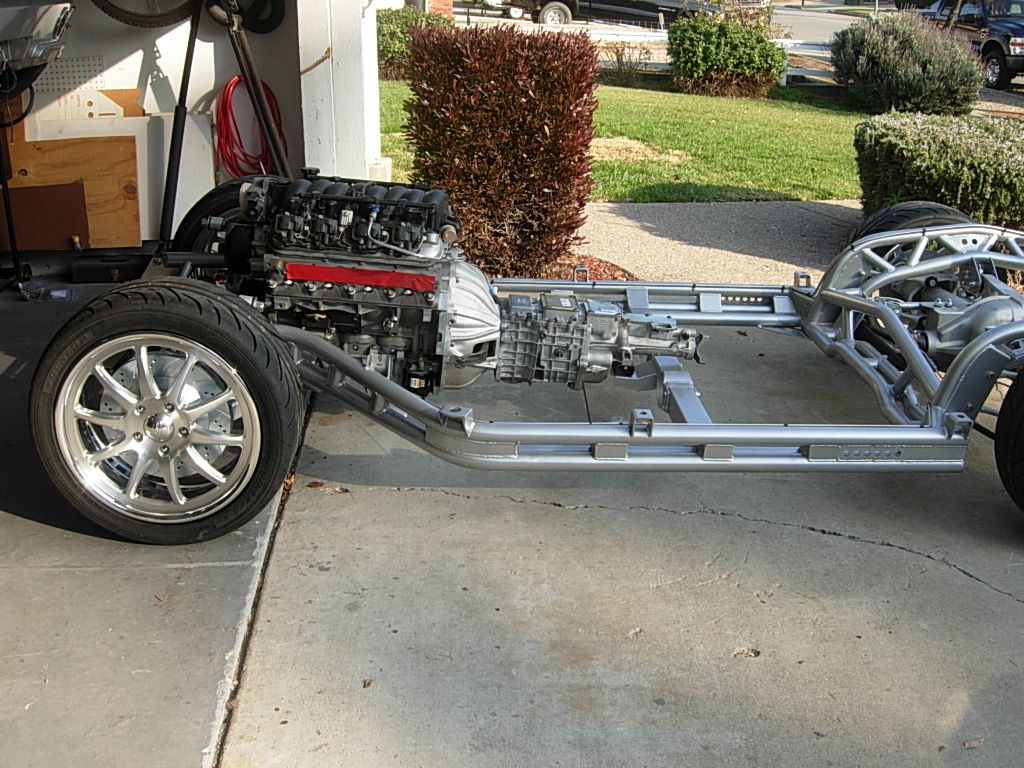
Phase II Chassis Conversion continued
THE PETS
Chevelles
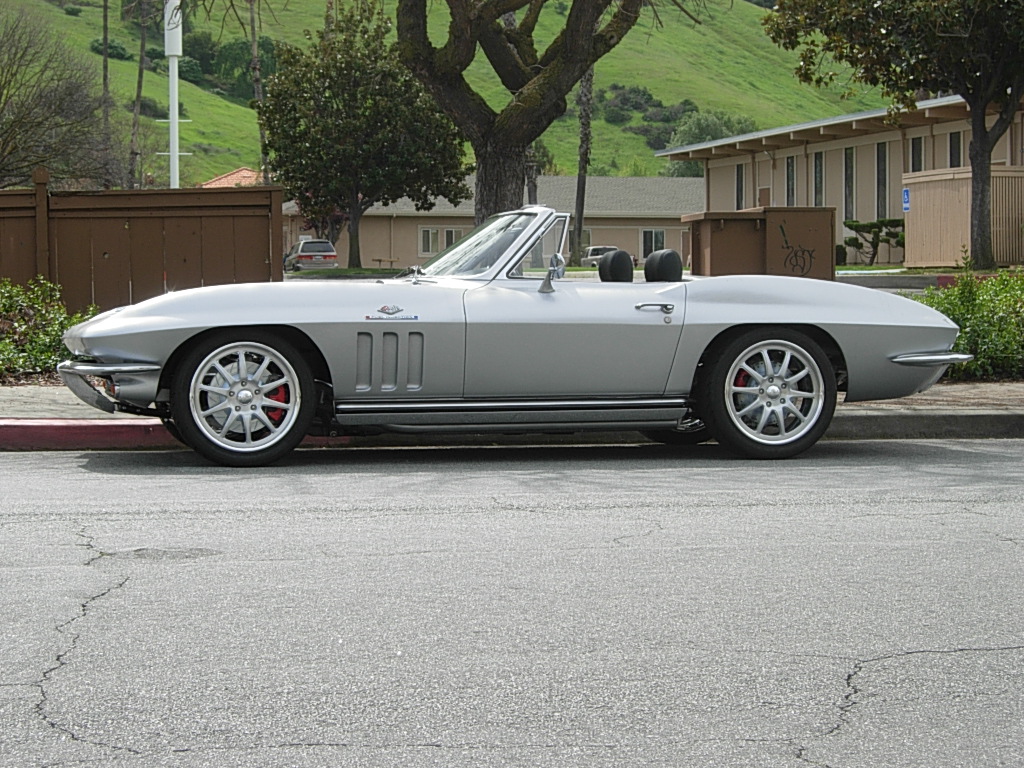
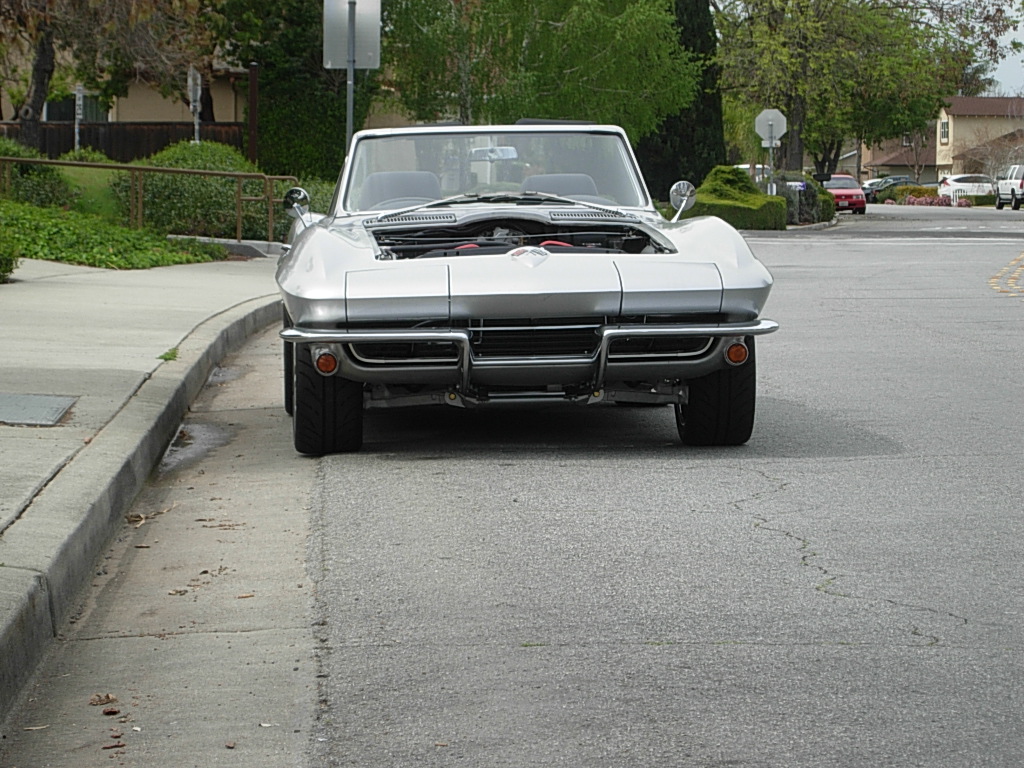
1965 Corvette
Motorcycles and Track Days
The Corvette Build- Drivetrain and Interior
The Corvette Build- Wiring and Final Assembly (Phase 1)
The Corvette Buildup (Phase 2) chassis conversion
More Corvette Phase 2 progress
Corvette Phase 3 Final Assembly and Glamour pictures
1949 Mercury Woody Wagon project- Part 1
Chico house
Mercury Woody Project- Part 2
Mercury Woody Project- Part 3
Final reassembly and adjustments to make it driveable agin...
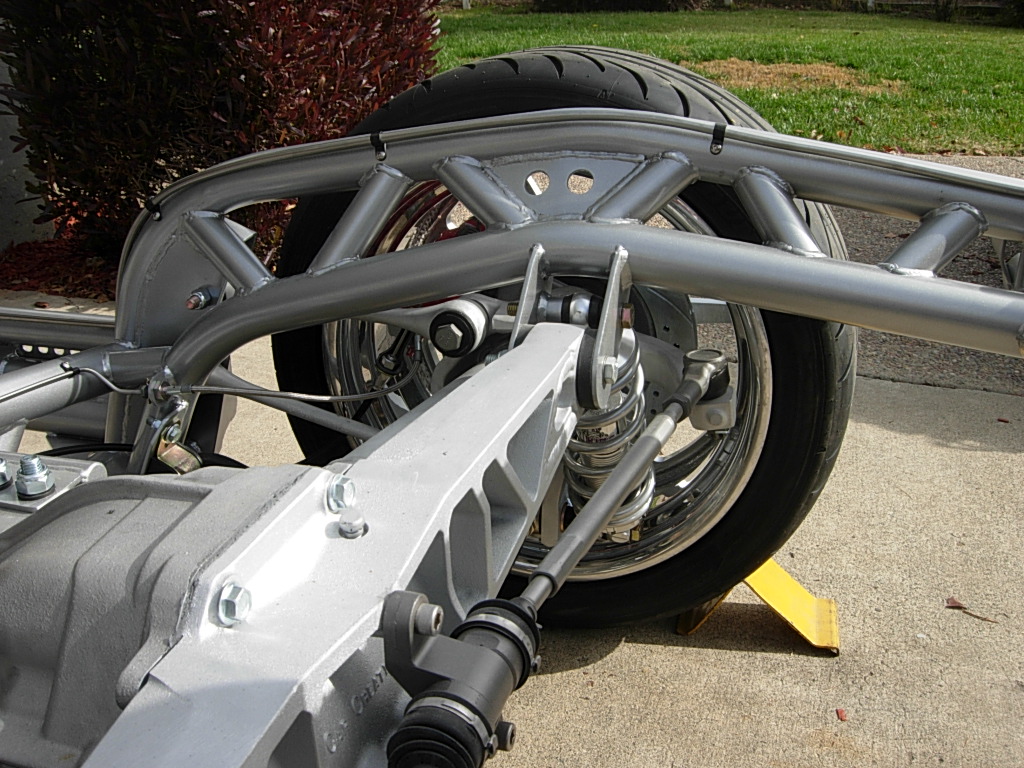
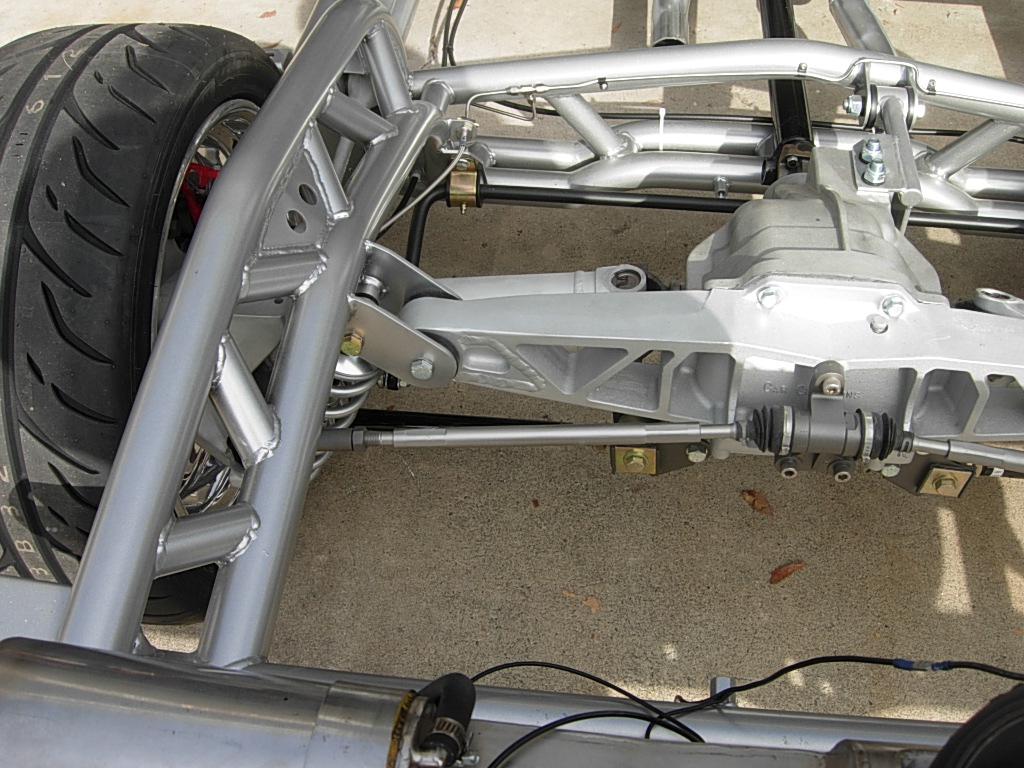
With the right engine adapter plates I was able to mount the engine and transmission. The Dana 44 differential is larger that stock, so I need to get the drive shaft cut down about 1".
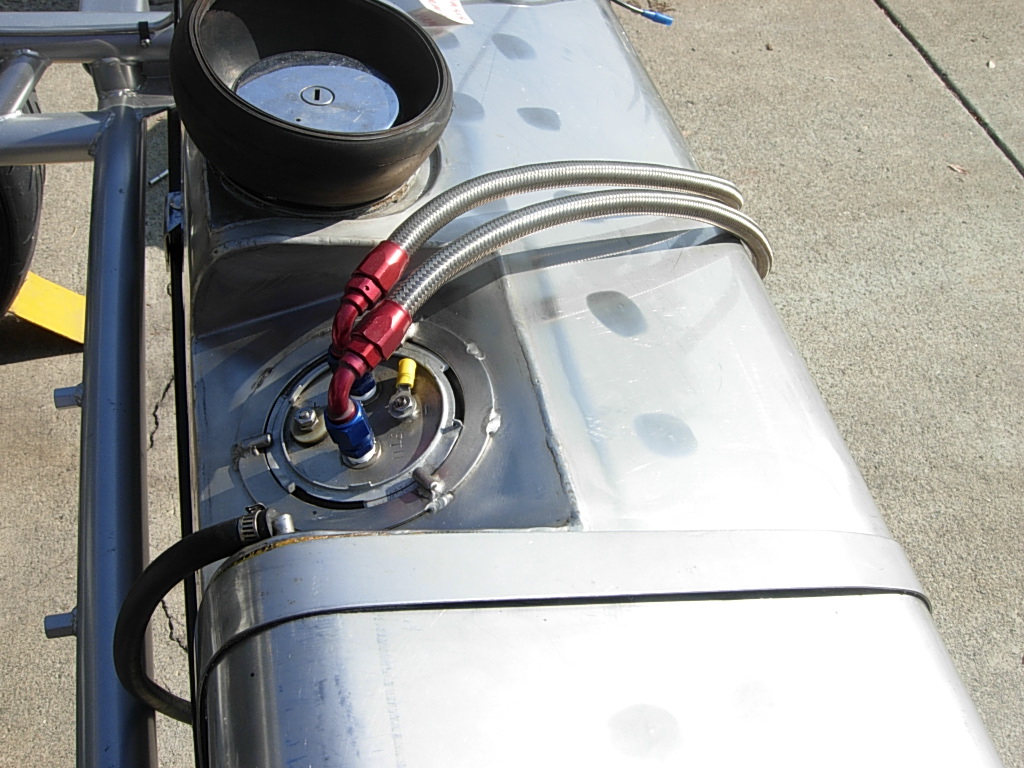
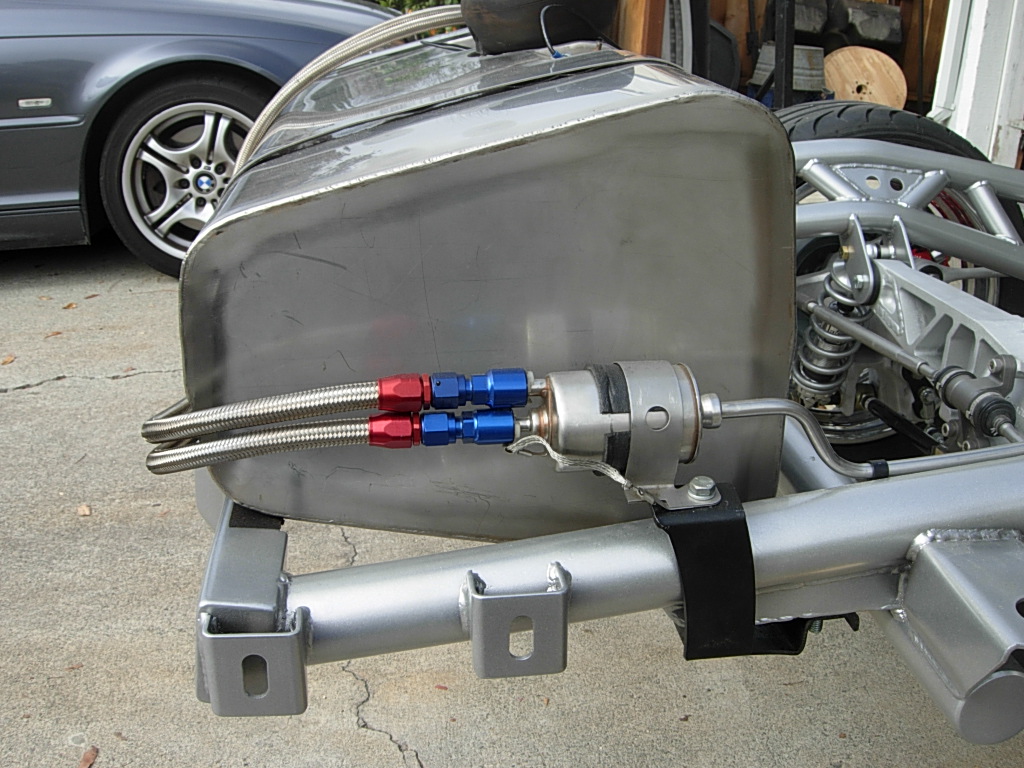
I installed the fuel tank and fittings after cleaning everything.
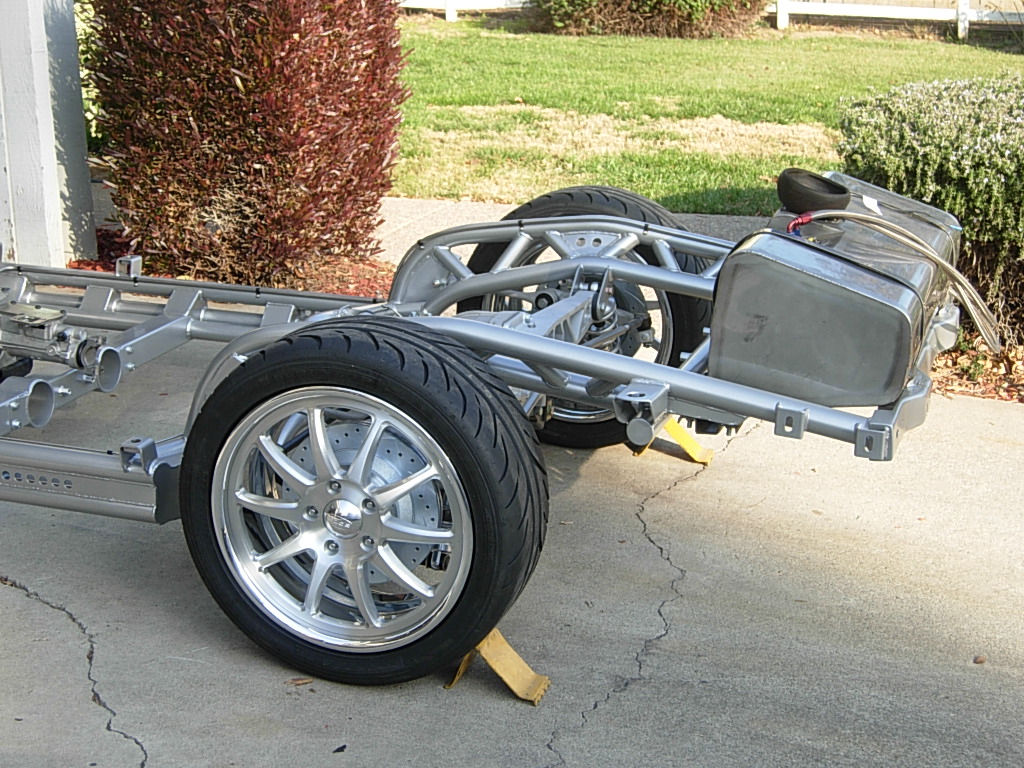
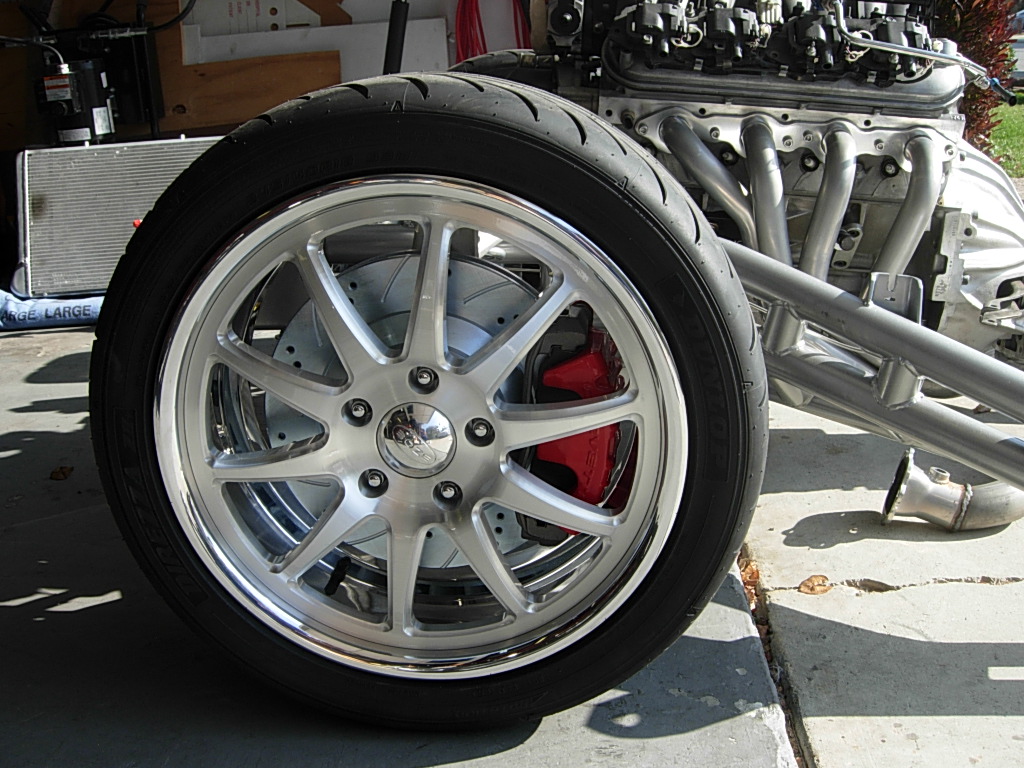
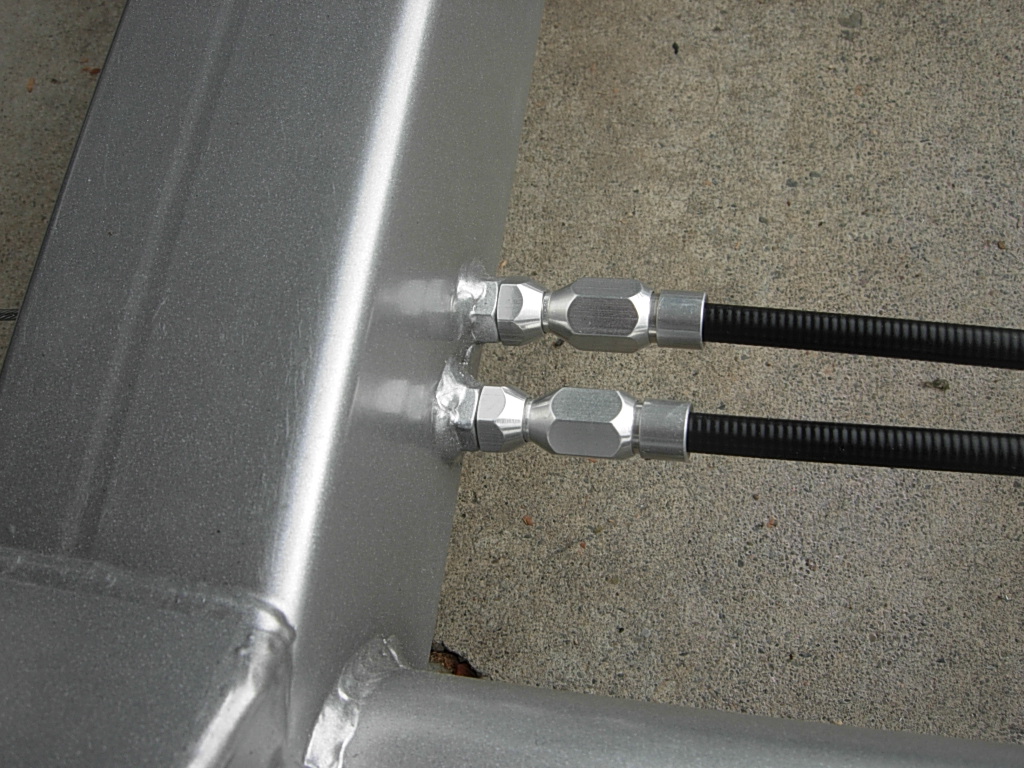
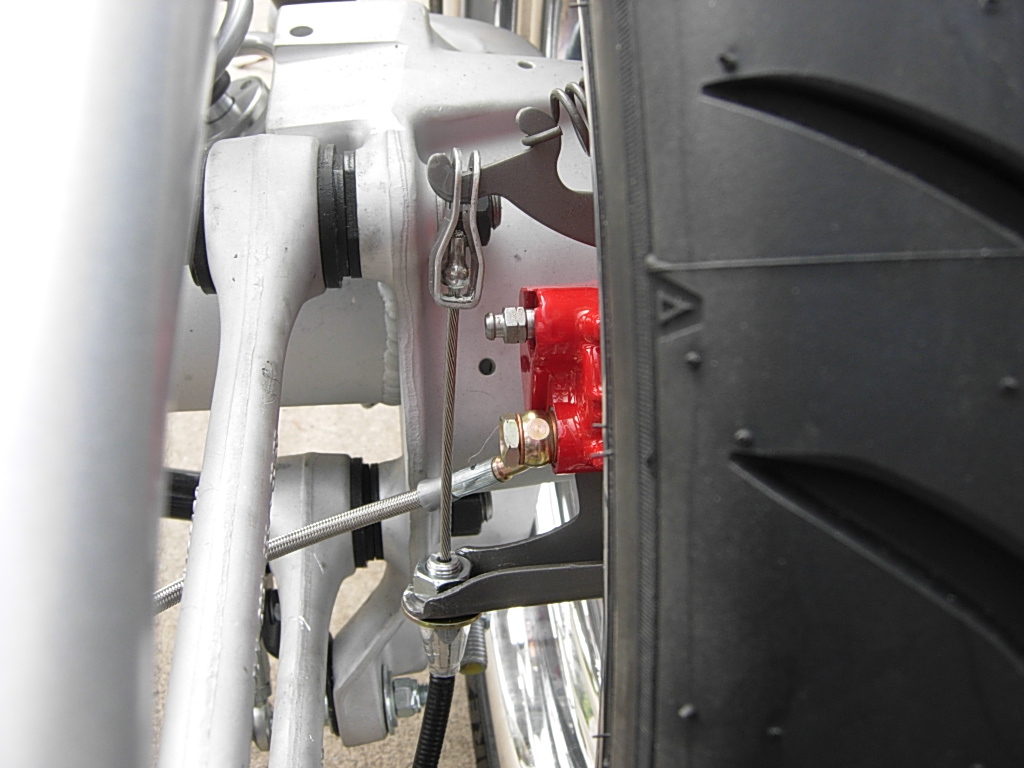
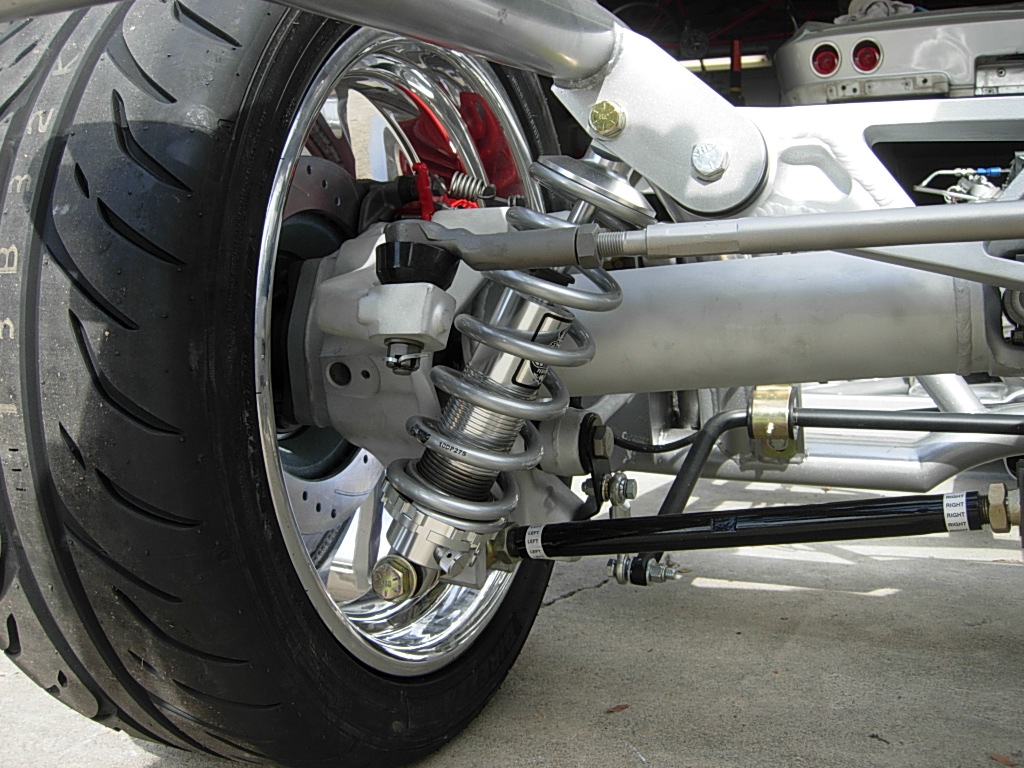
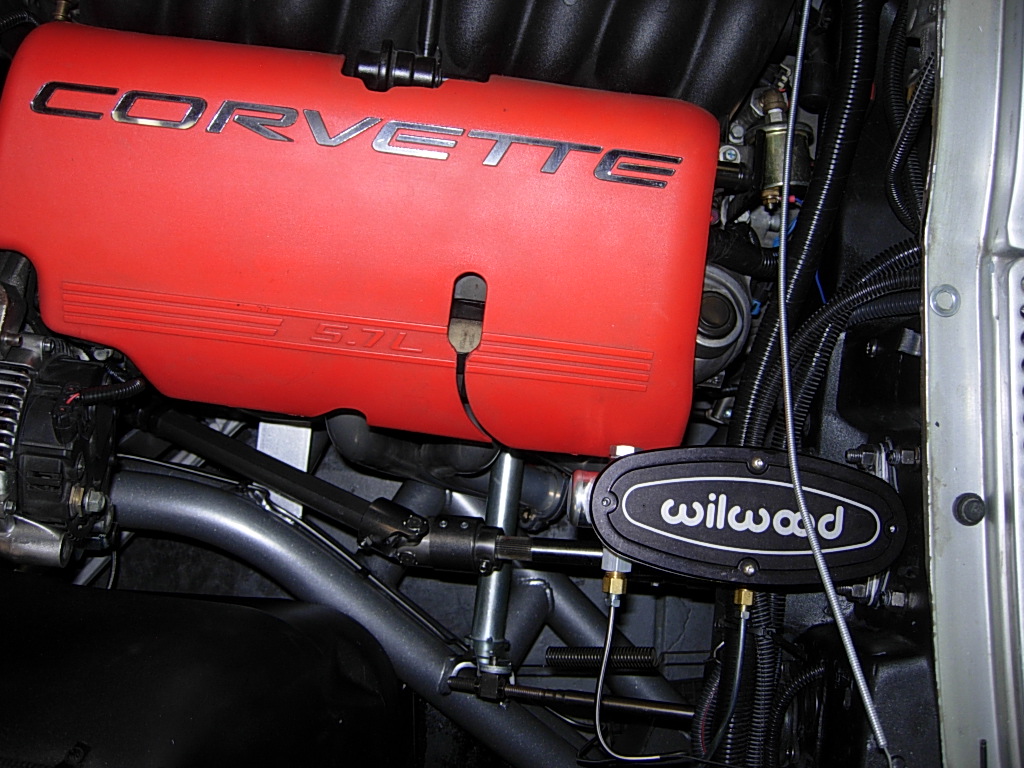
I mounted the brake calipers and flex lines.

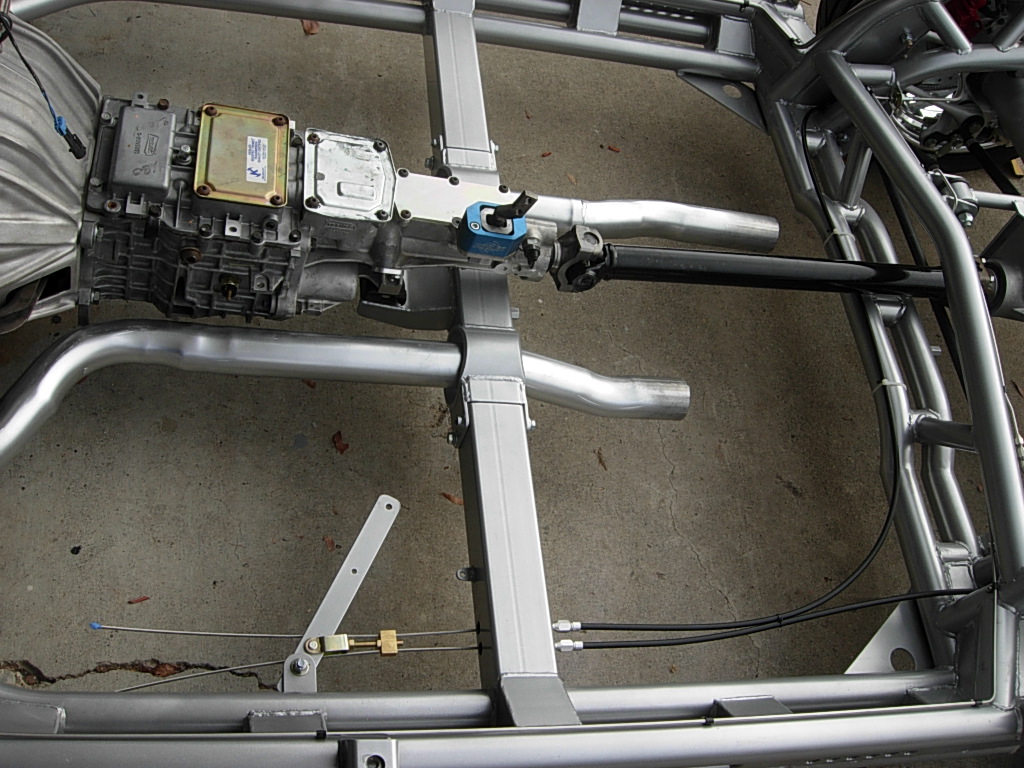
SR III designs their frame to use Lokar emergency brake cable to operate the Corvette rear brakes.
As usual for SR III the egineering and execution is excellent.
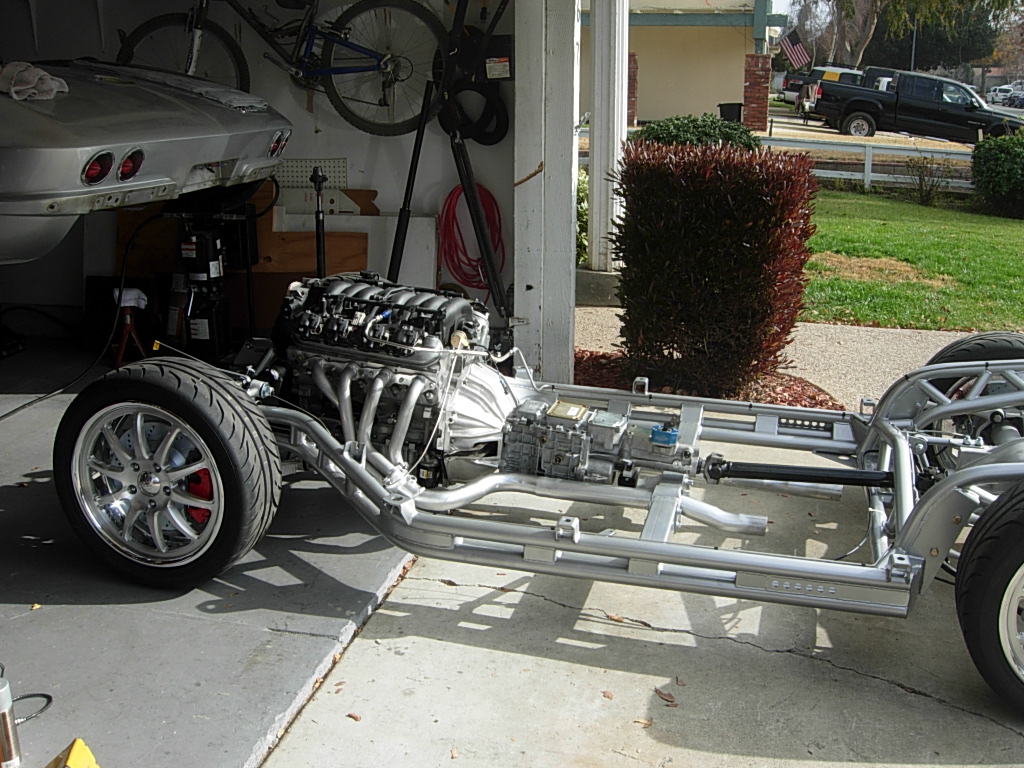
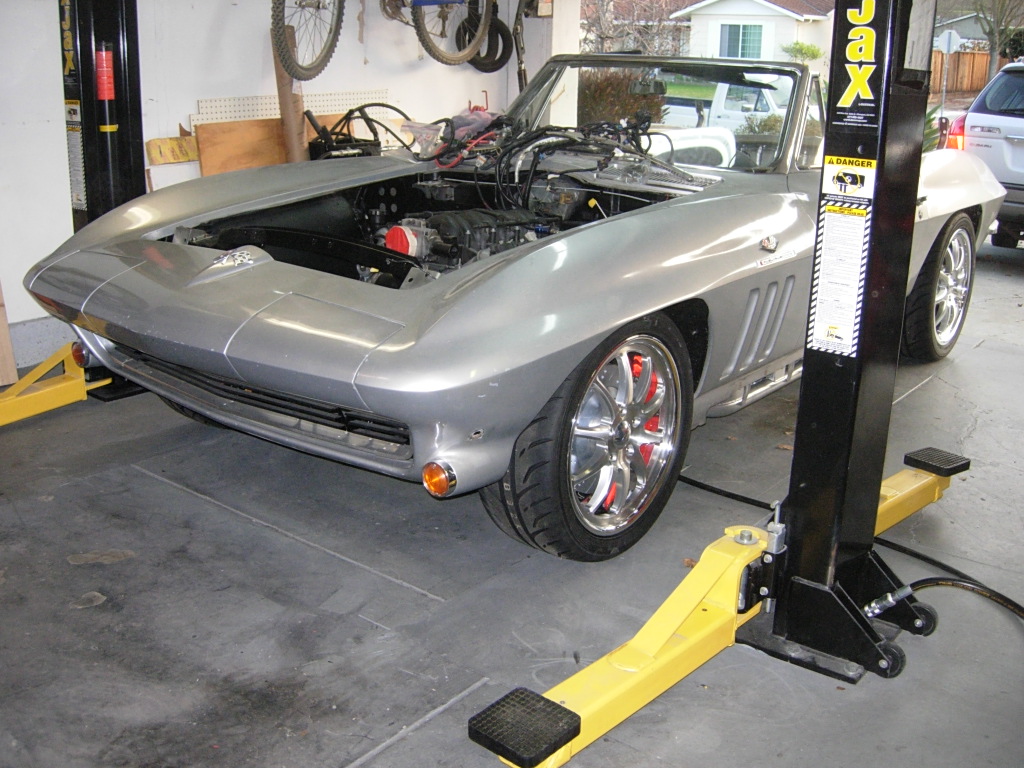
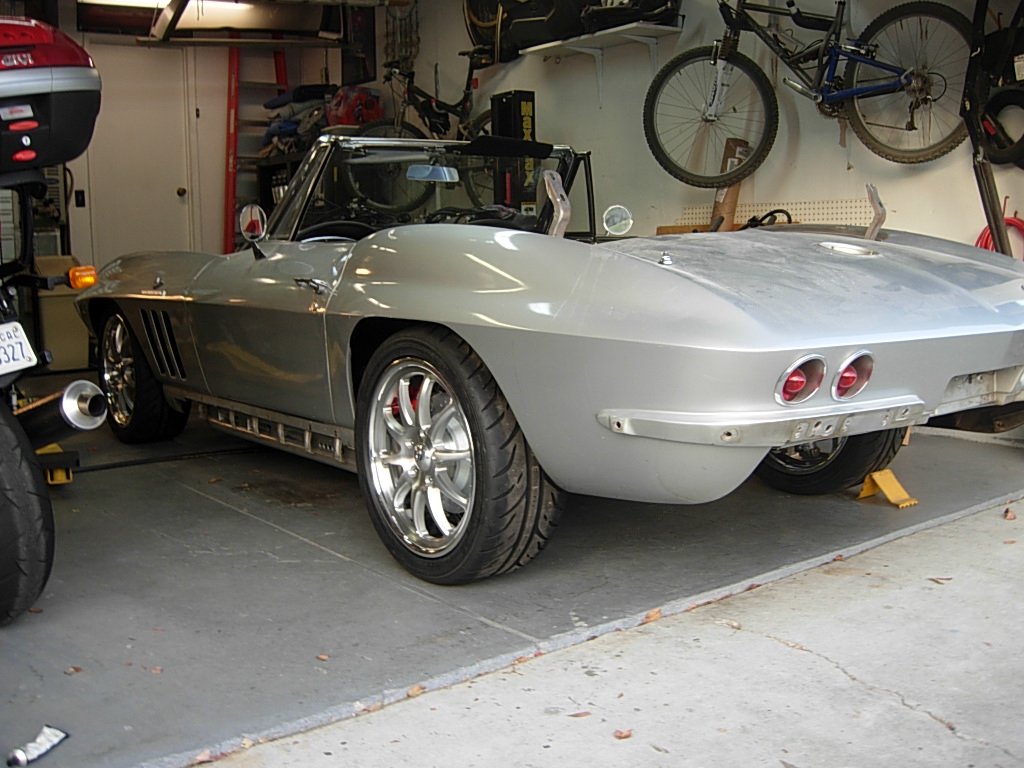
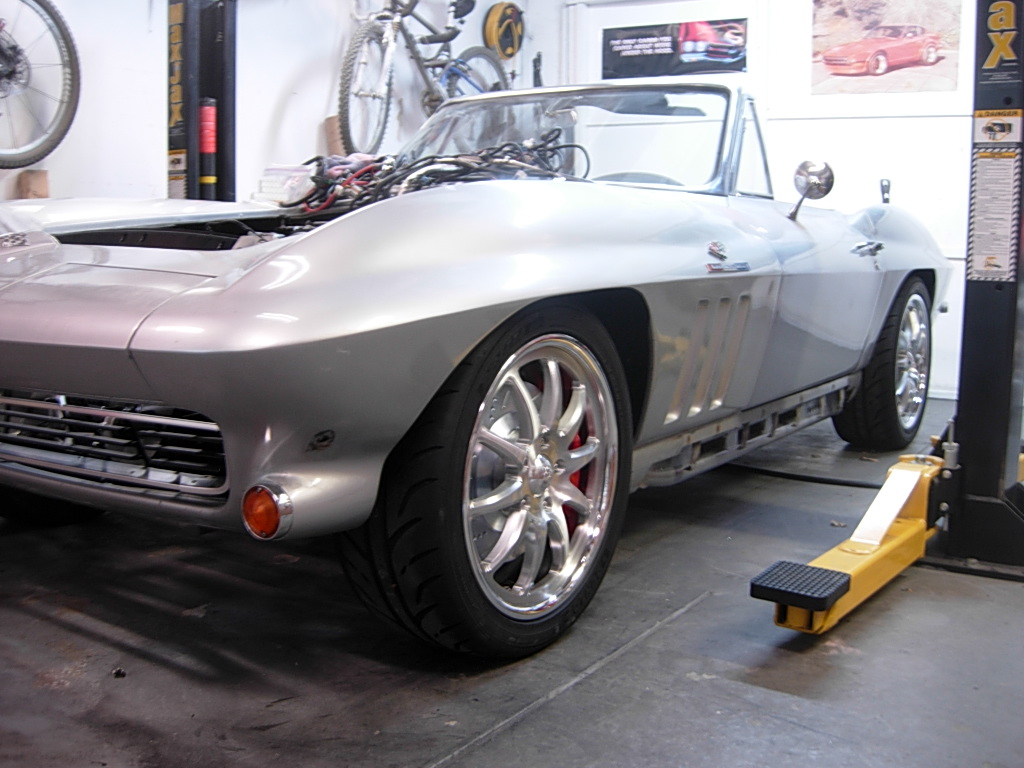
Last chance to see the frame in all it's glory before the body gets dropped into place....
By Sunday Jan 17, everythink I could think of was fit-checked and measured. We were ready to lower the body for real. Mark Flanagan came over and helped. Things went pretty smoothly.
A few hours later it was starting to look like a car again. A car with absolutely WICKED intentions,
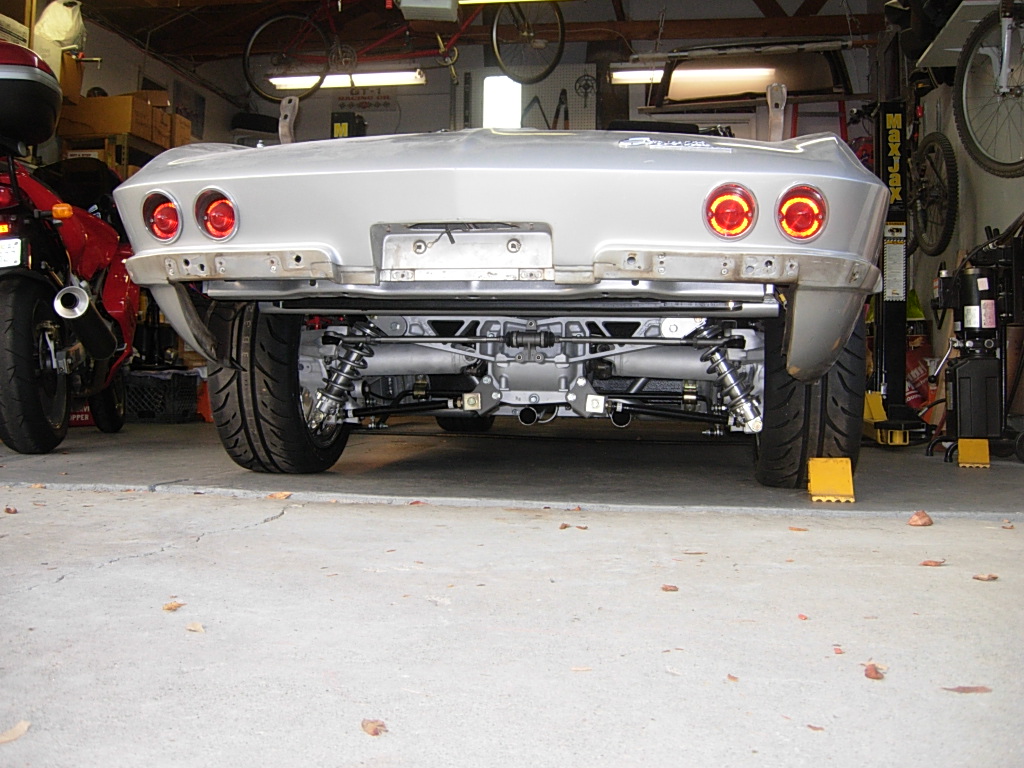
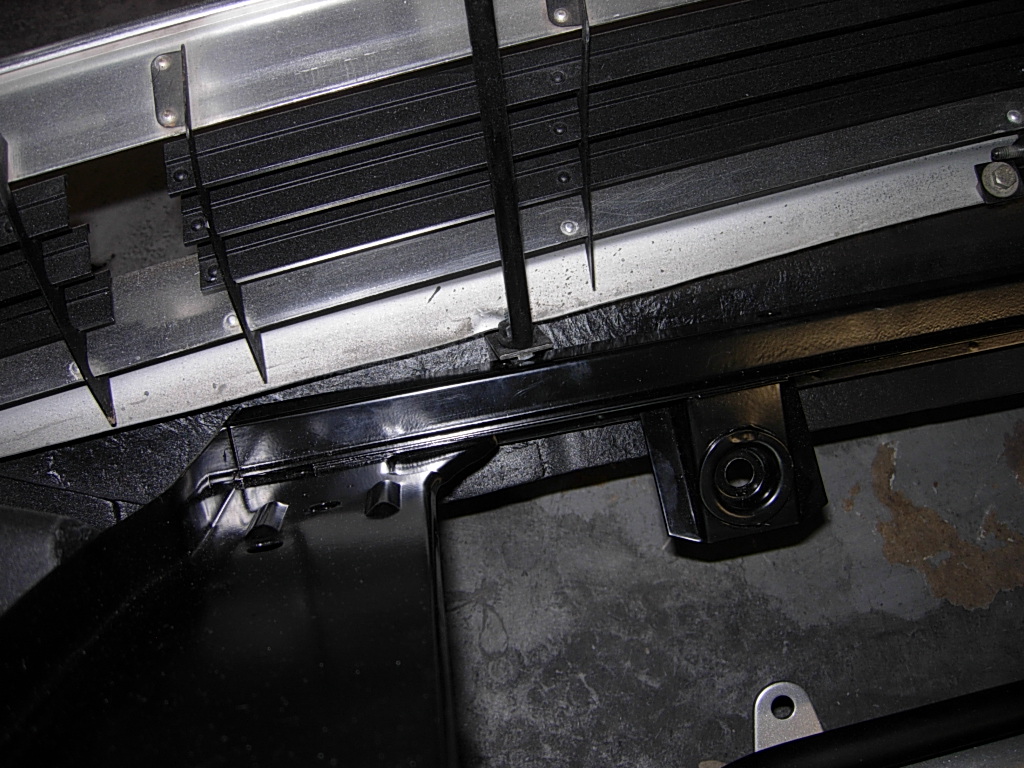
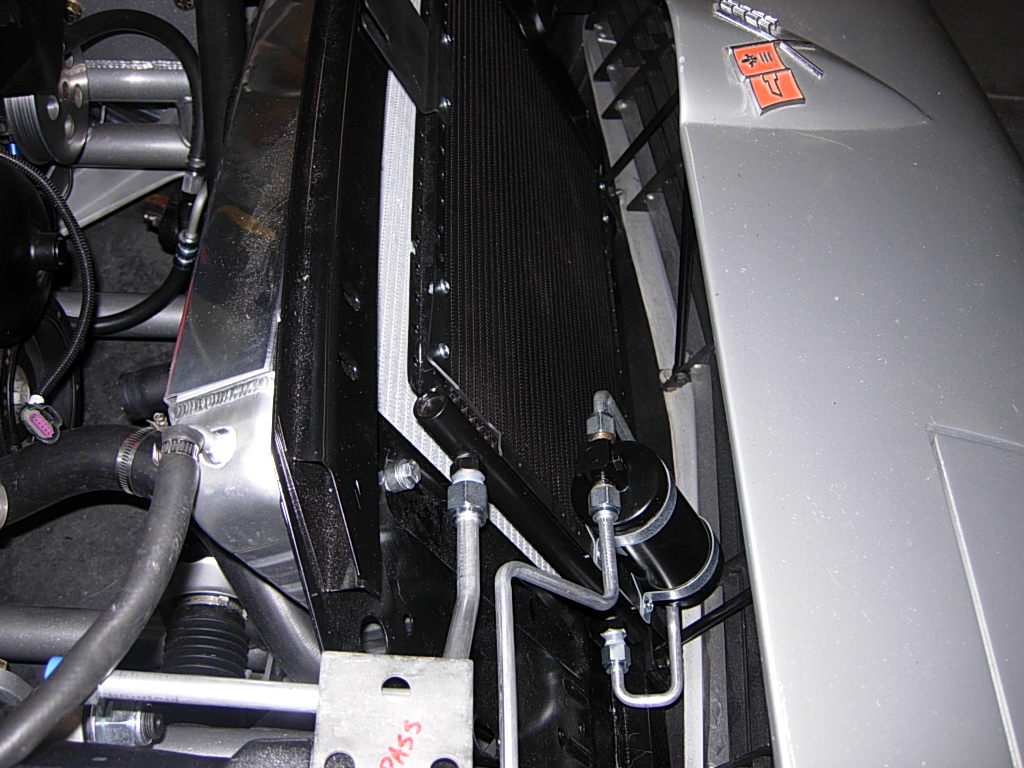
The frame uses the C5 sway bar in the stock C5 position, which requires a 66-67 core support to move the lower part of the radiator forward for clearance.
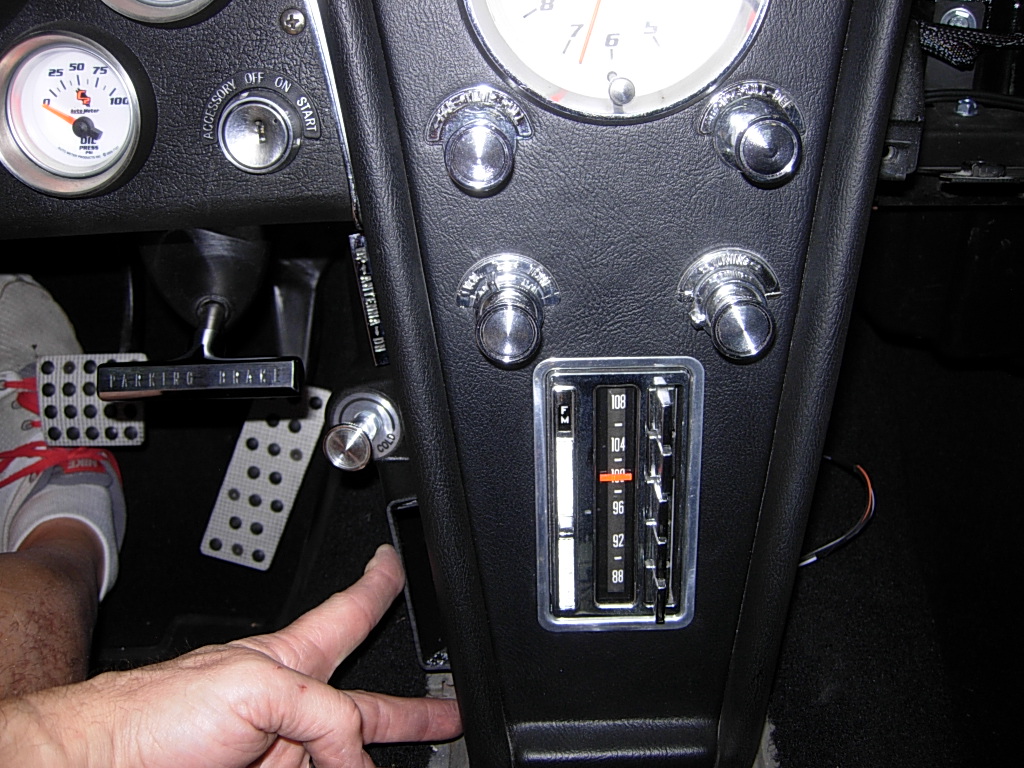
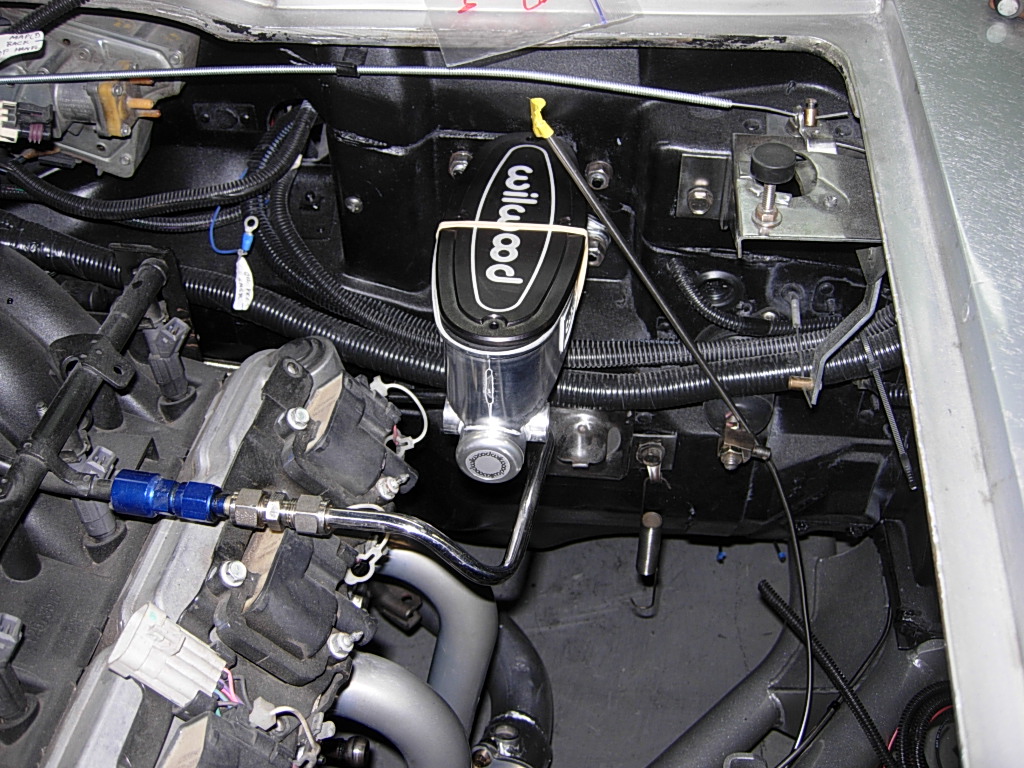
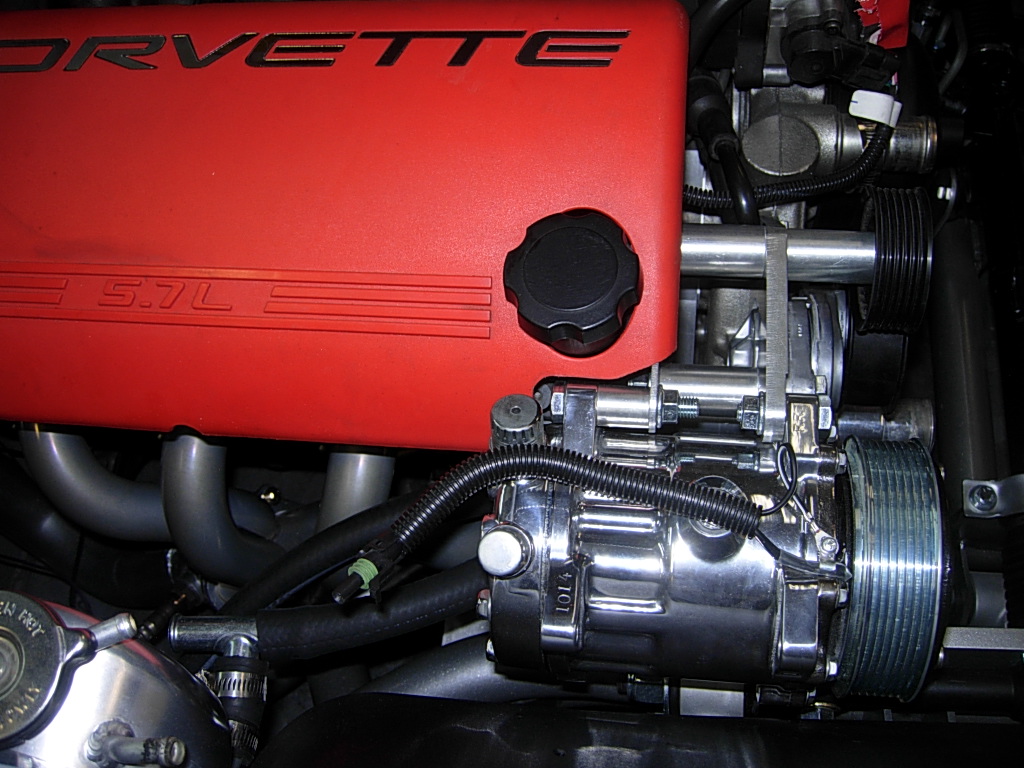
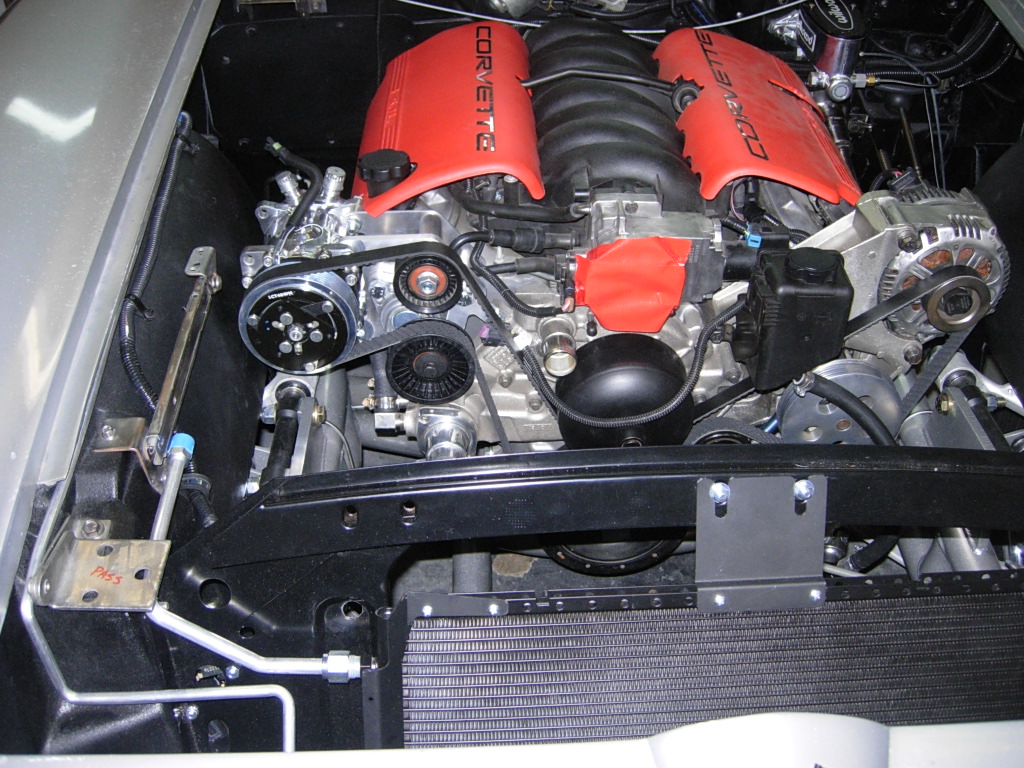
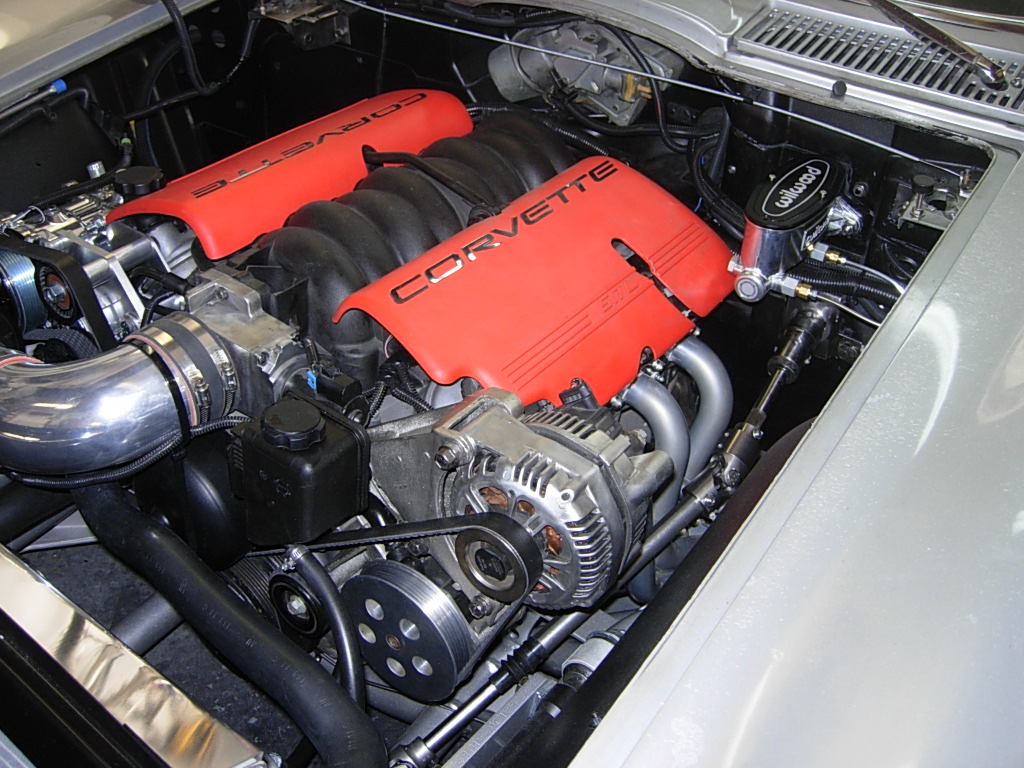
I remounted the alternator, P/S pump, water pump, etc., and fit-checked the master cylinder. I never liked the way the Gen 2 brake power booster looked. For now, I'll go with manual brakes, with a Wilwood master cylinder and adjustable proportioning valve. I may go with an electric booster eventually.
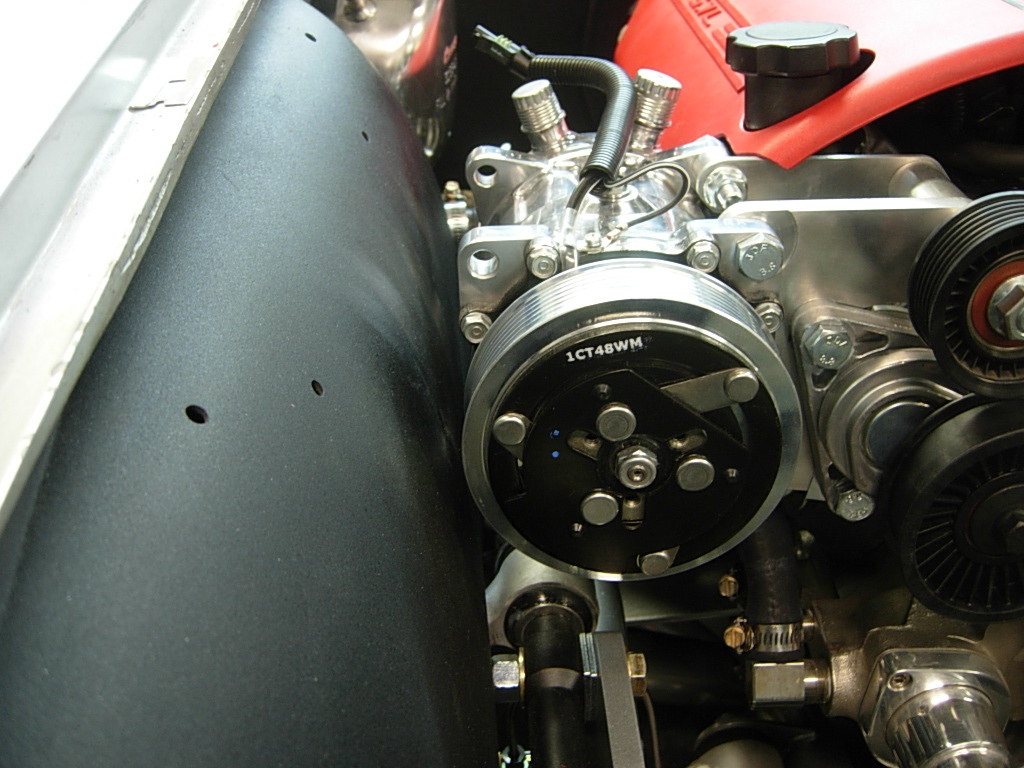
I went to fit-check the AC compressor. Houston, I have a problem.
Remember that nice job I did of filling the A-arm openings in the wheelwells? Argh!!!!! The compressor won't clear, even after cutting off the unneeded mounting tabs
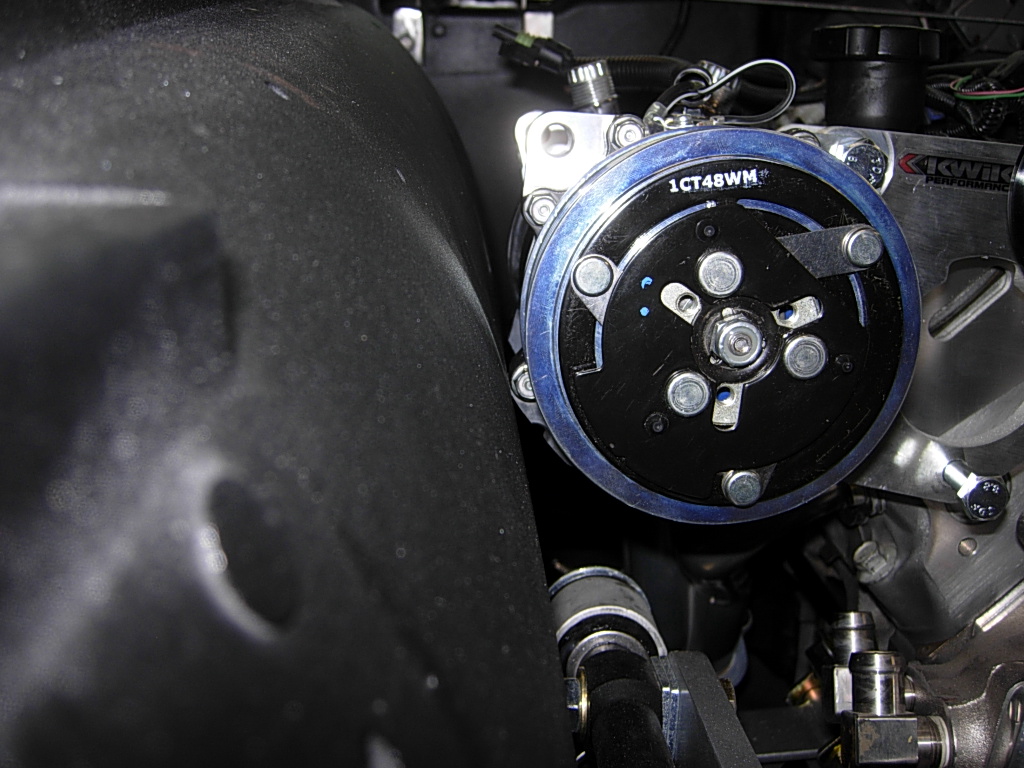
After staring at it blankly for a few hours, my choices came down to cutting out a clearance rectangle and 'glassing in a "pocket", or move the whole thing in-board.
I measured everything and had Kelly Swanson put the brackets on the mill and moved the whole mounting pattern in-board by 1/2". Problem solved! I had to notch the coil pack cover a little more than I would've if I used the compressor in the stock location. No big deal.
Knowing that fitting the compressor was now doable, I went to mount the Vintage Air condensor and drier.
I ended up needing to use the hard lines from a '67 to match the core support, but with the smaller '65 condensor. The '67 was larger and would've blocked access to the radiator mounting hardware.
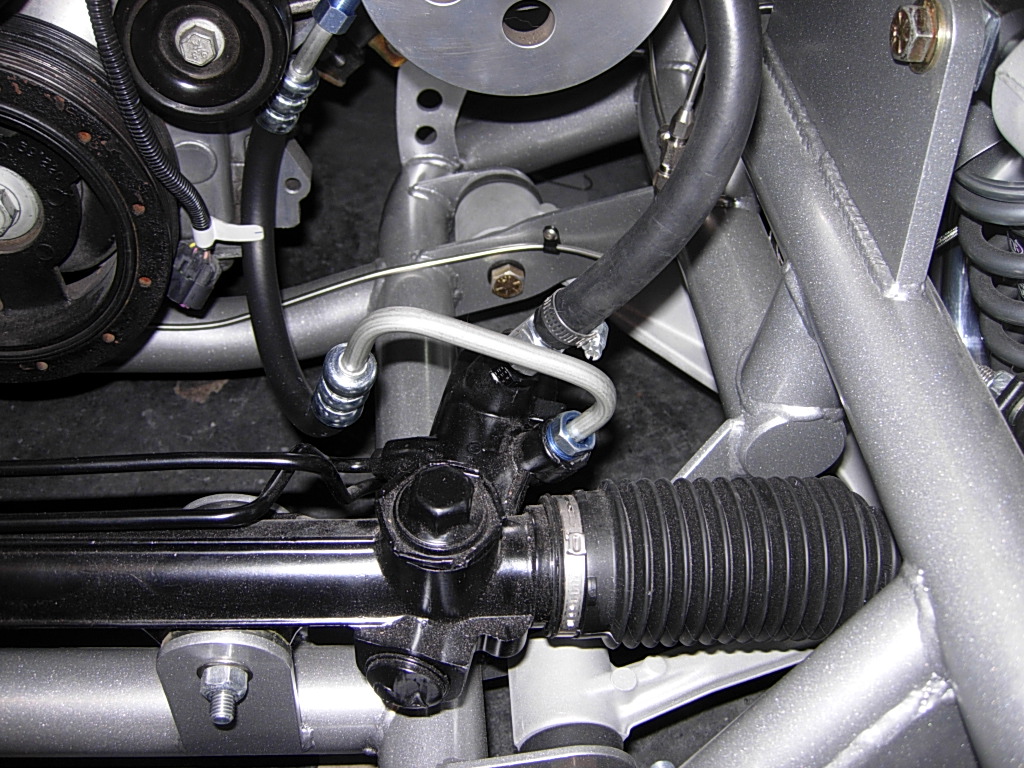
There's SO much fit-checking, modifying of EVERYTHING. Here I'm fit-checking the power steering hoses to the steering rack.
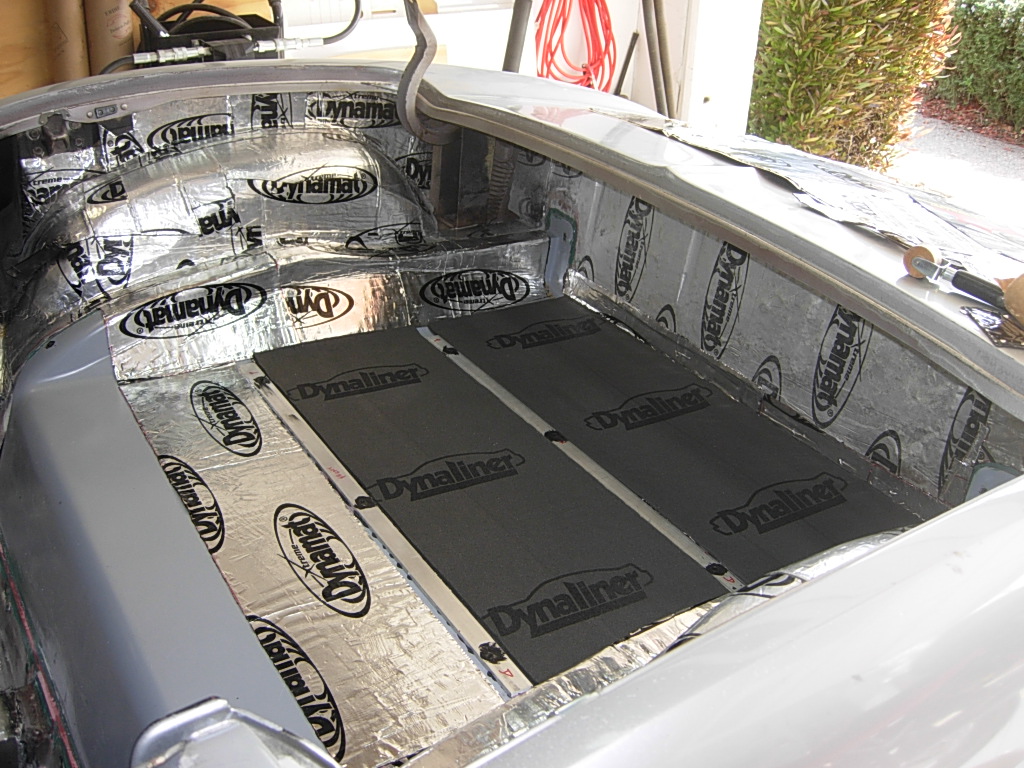
I was worried about a "drumming" vibration from the fiberglass floor pan insert. I had some left-over bonding adhesive and sandwiched two set of aluminum ribs top and bottom.
I only went part way with the Dynamat and Dynaliner until I decide what to do about a luggage stop. Between the ribs and the Dynaliner, there's a nice solid "thud" when you hit the floor pan, no drumming/resonance.
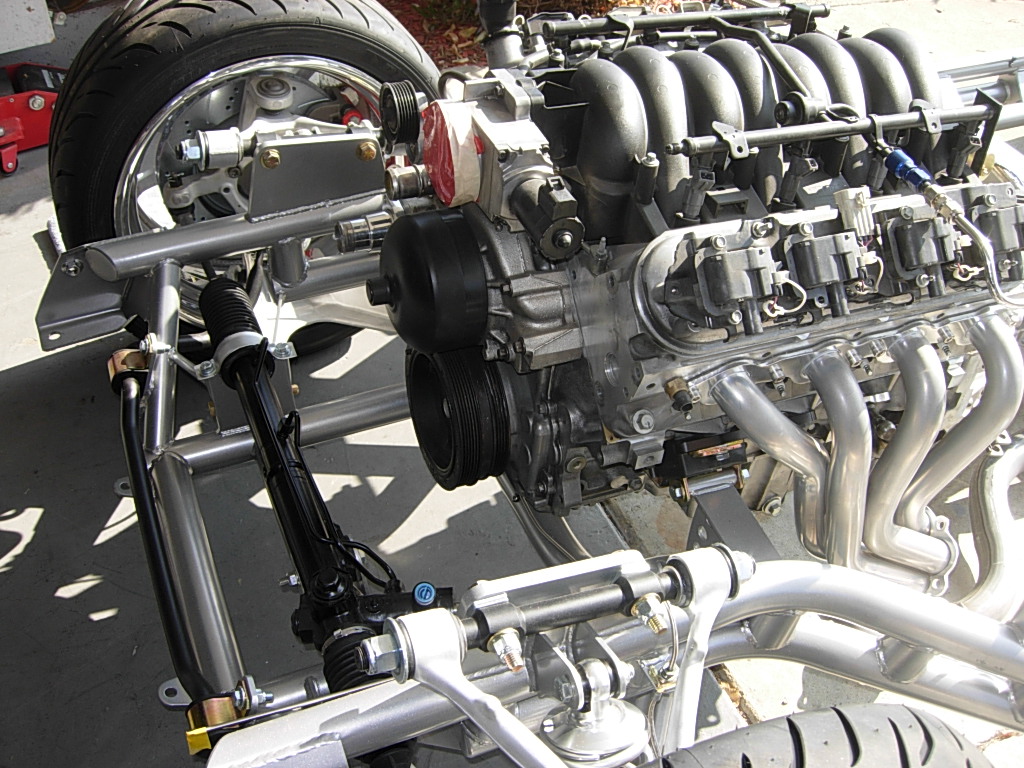
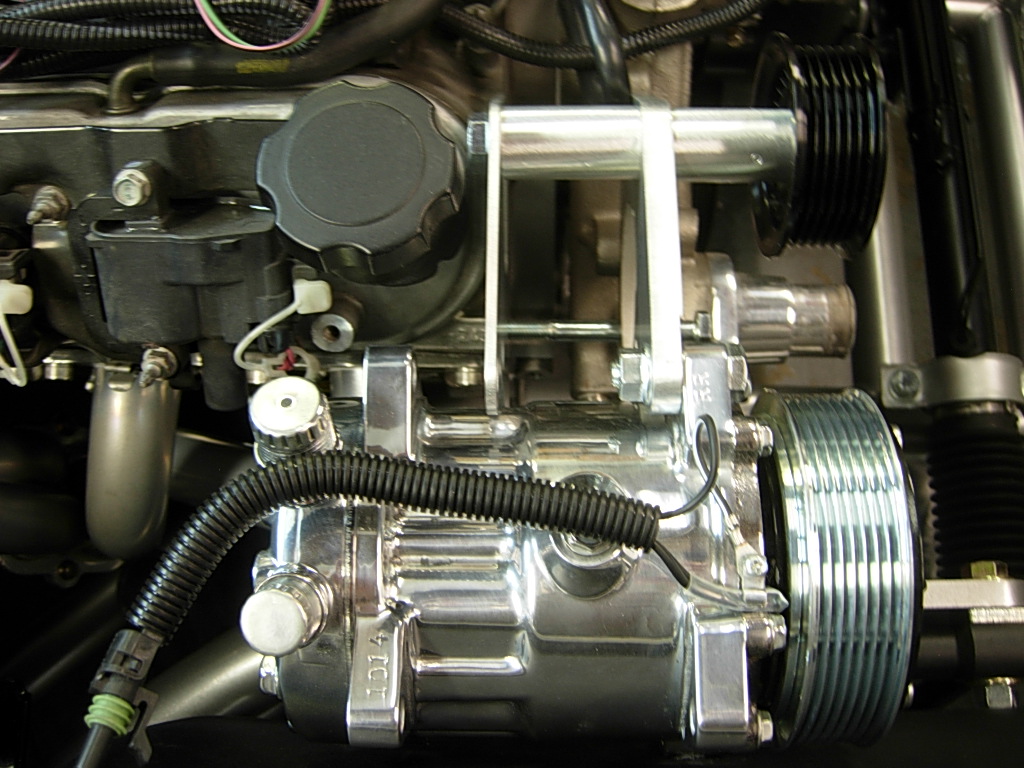
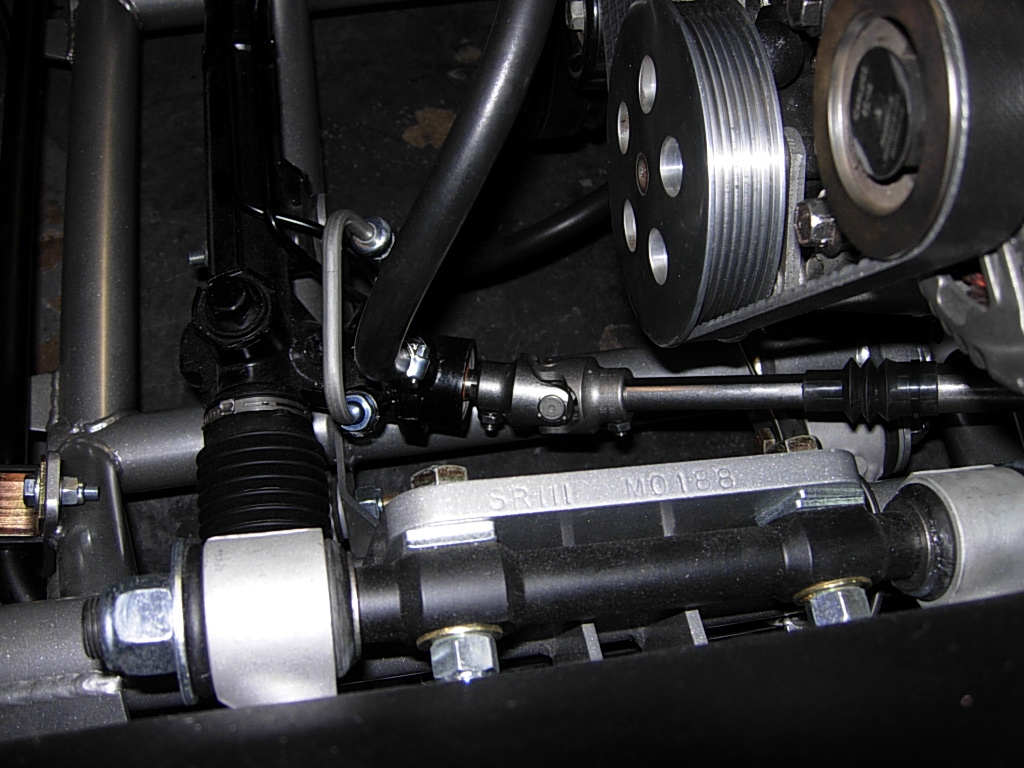
Fit-checking the serpentine belt for alignment...

I didn't want to try to learn how to flare brake lines on this car, so I found a shop that does mobile repairs and had the right tools.
Having the brake lines done allowed me to finally install the intermediate steering shaft and U-joints to attach to the stock steering shaft and the new steering box.
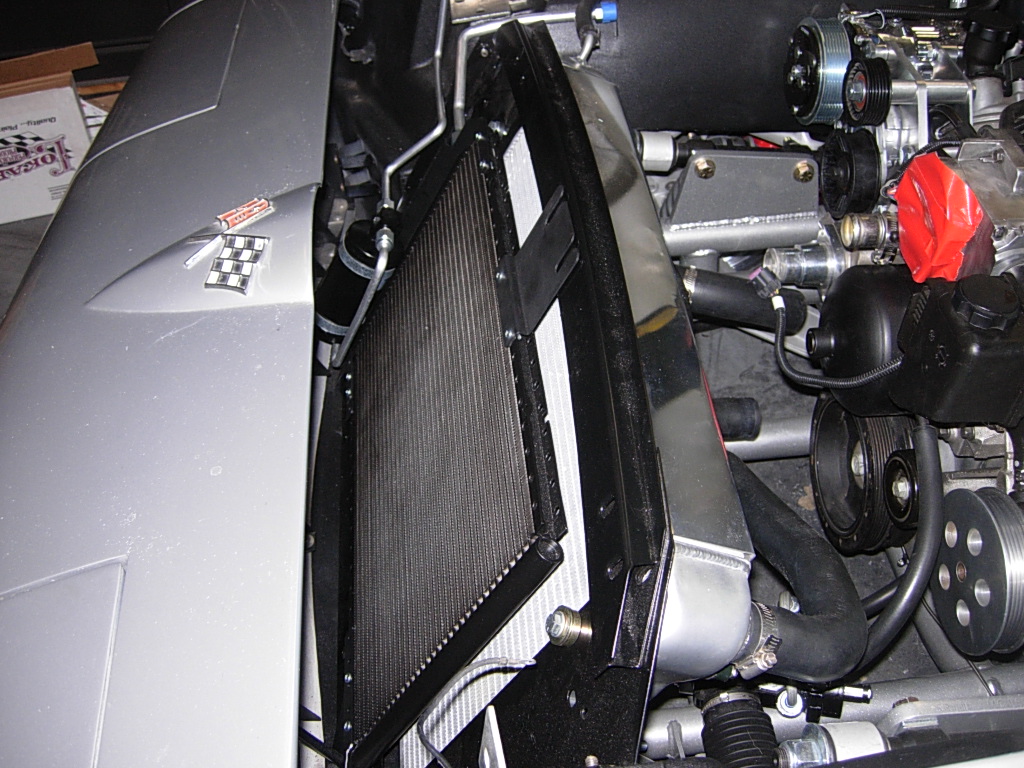
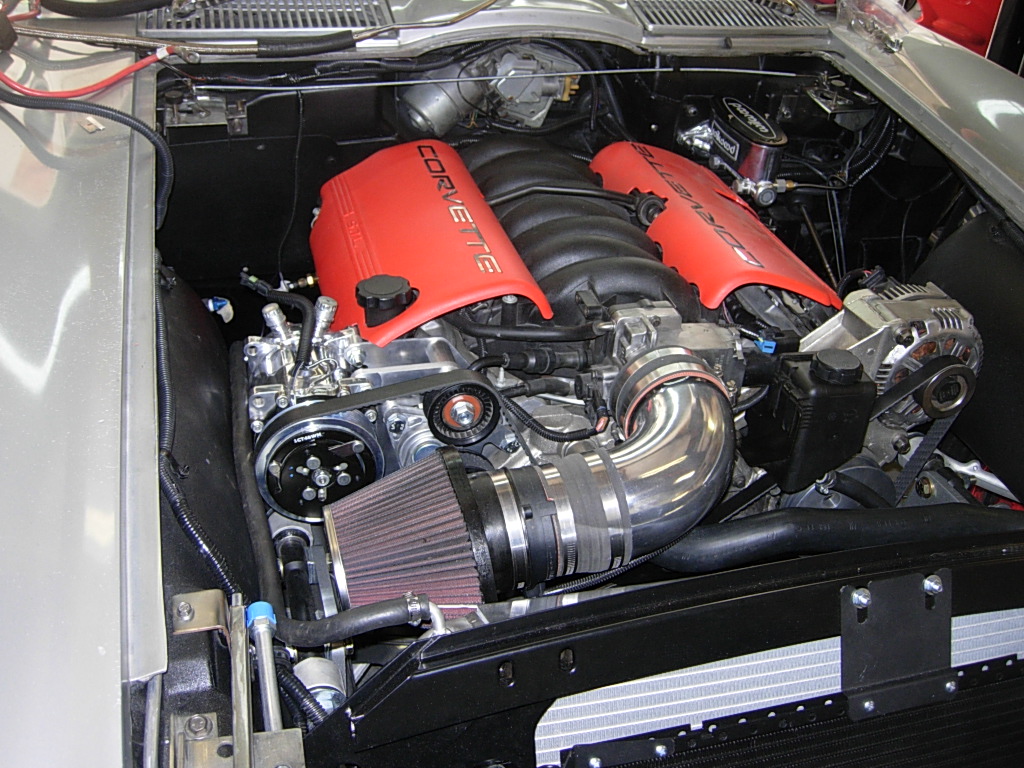
Then with the steering issue resolved, I could mount the radiator, hoses, air intake and Mass Air Flow sensor.
Smitty, a friend at work is great with CAD stuff. He made a "Hot" and "Cold" label for the temp control switch to replace the one that came with the AC system. It's a little detail, but it makes a big difference. This one looks "period authentic".
Out of the garage under its own power, Ready for the tow truck ride to get the exhaust buttoned up, and the four wheel alignment.