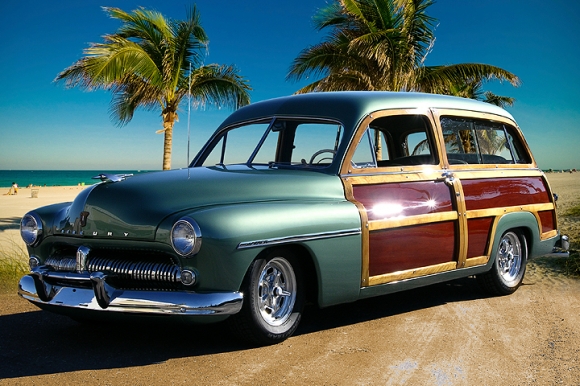
Mercury Woody Project- Part 2
THE PETS
Chevelles
1965 Corvette
Motorcycles and Track Days
The Corvette Build- Drivetrain and Interior
The Corvette Build- Wiring and Final Assembly (Phase 1)
The Corvette Buildup (Phase 2) chassis conversion
More Corvette Phase 2 progress
Corvette Phase 3 Final Assembly and Glamour pictures
1949 Mercury Woody Wagon project- Part 1
Chico house
Mercury Woody Project- Part 2
Mercury Woody Project- Part 3
Photo Gallery
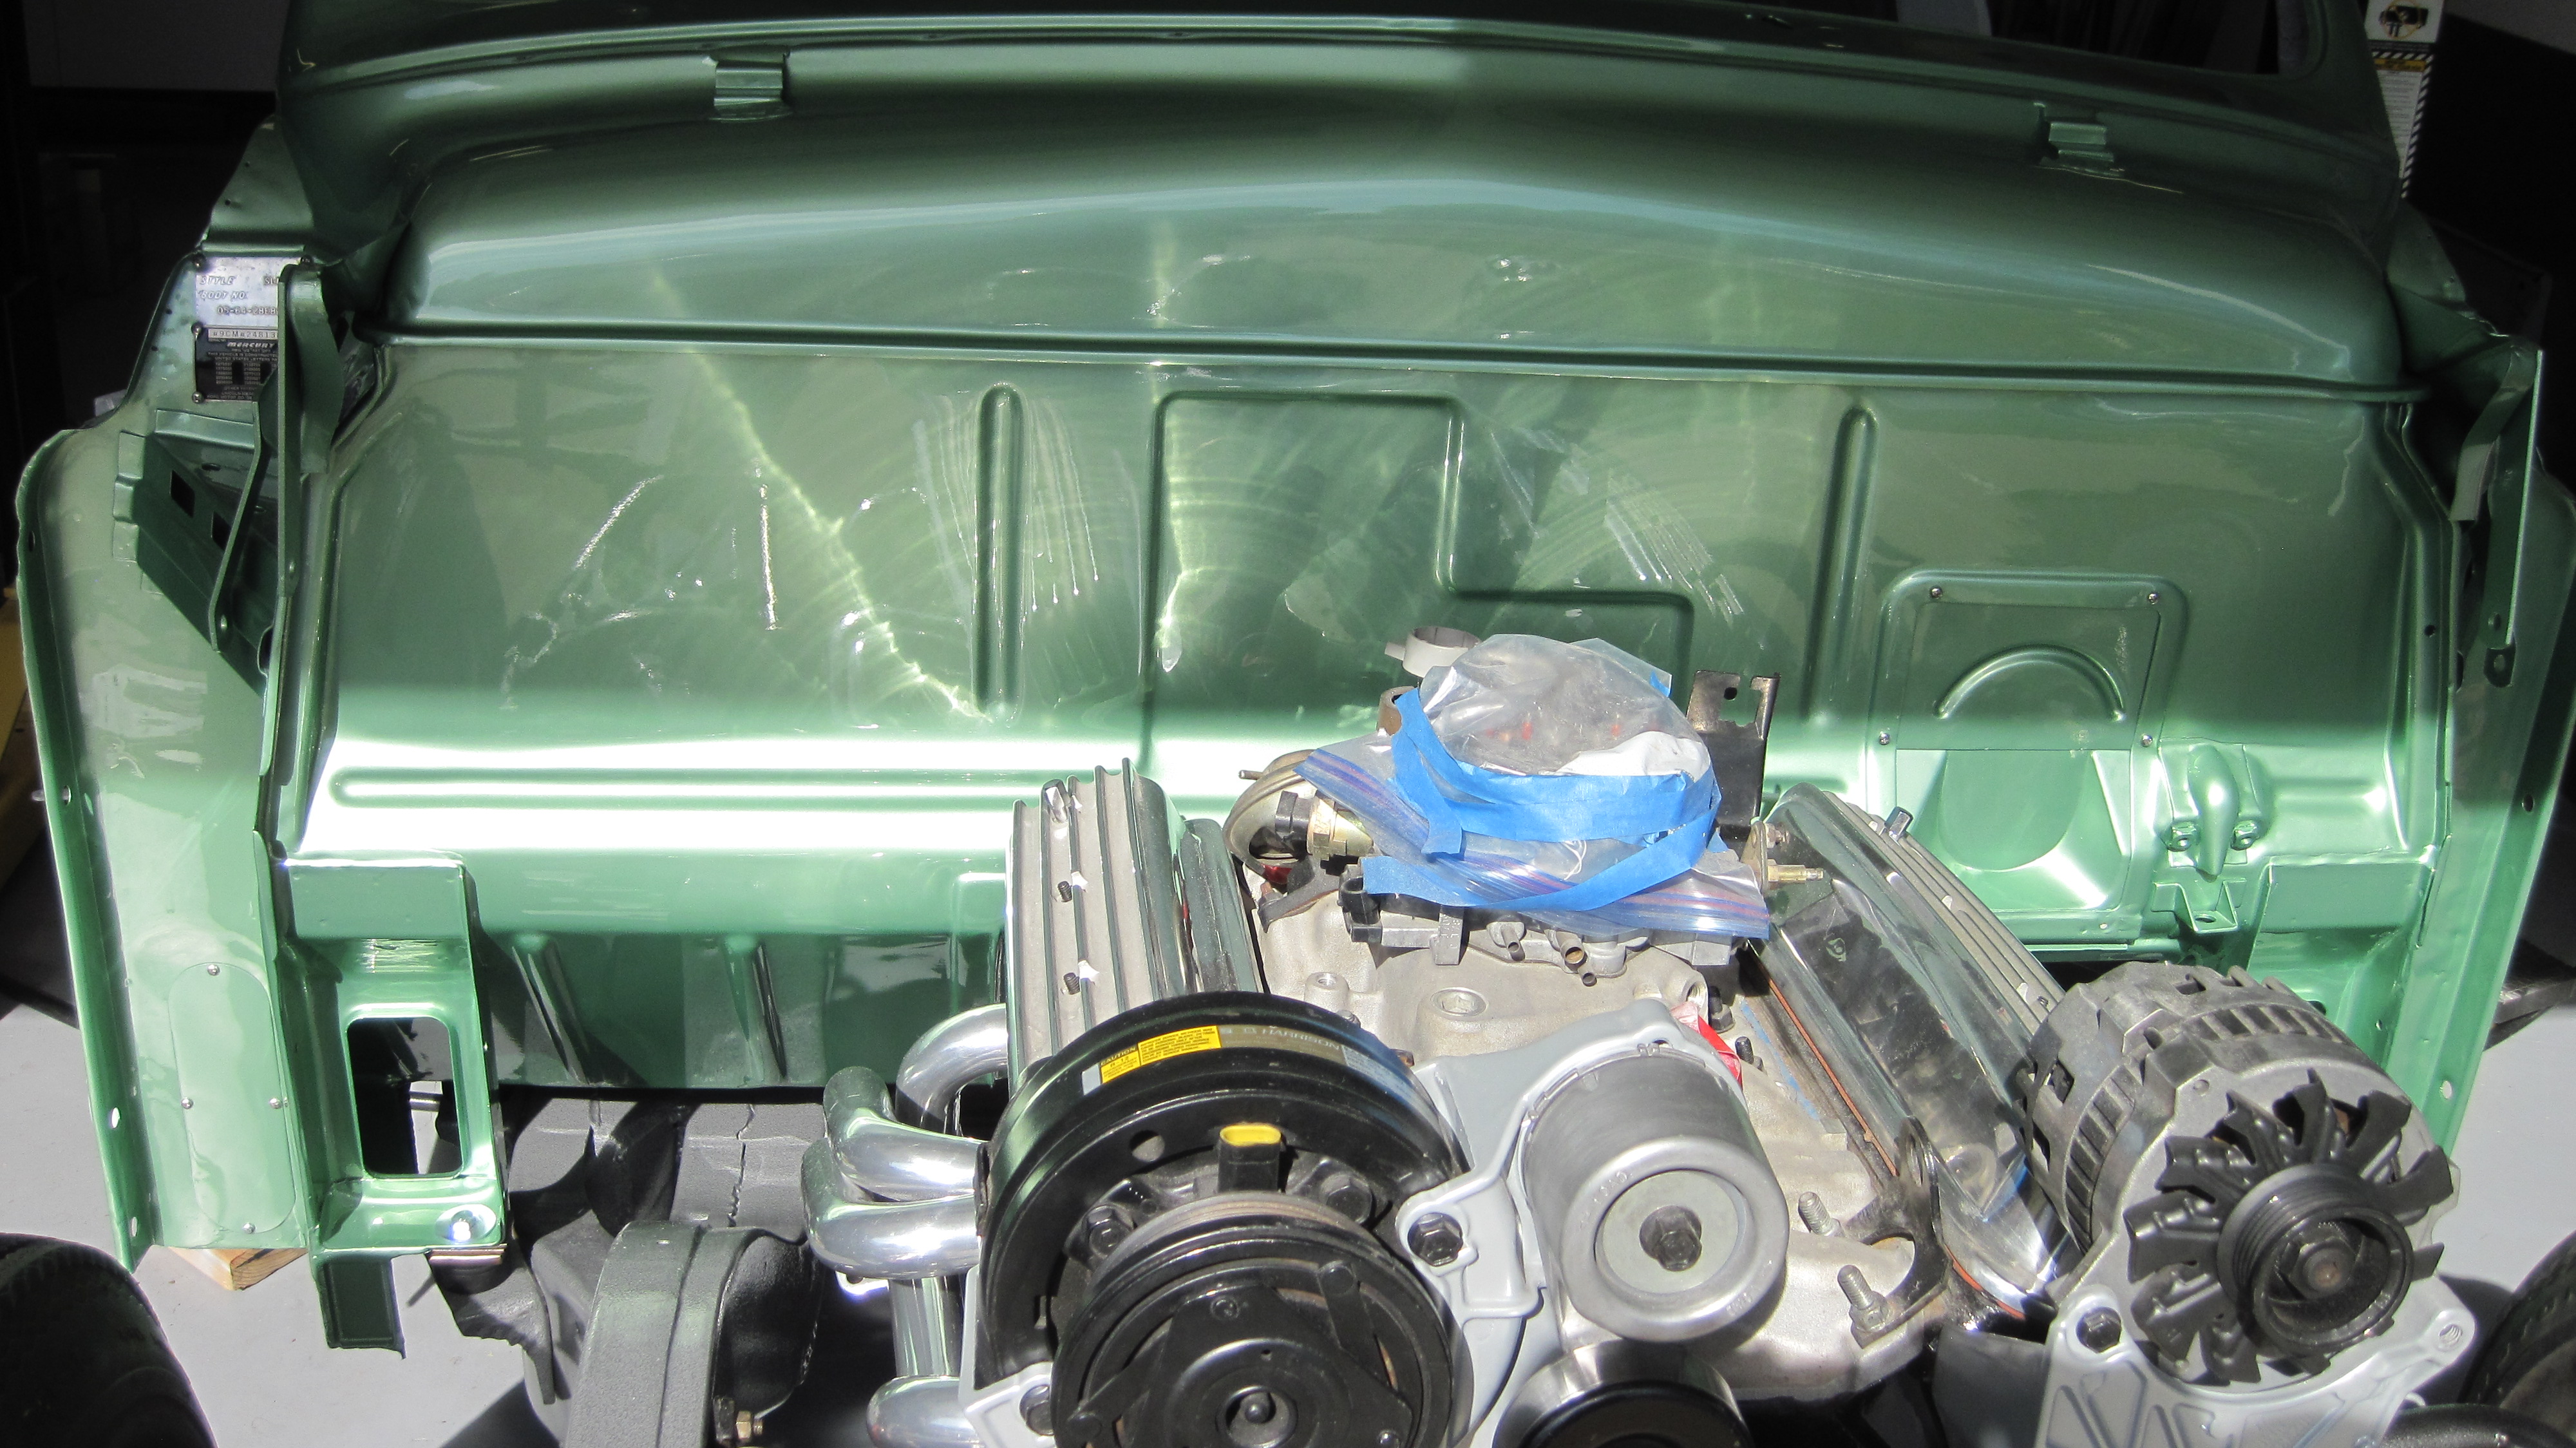
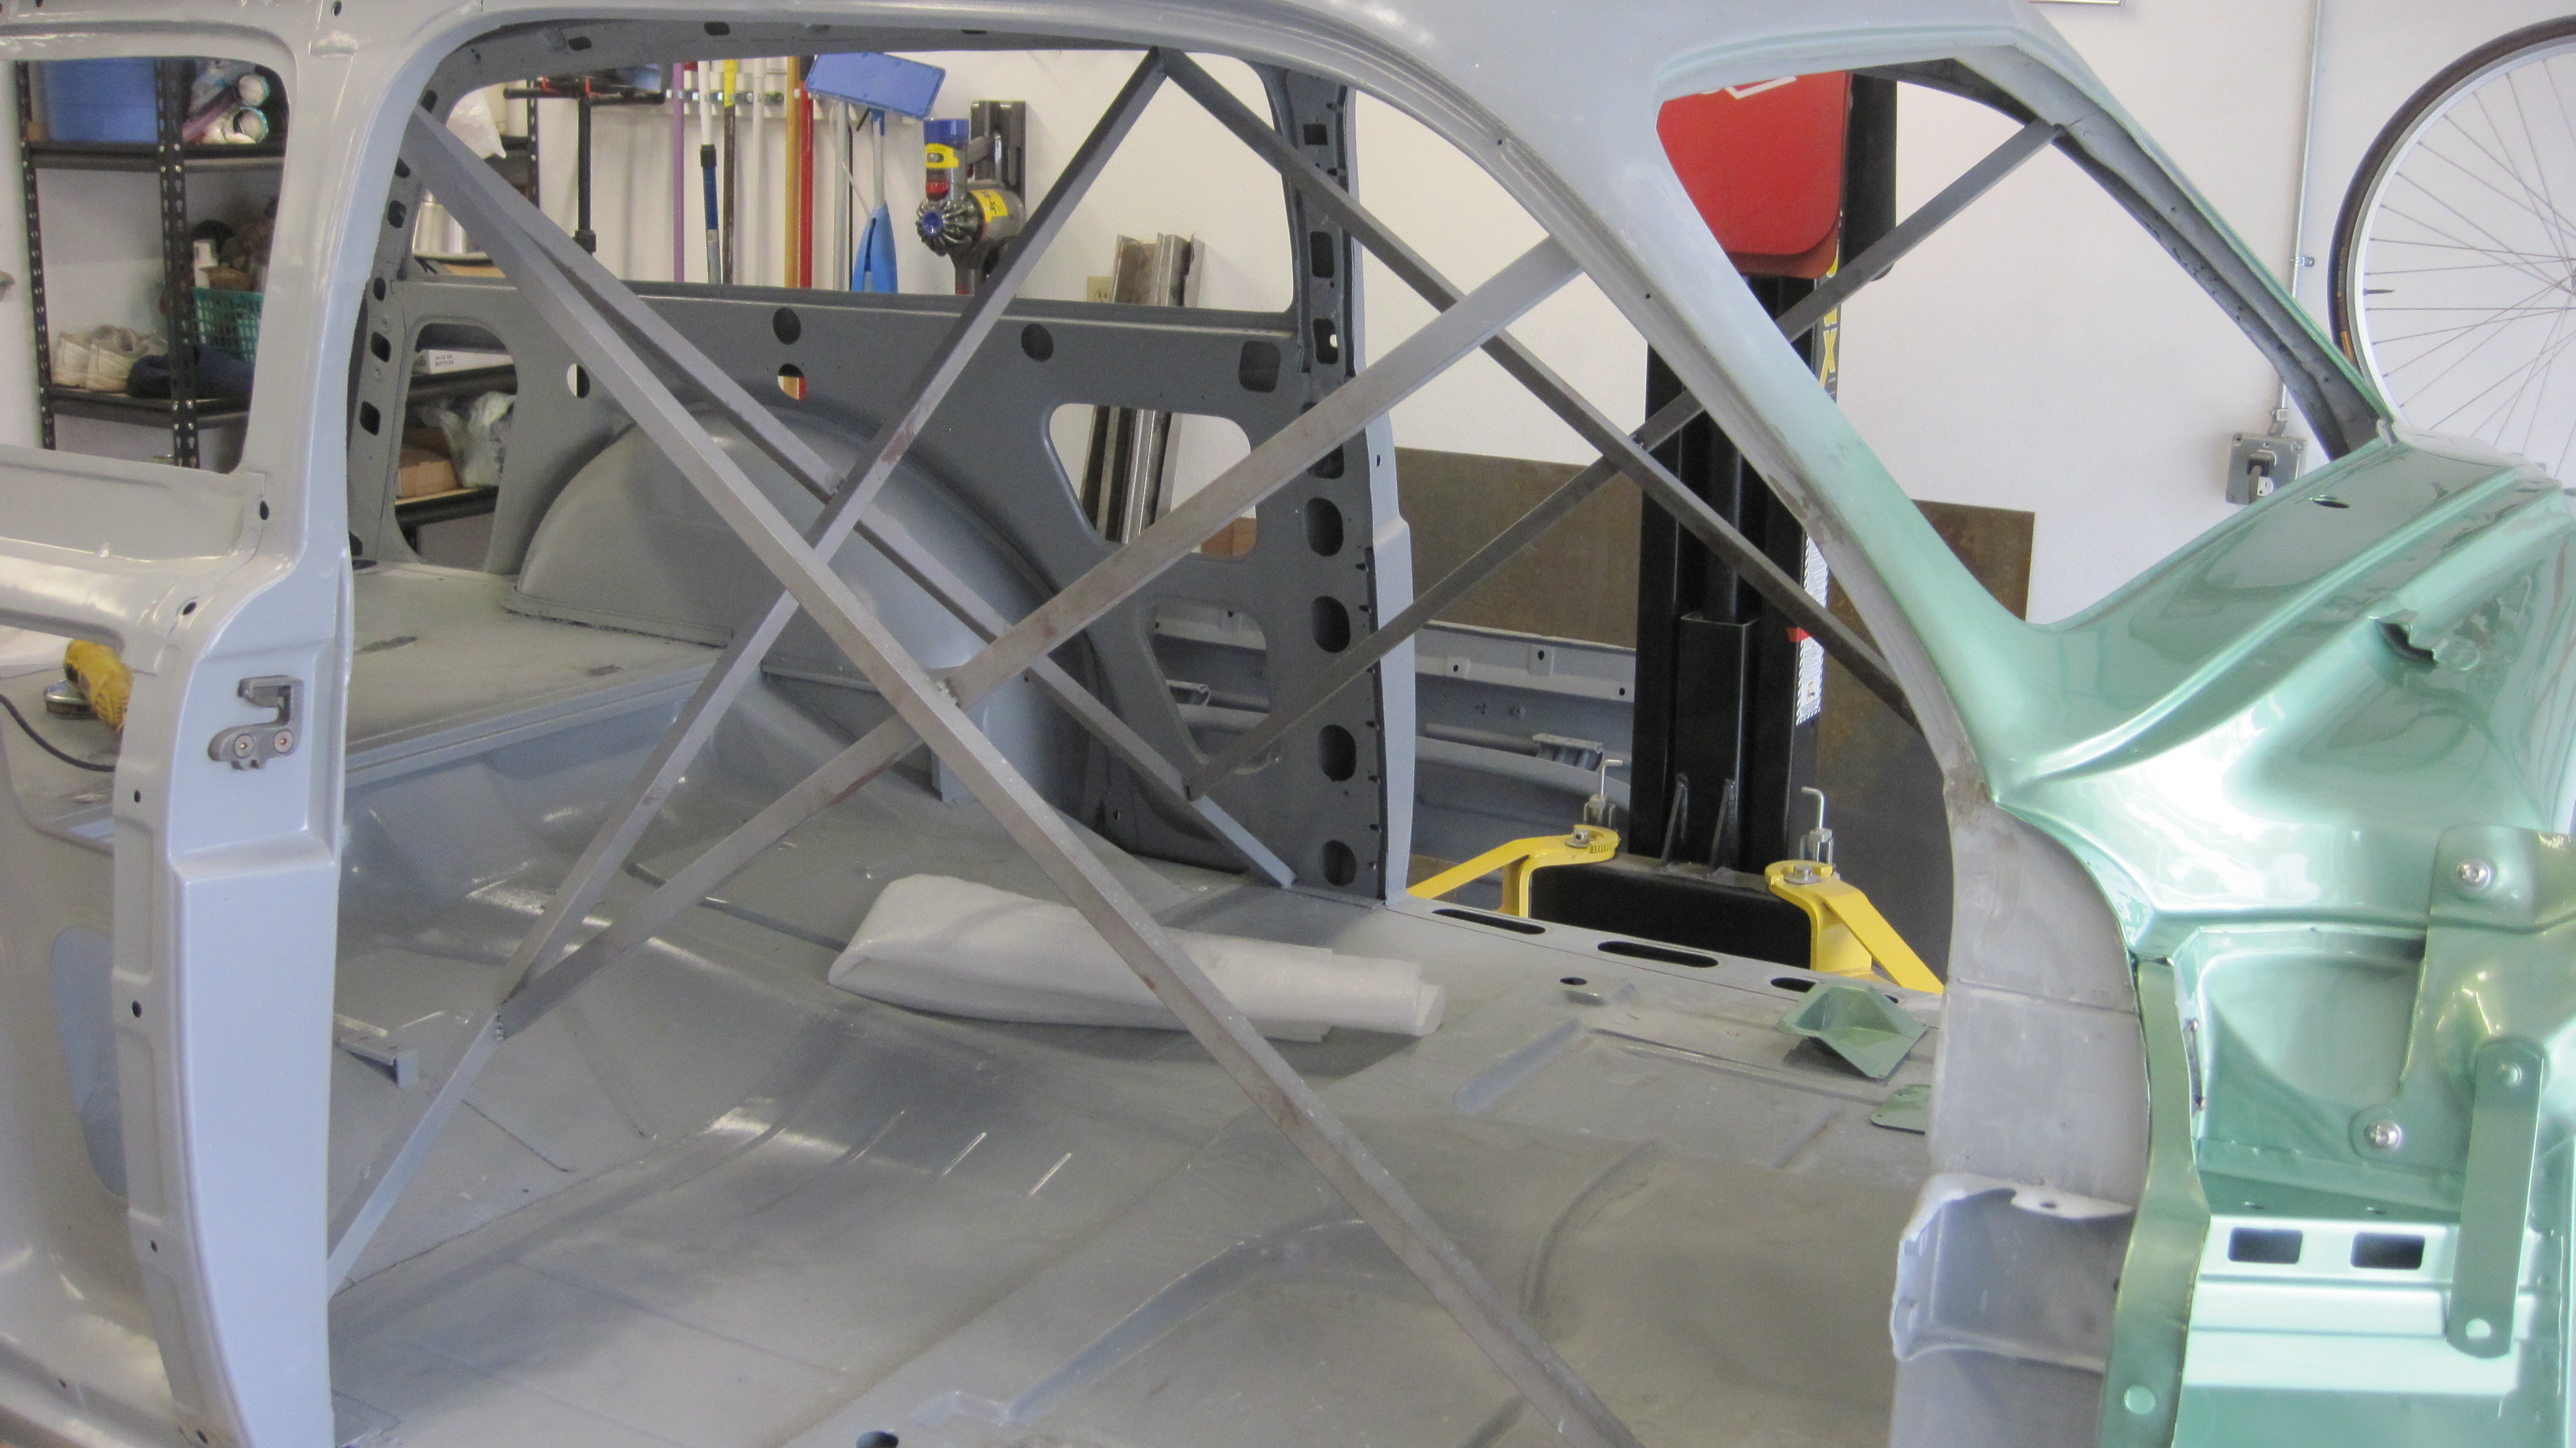
With the firewall painted I could do the bottom of the body with a textured bedliner coating. That hides imperfections, gives the bottom a nice clean look, and makes it really easy to clean.
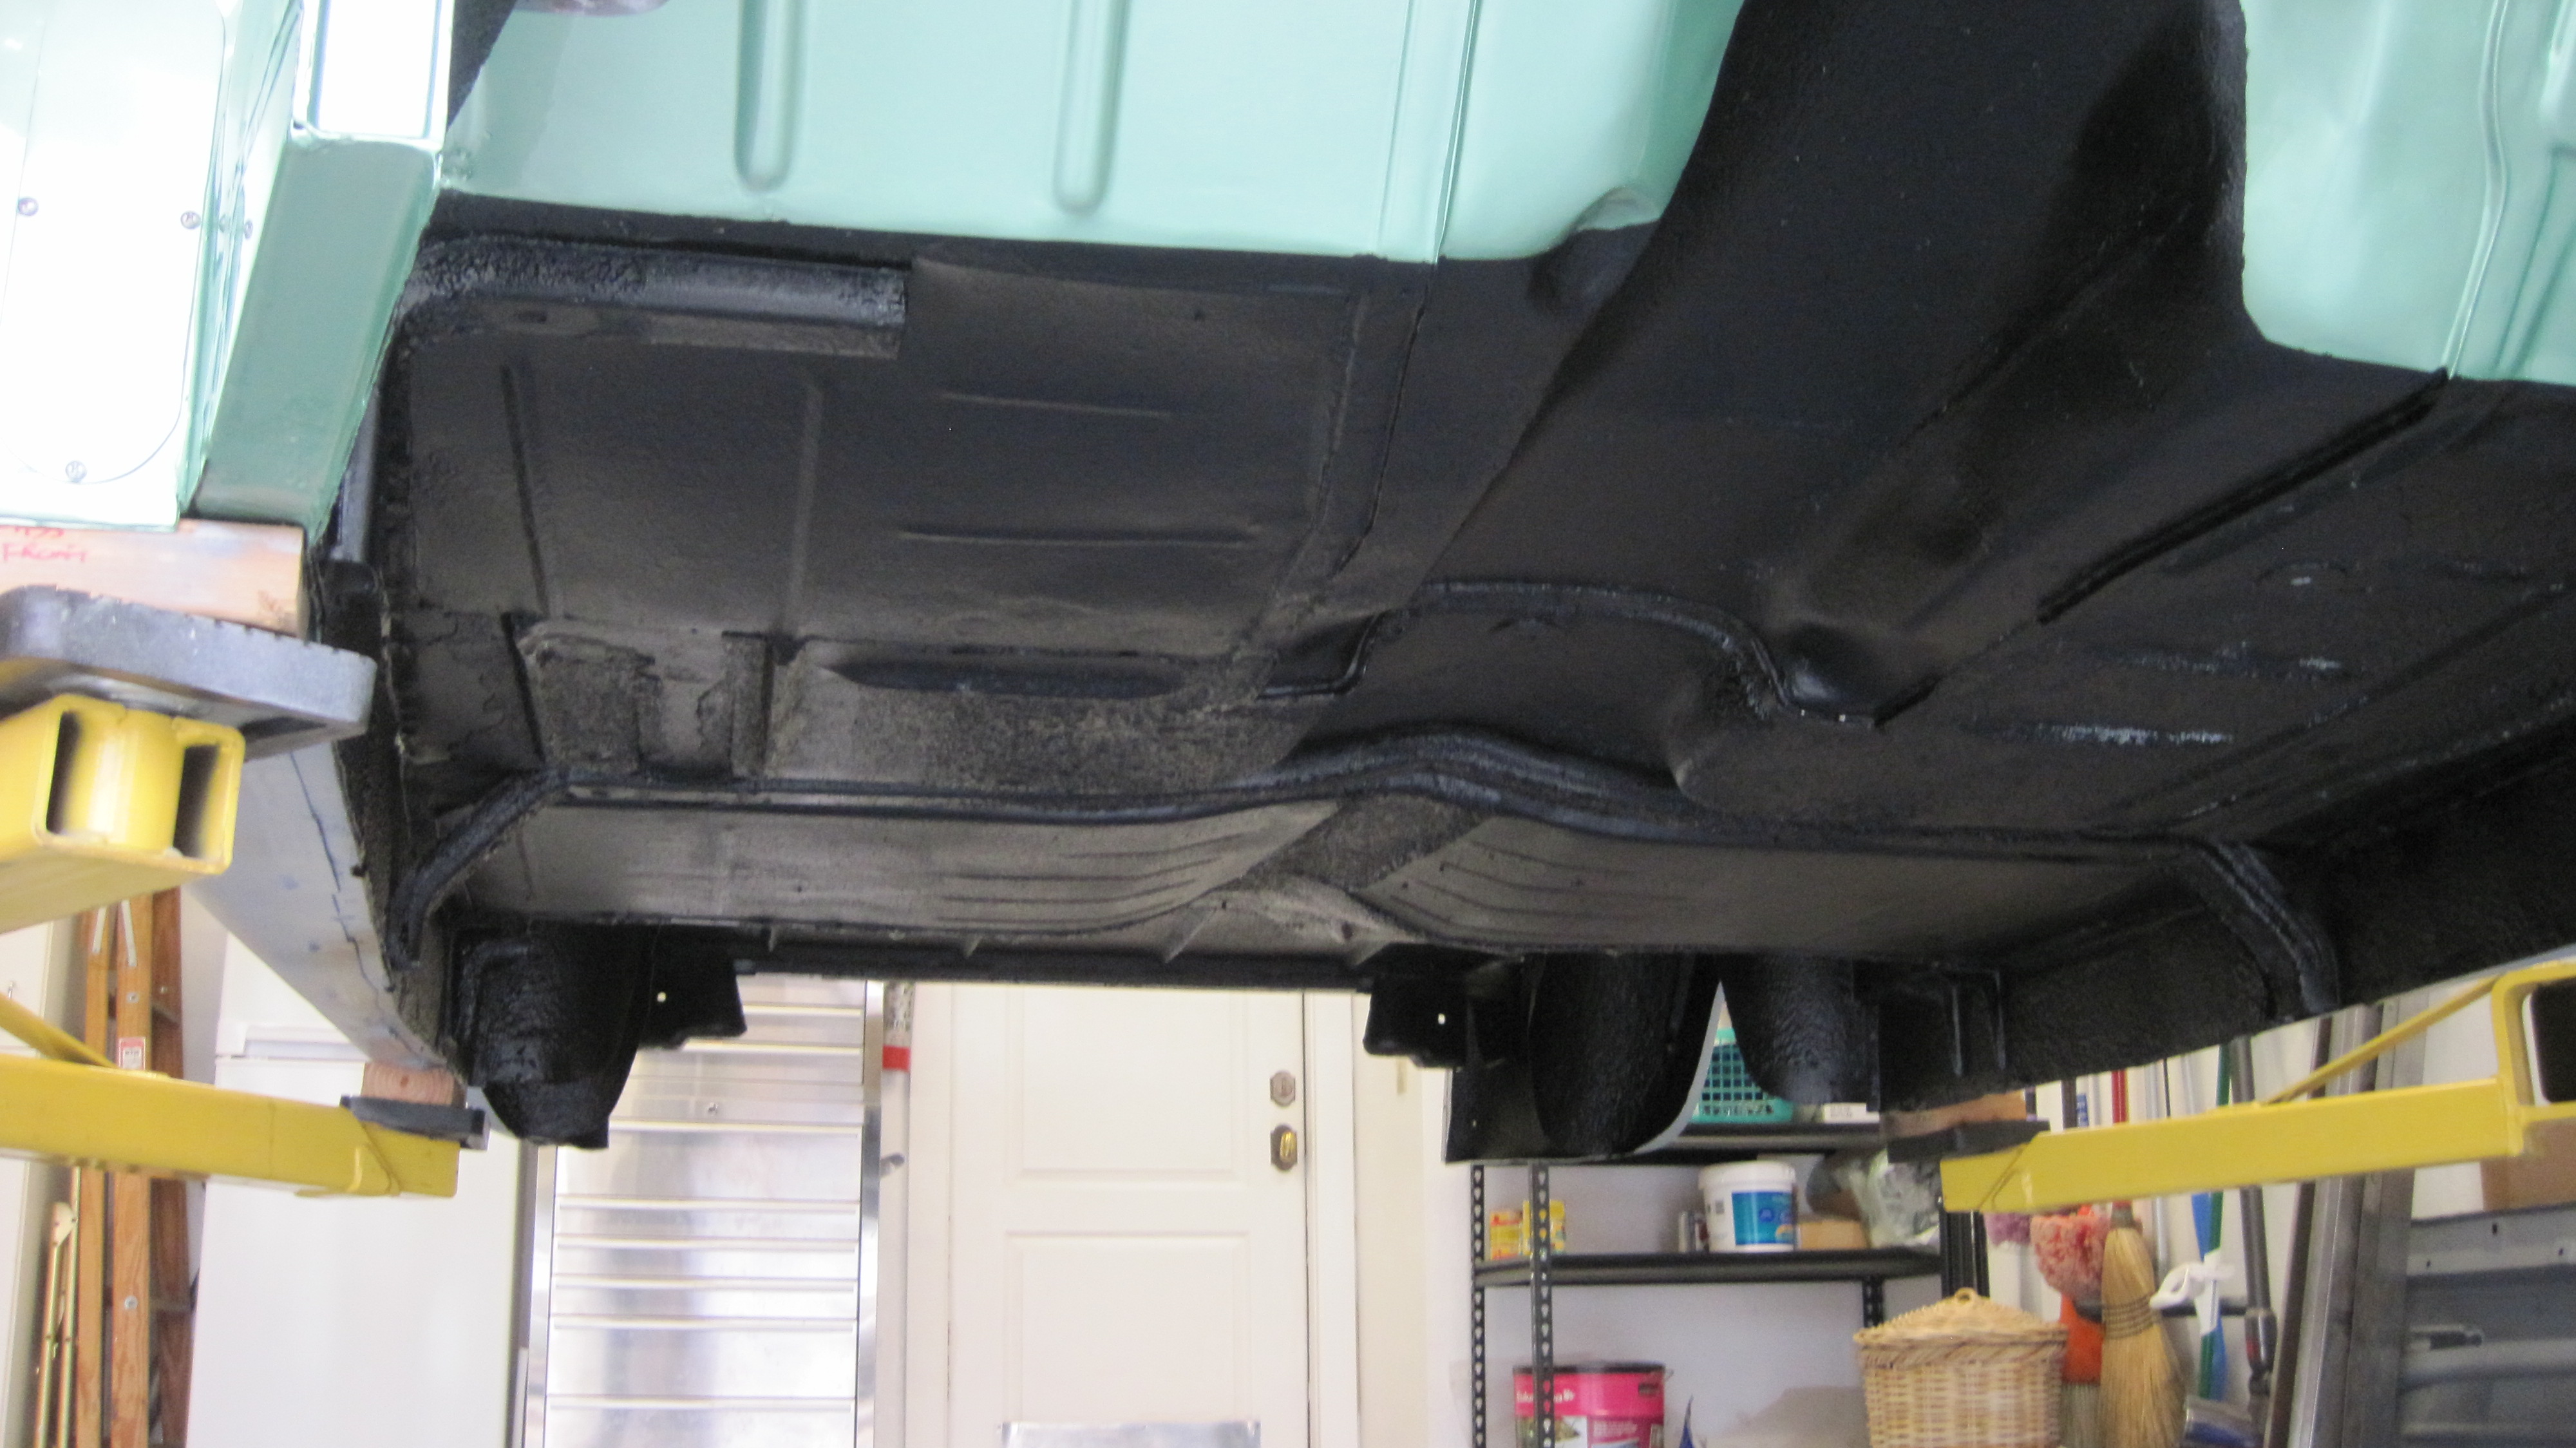
With that done, I could finally remanently attach the body to the chassis, and start building the car!
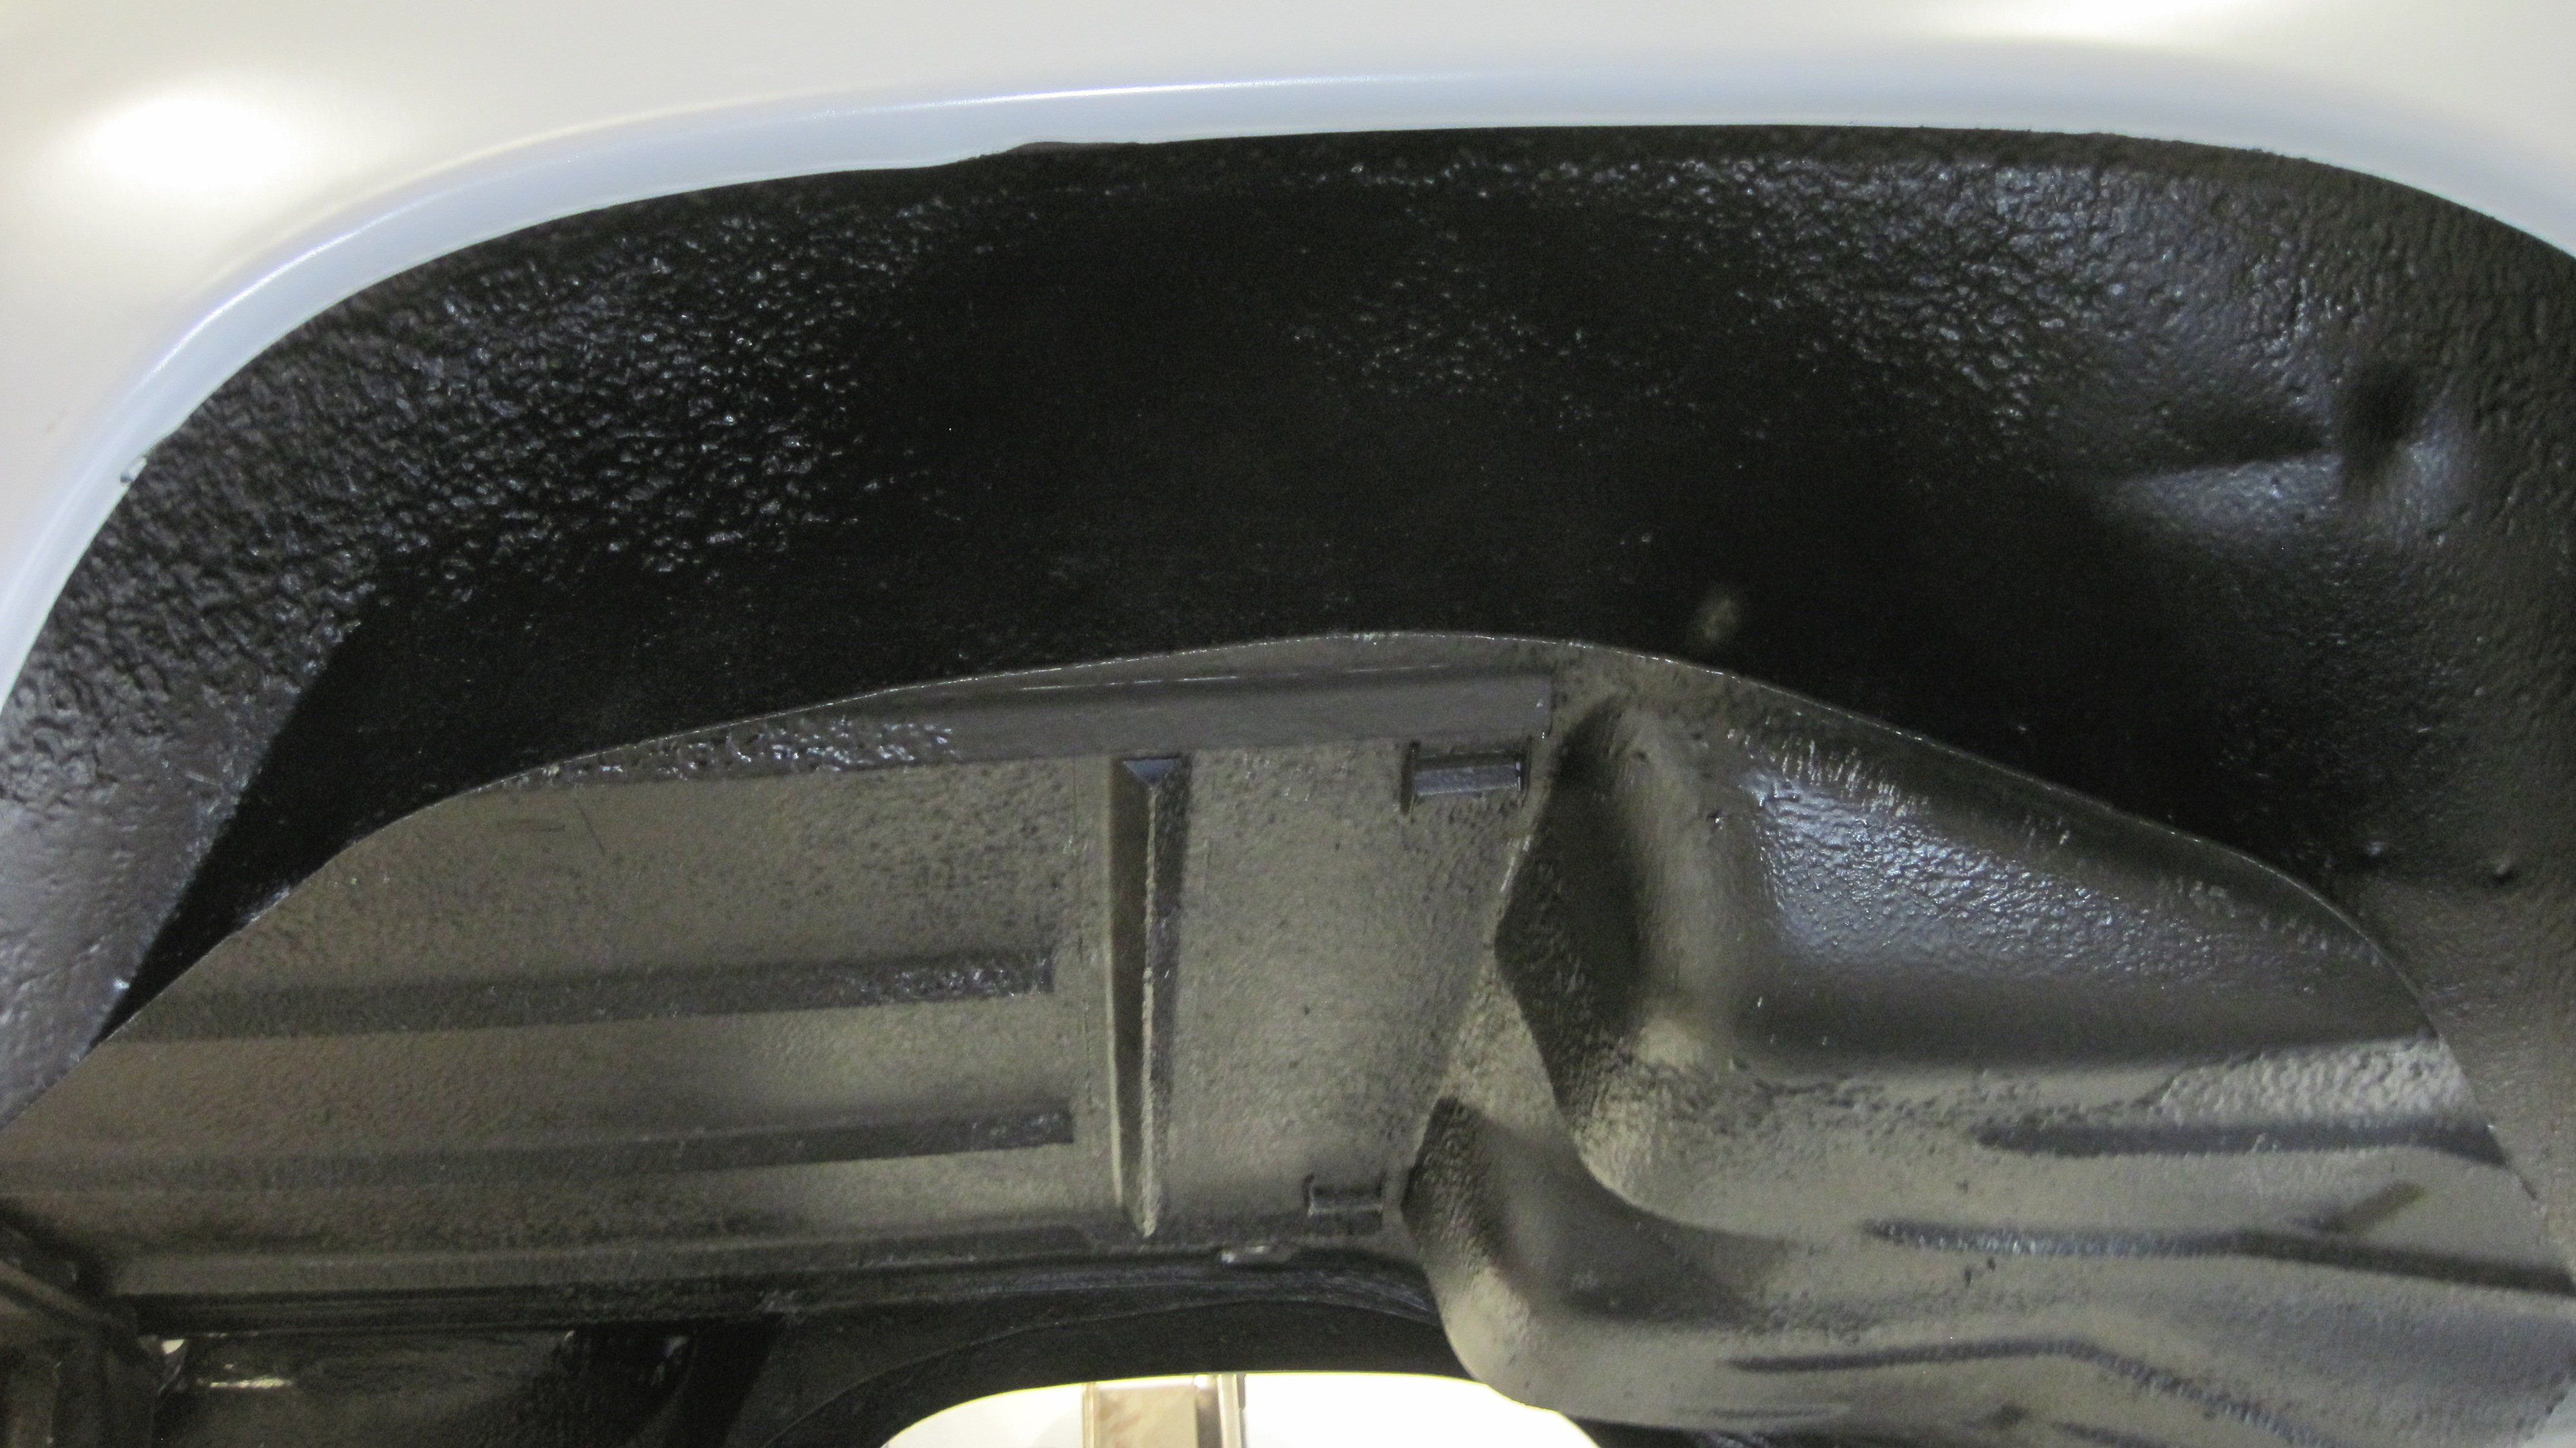
Also, I could cut out the body stiffening tubing I'd welded in.
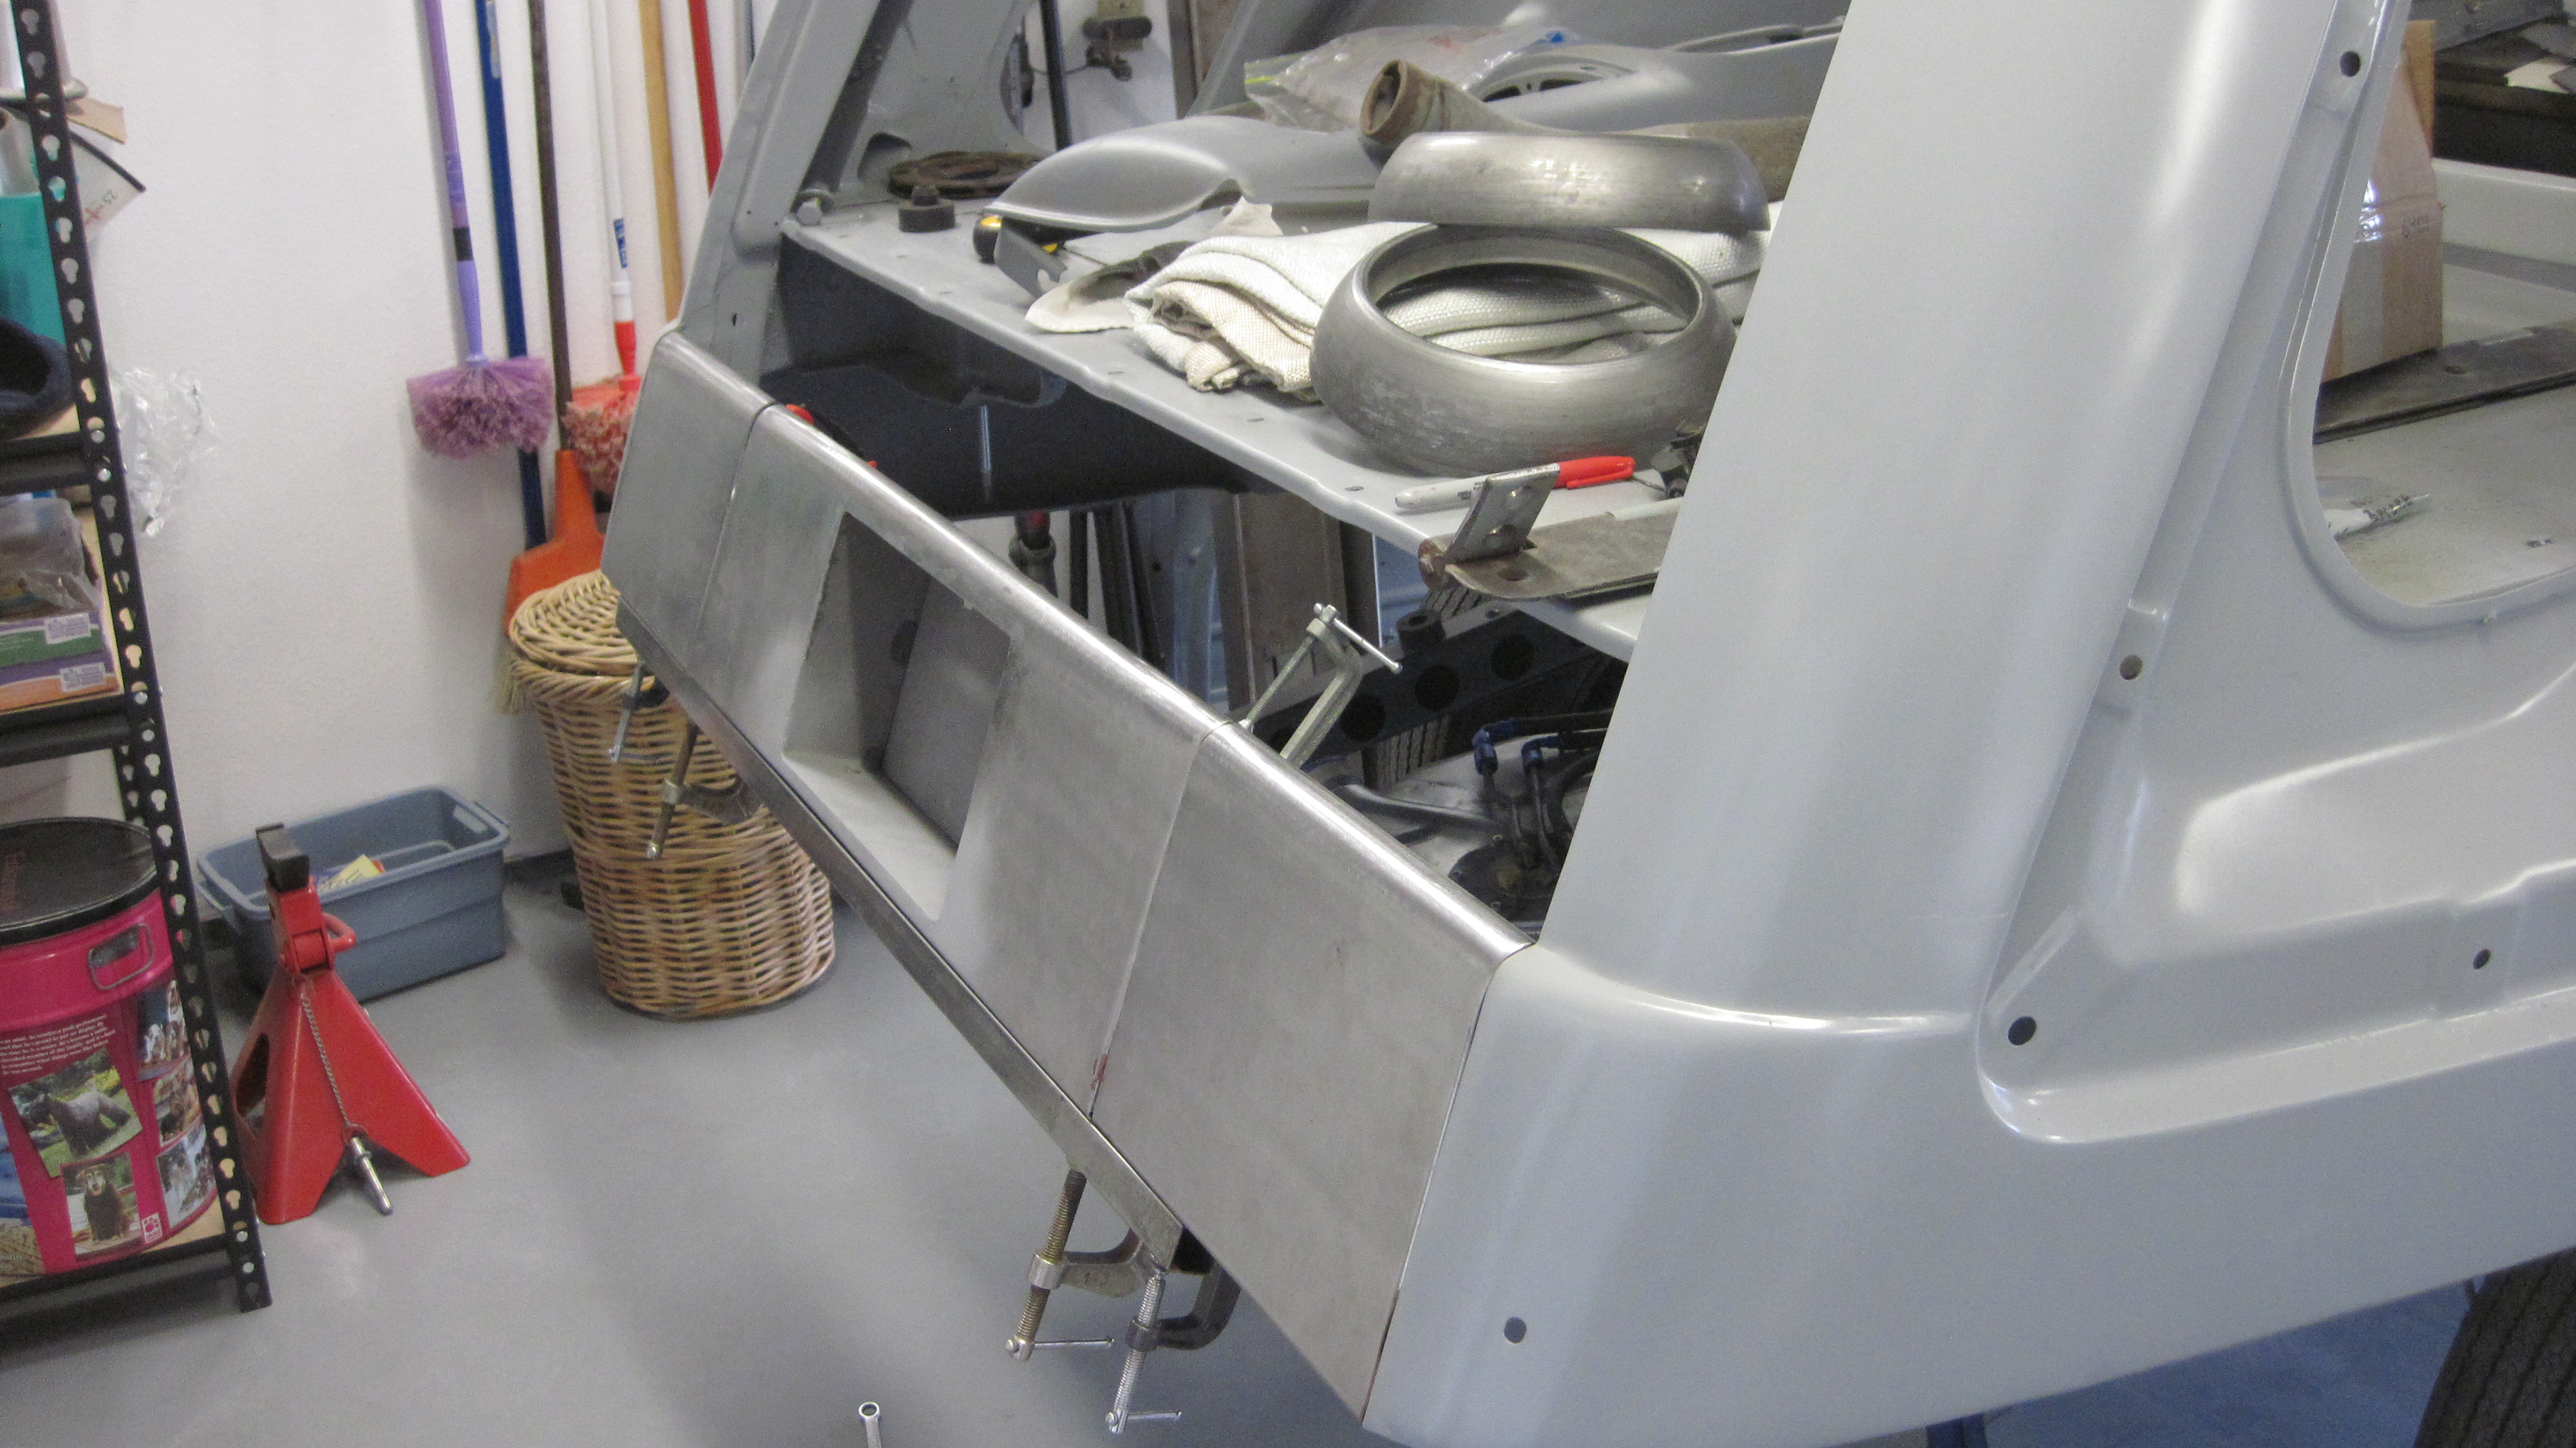
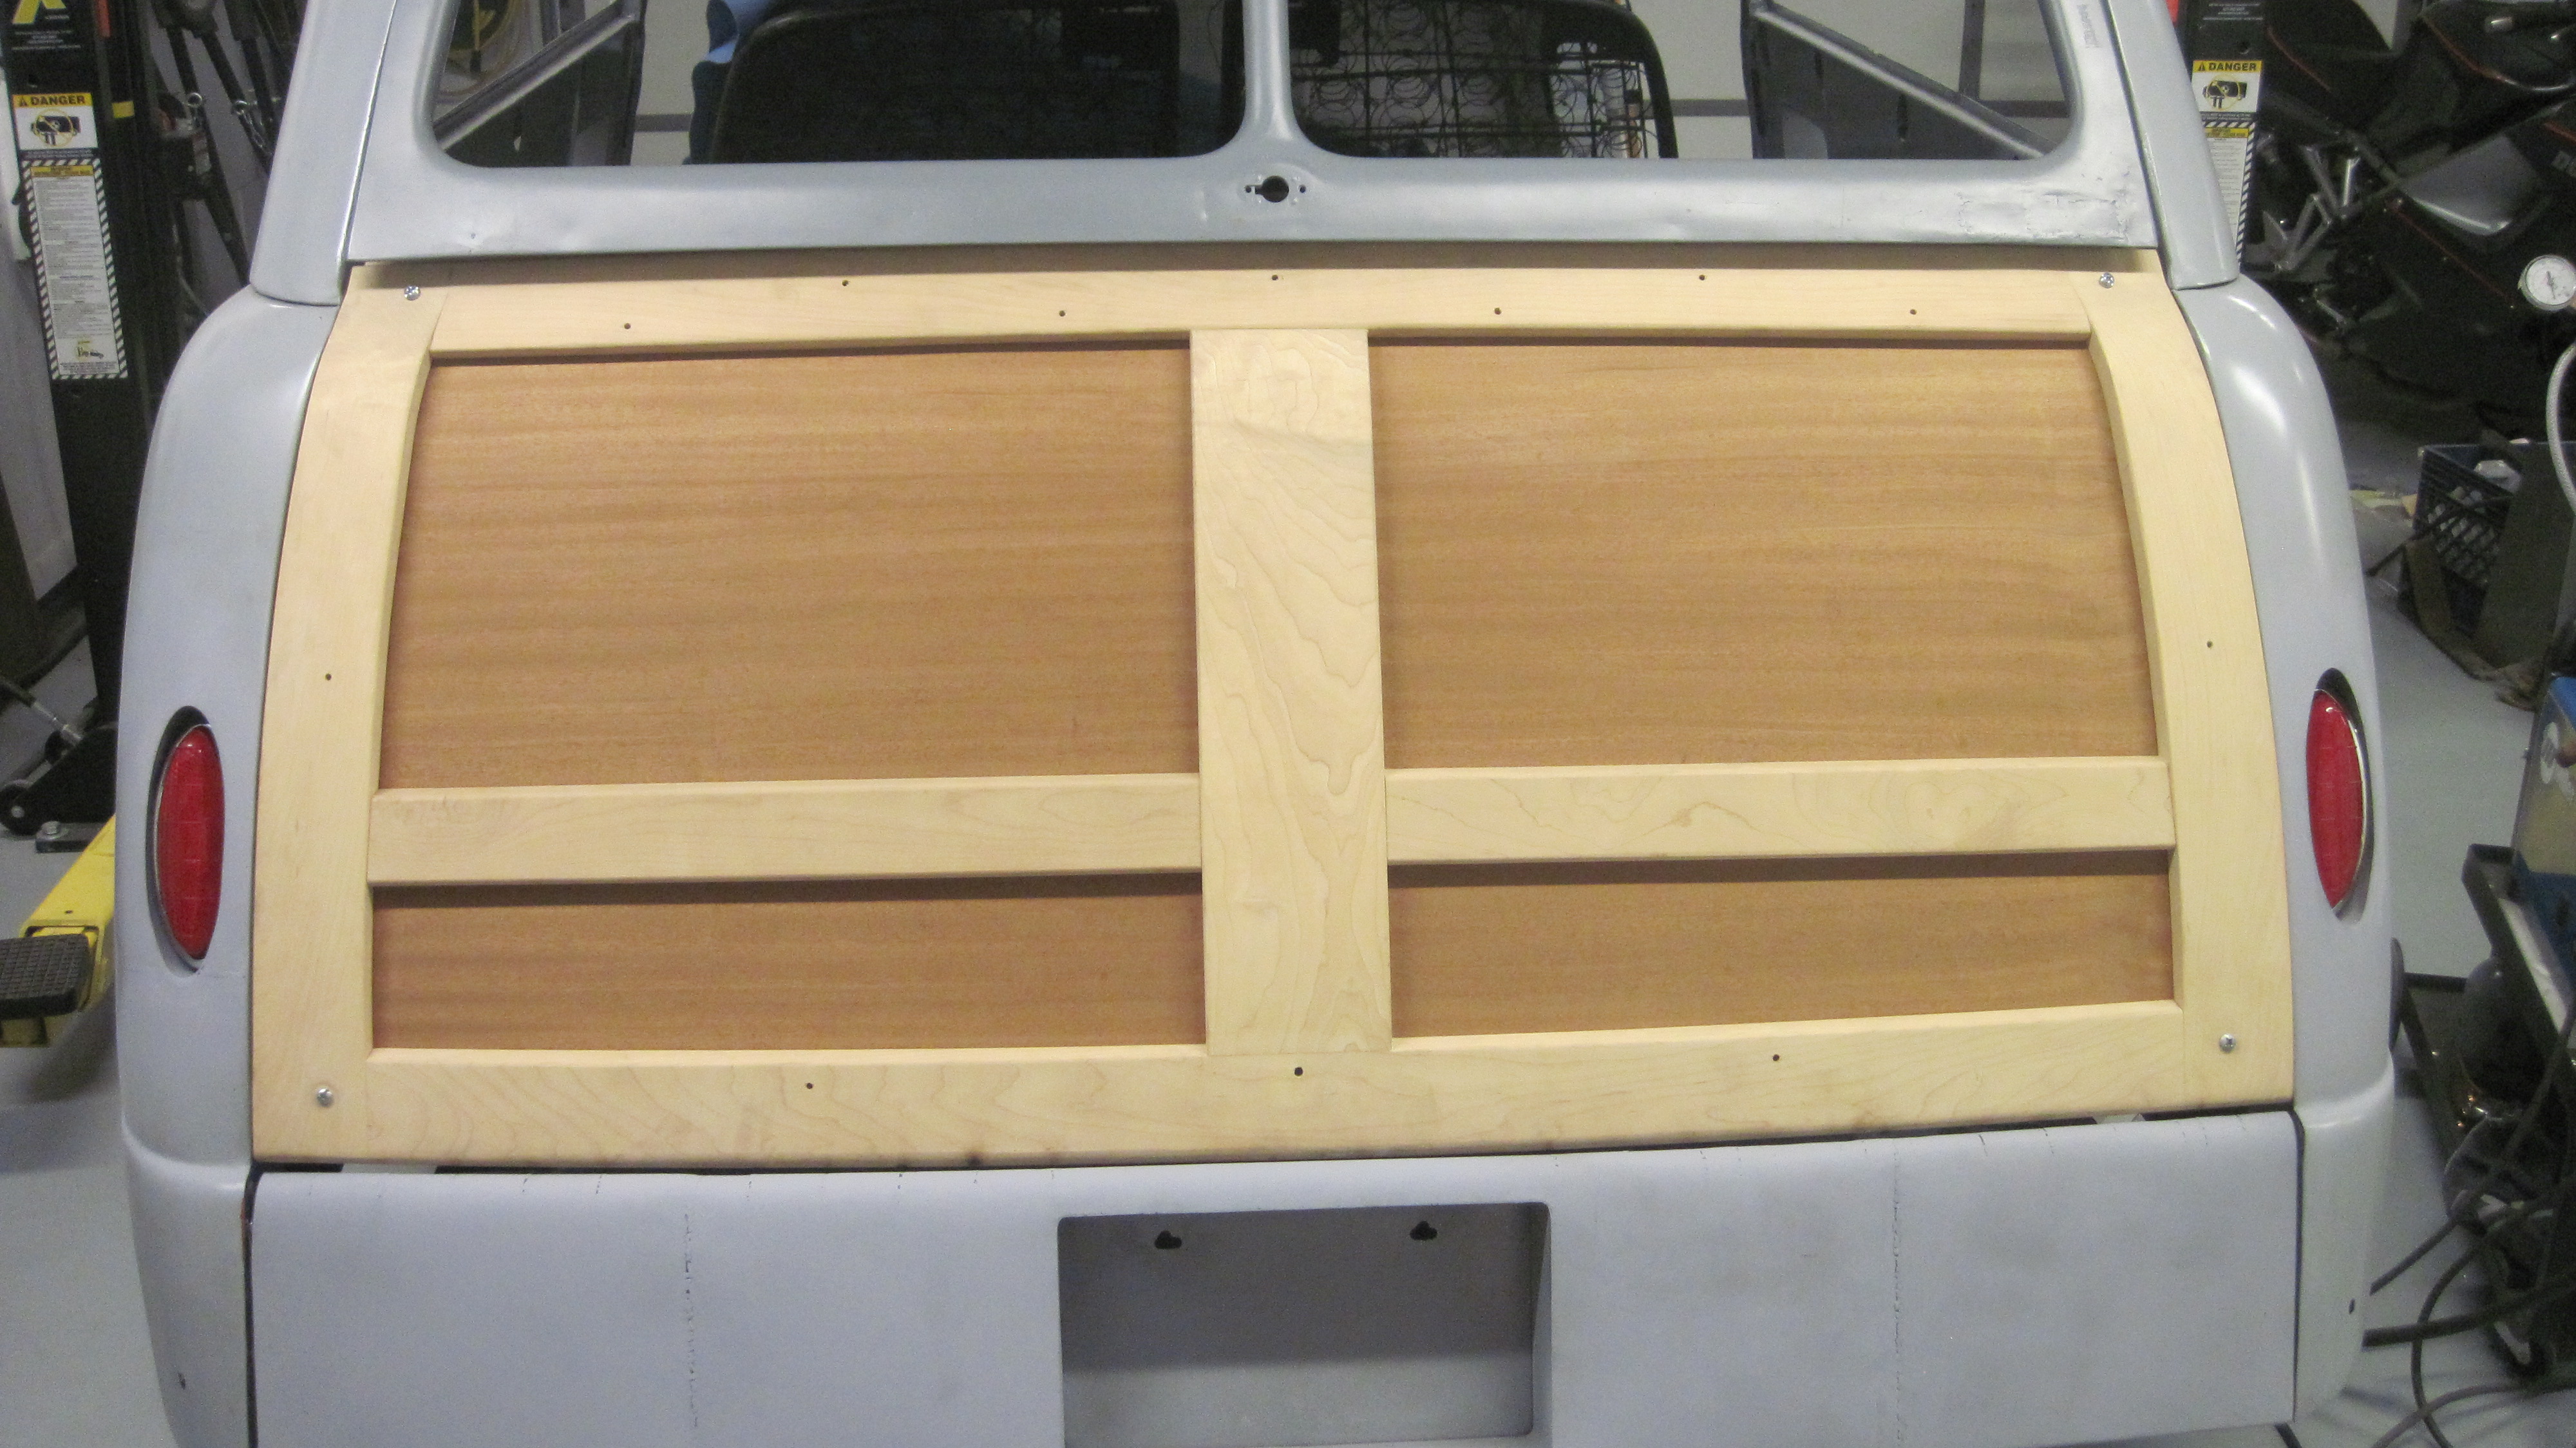
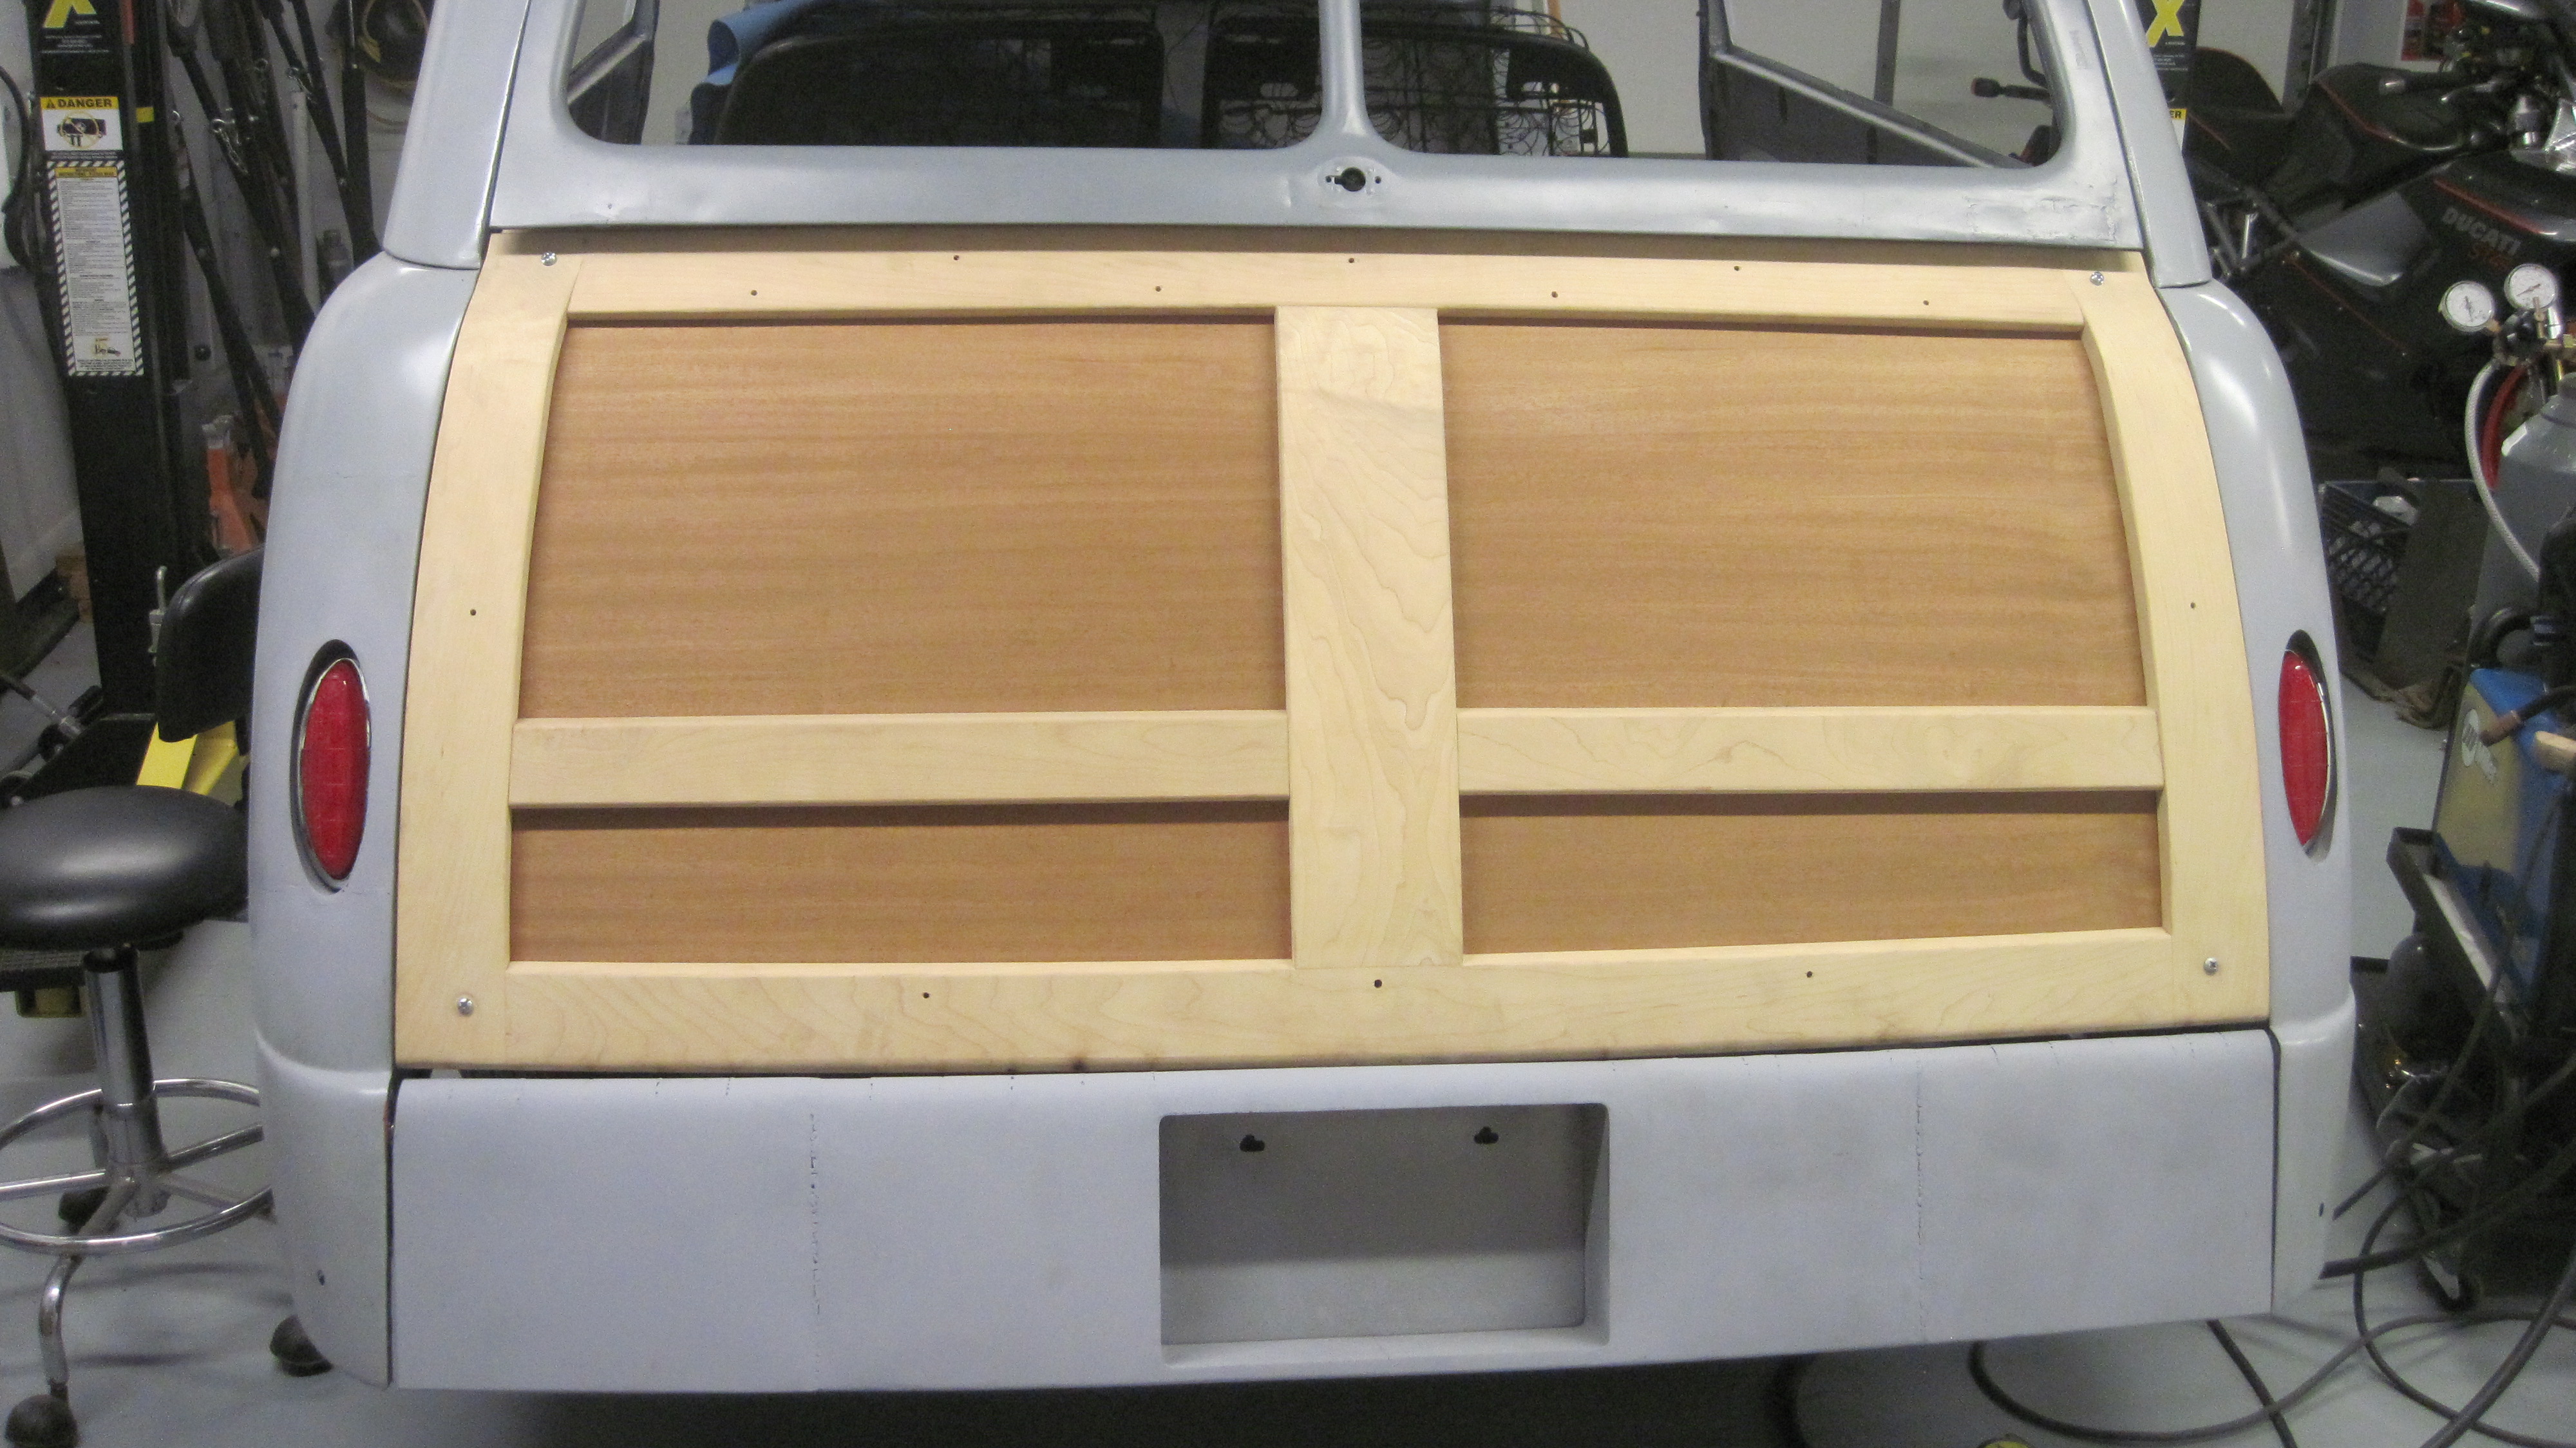
The rear valance panel (under the tailgate) was flat originally on these wagons. That looked OK until you install the radiused tailgate and realize it looks terrible.
So, I worked to add a radius that would match the tailgate. Not easy....
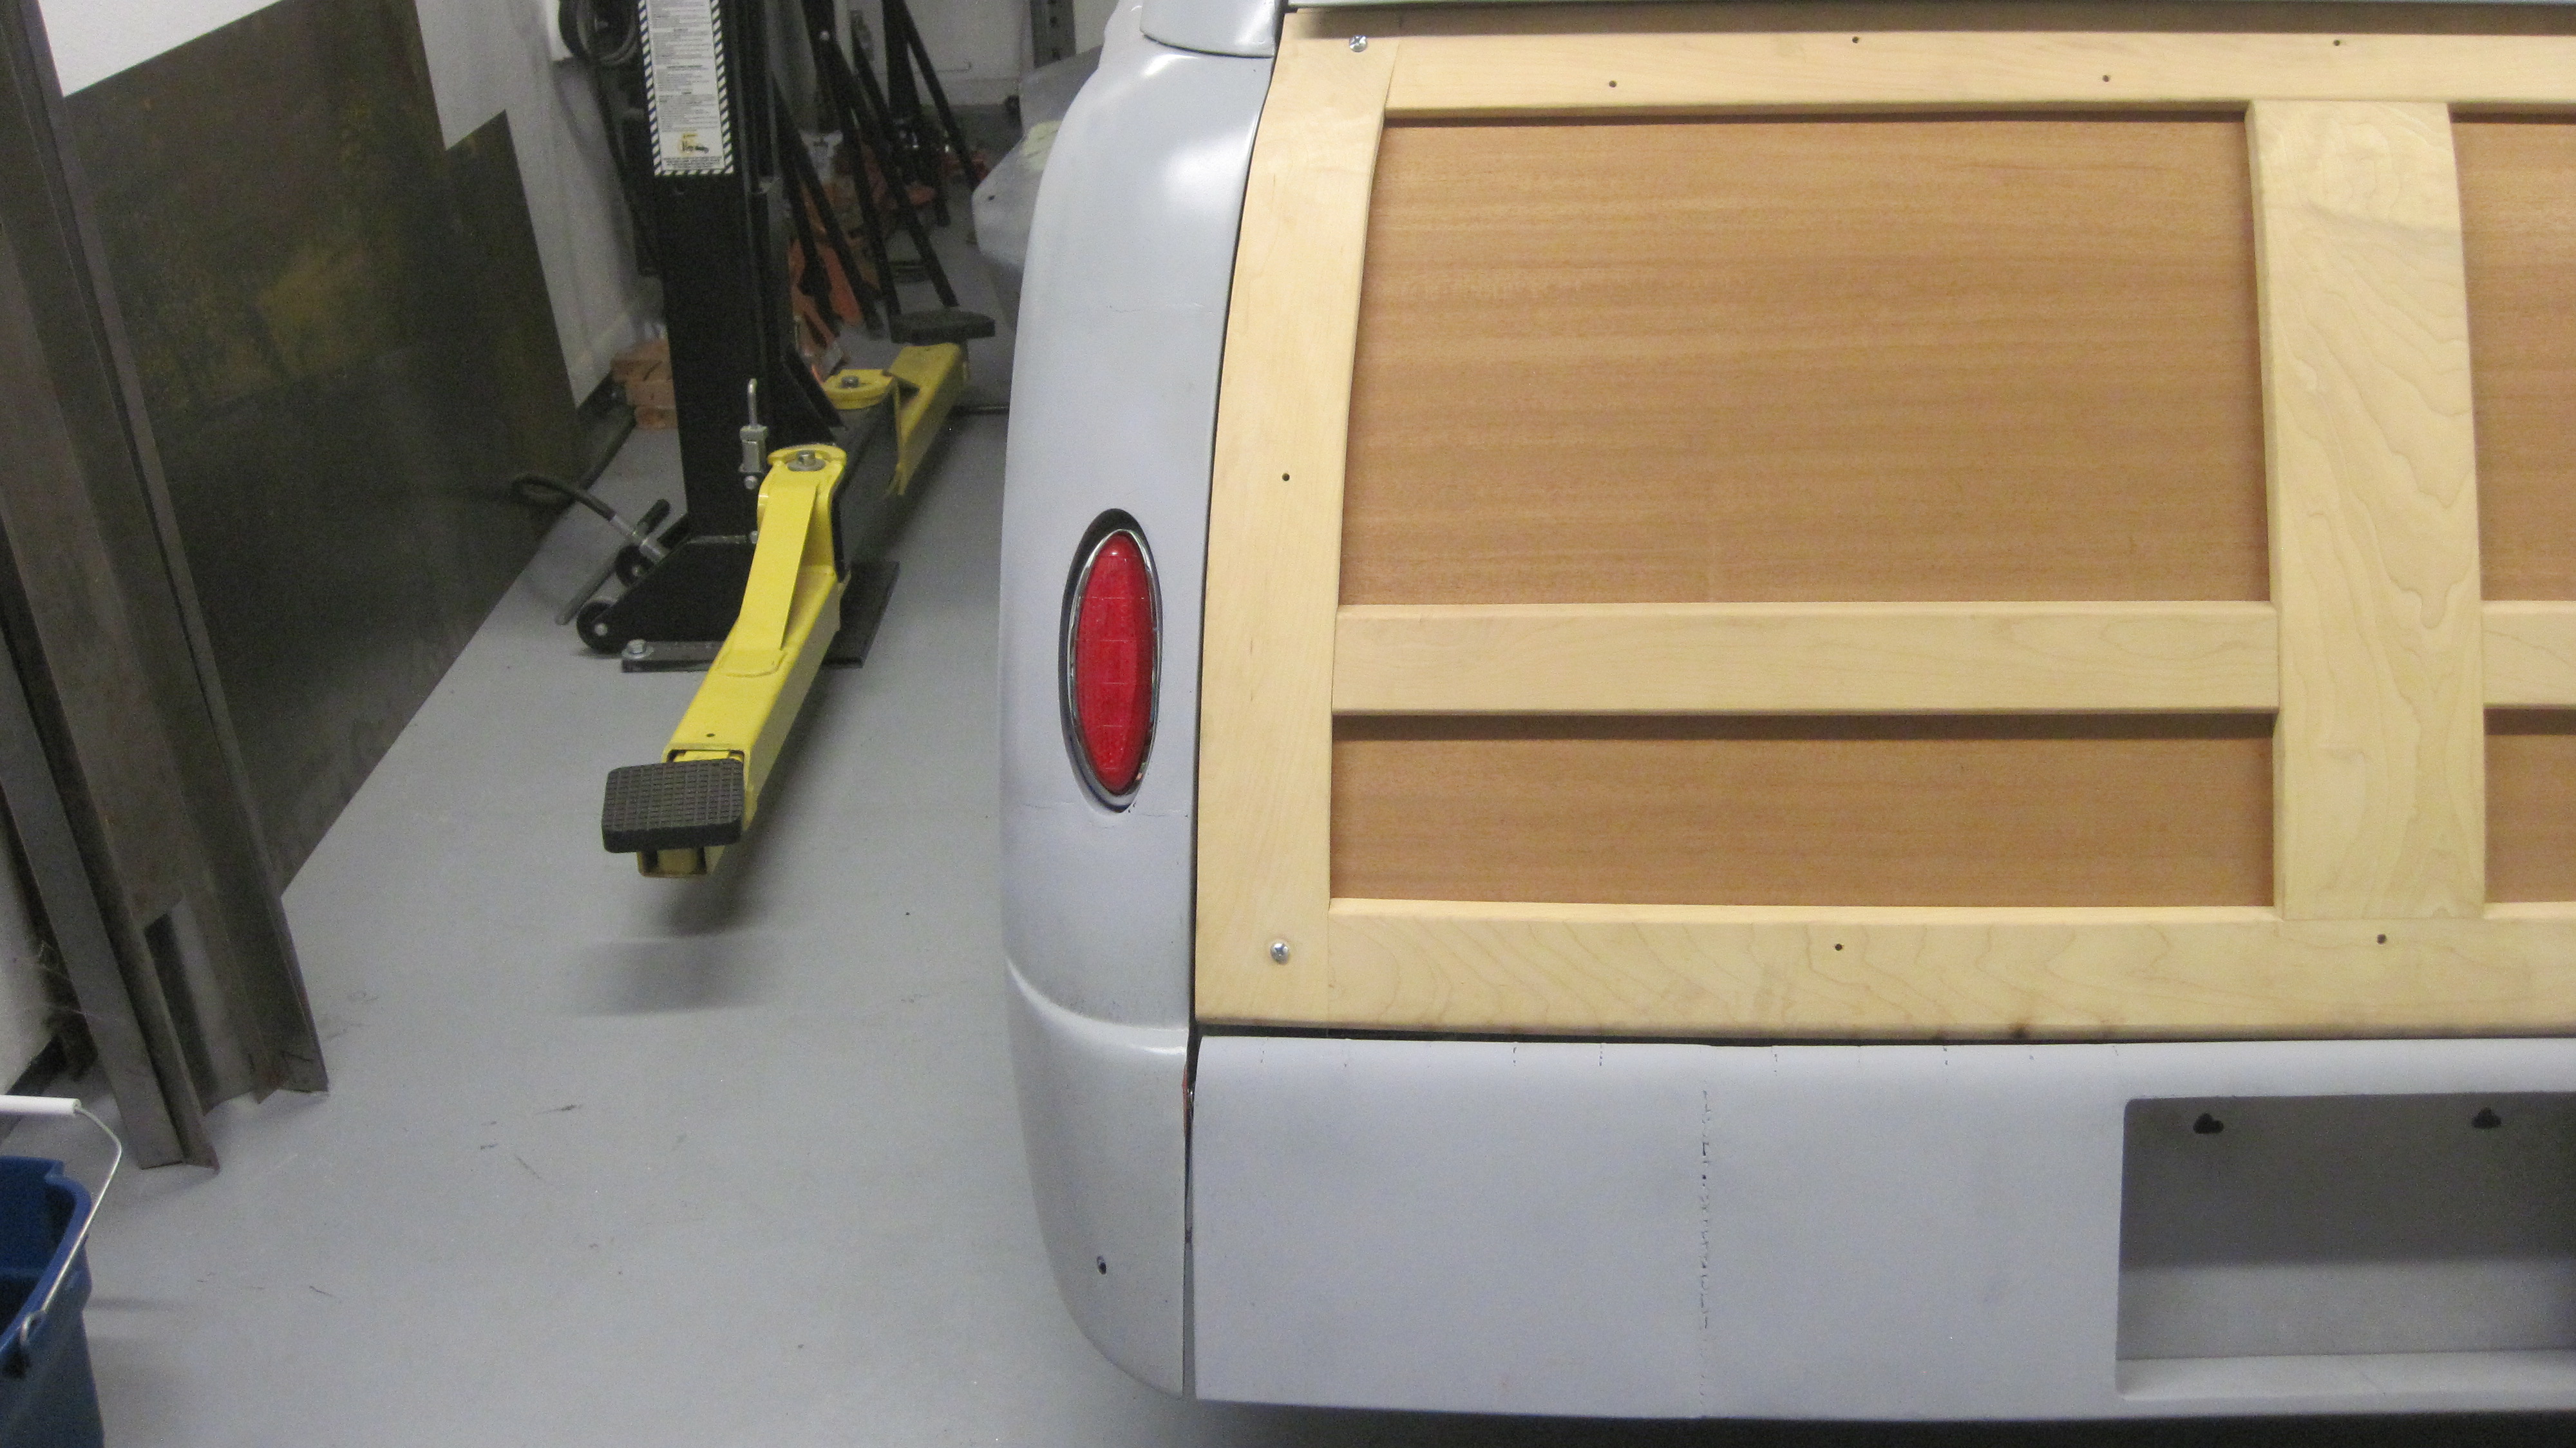
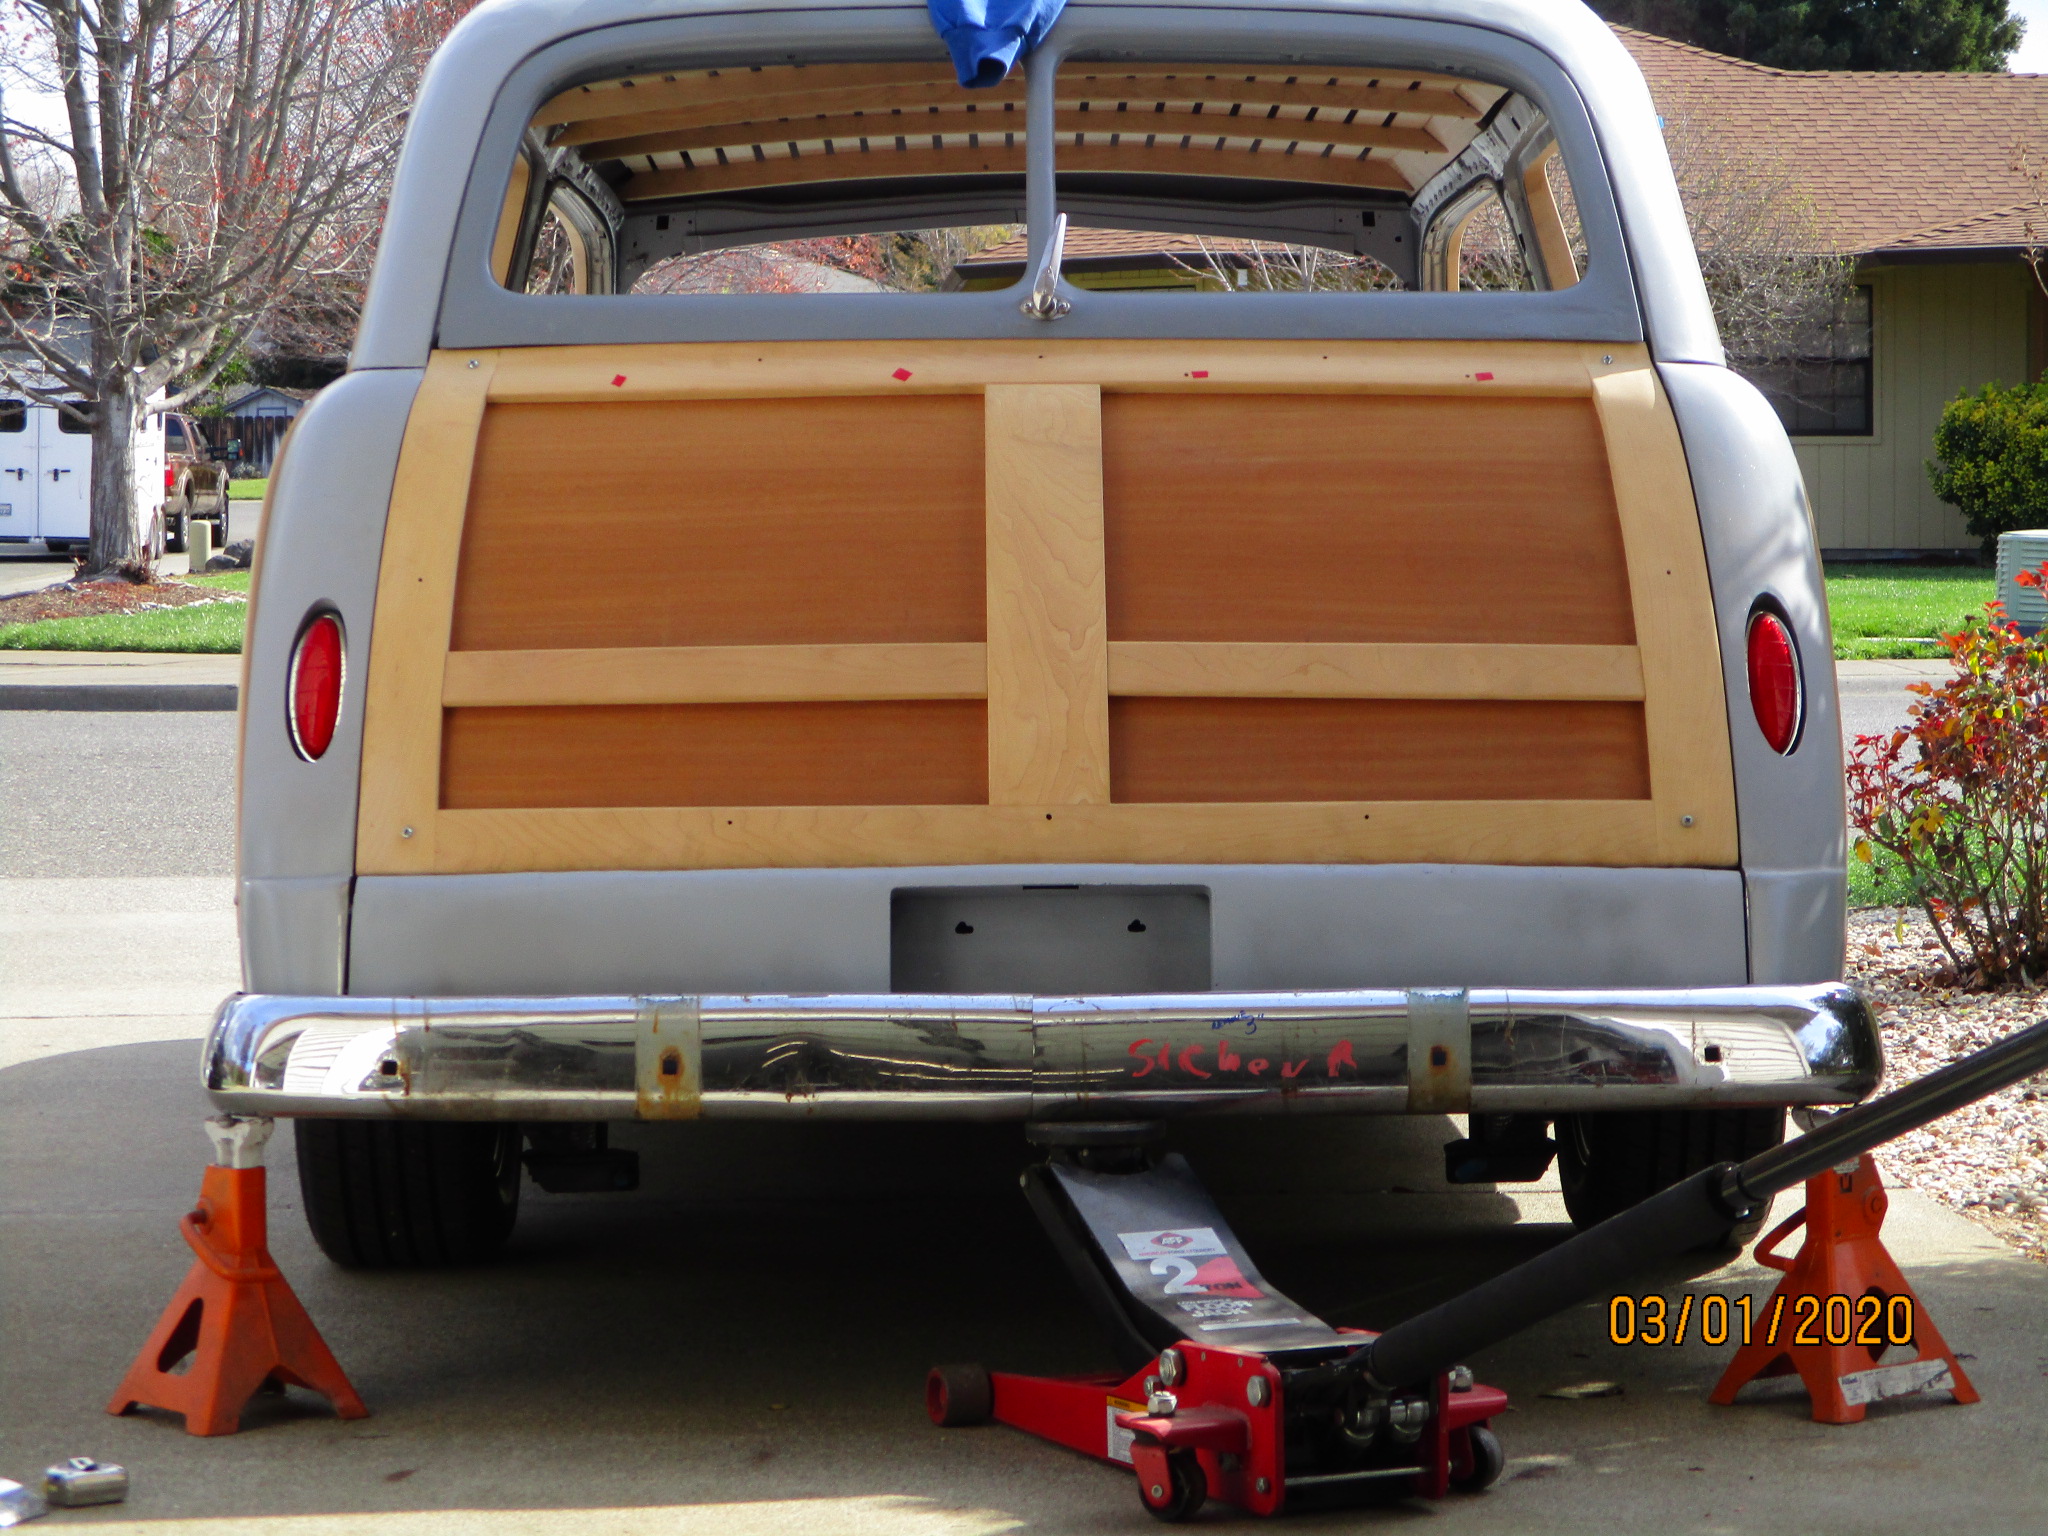
Tail lights that look "right" on a car this old are hard to find. I'd seen one with frenched-in tail lights from a 1950 Ford that looked excellent.
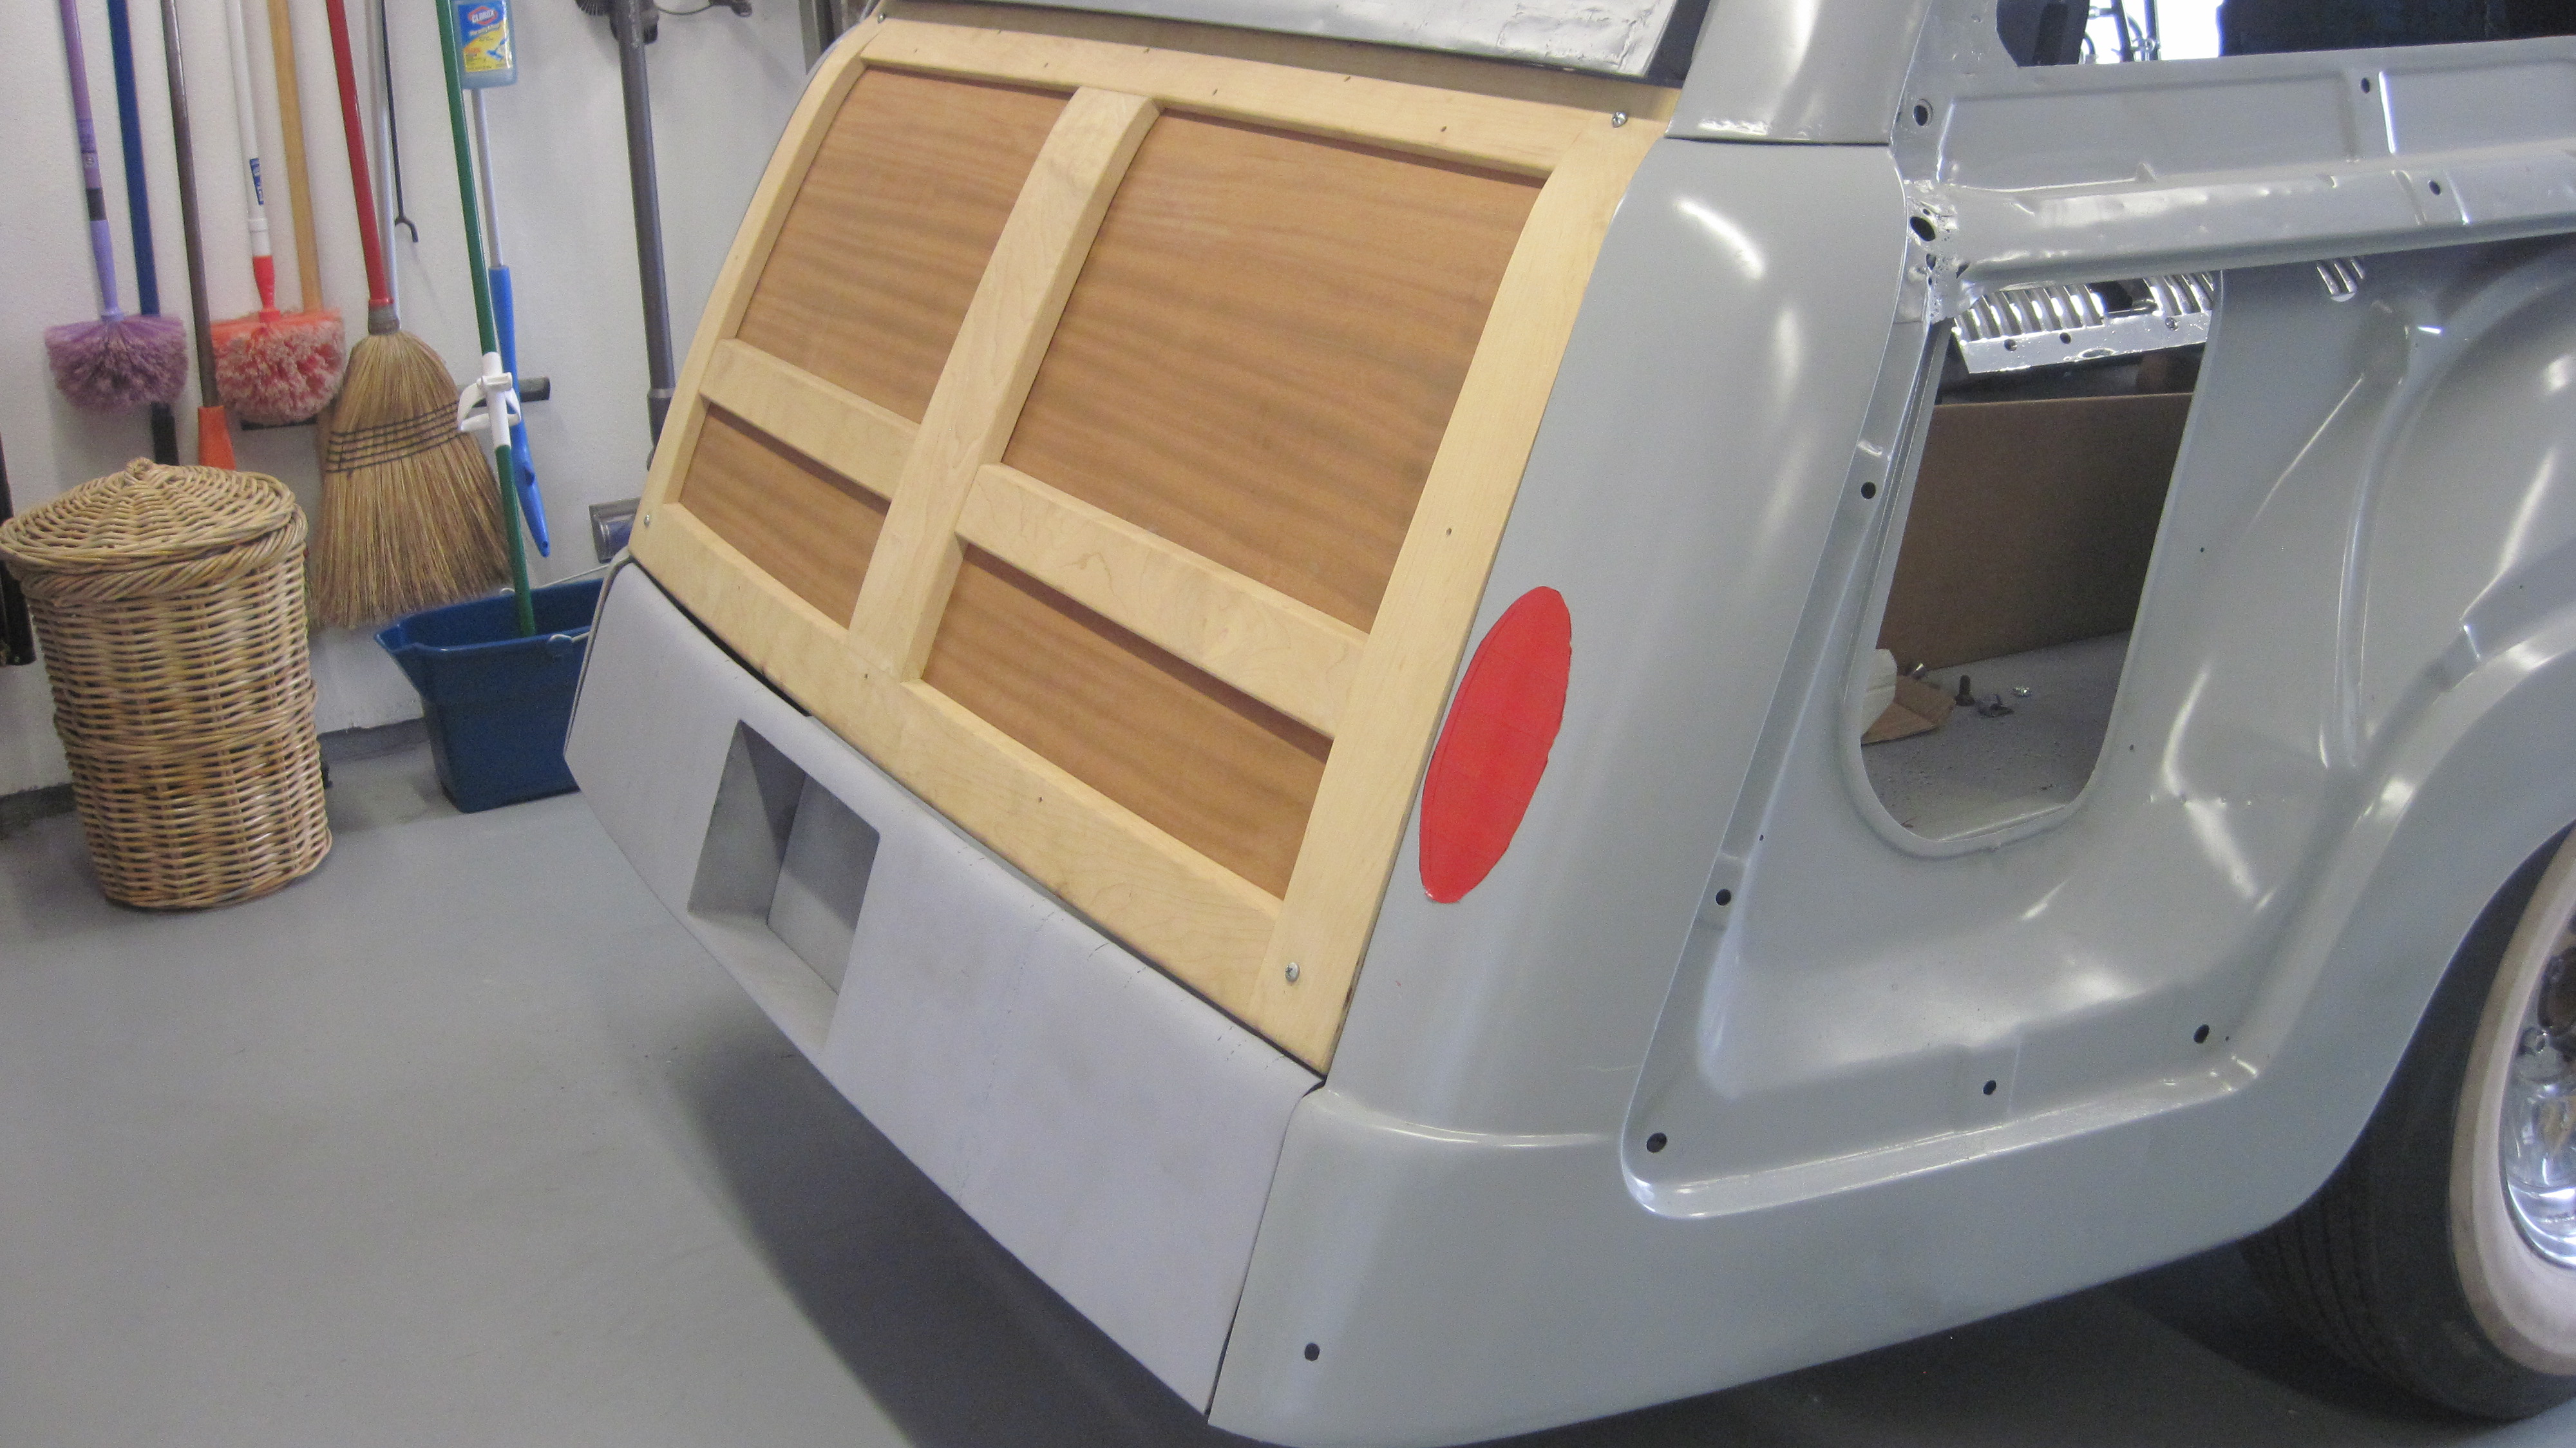
So I located LED tail lights and frenching buckets and went to work.
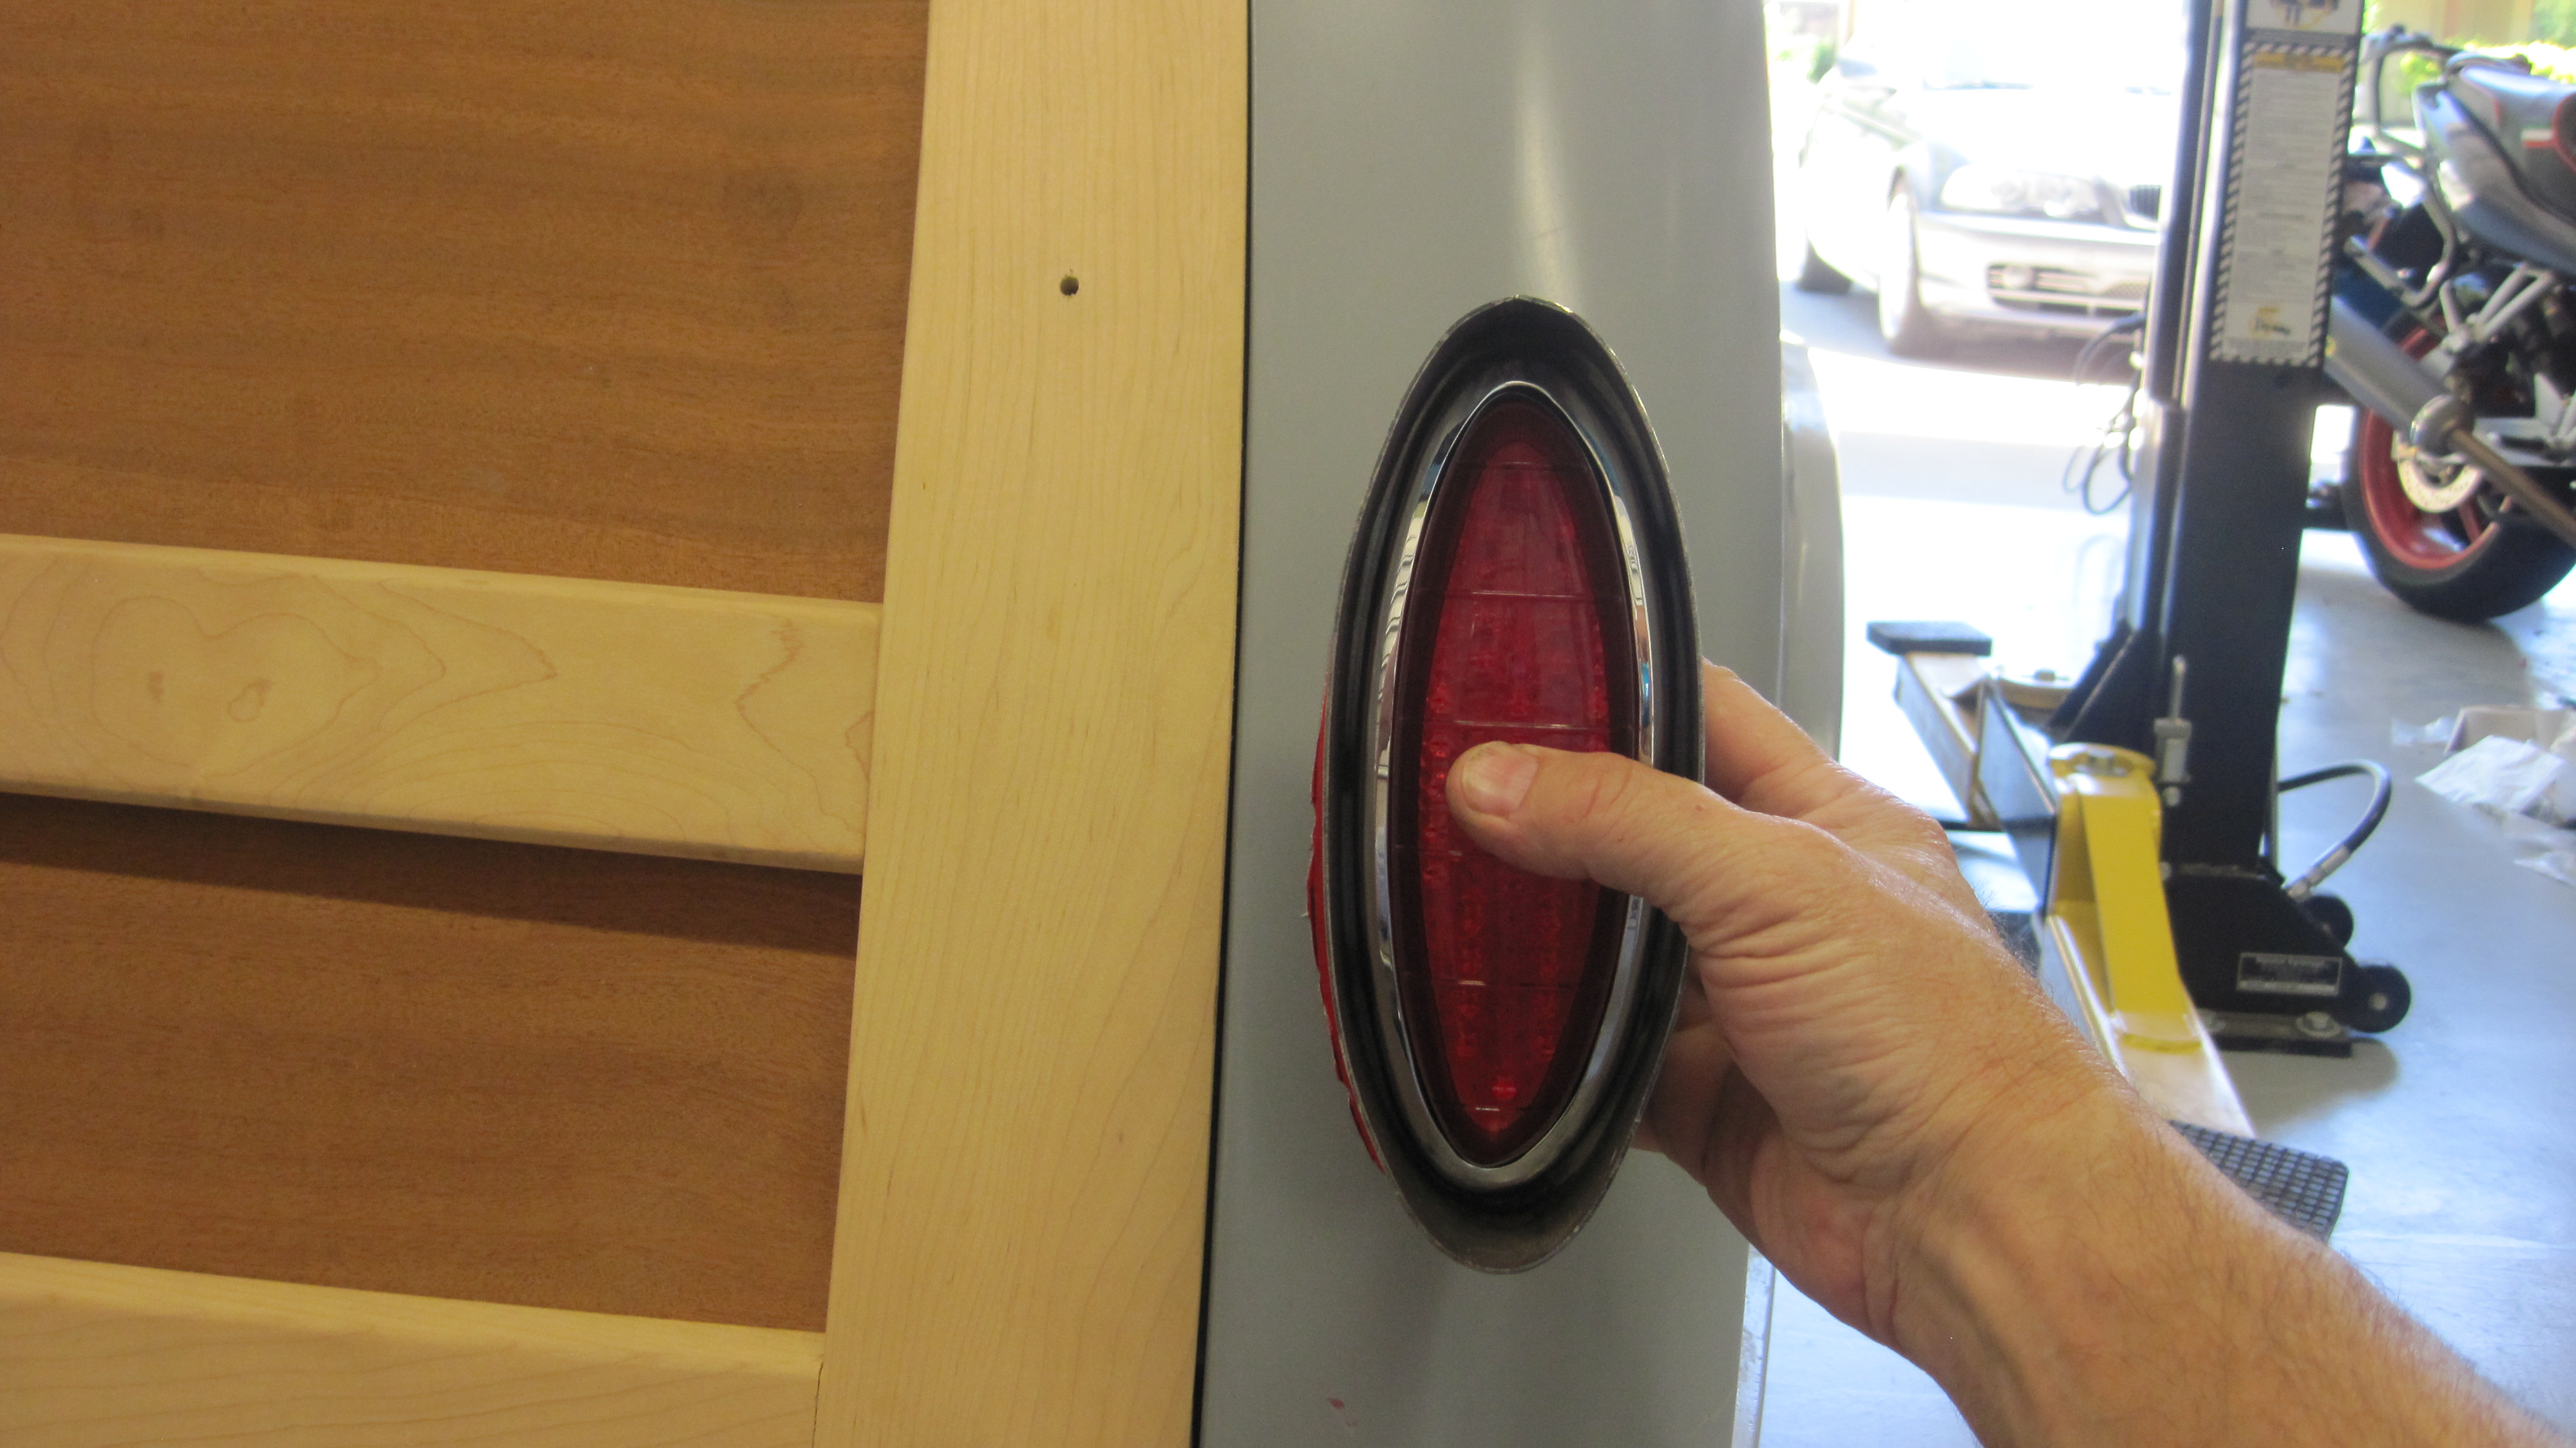
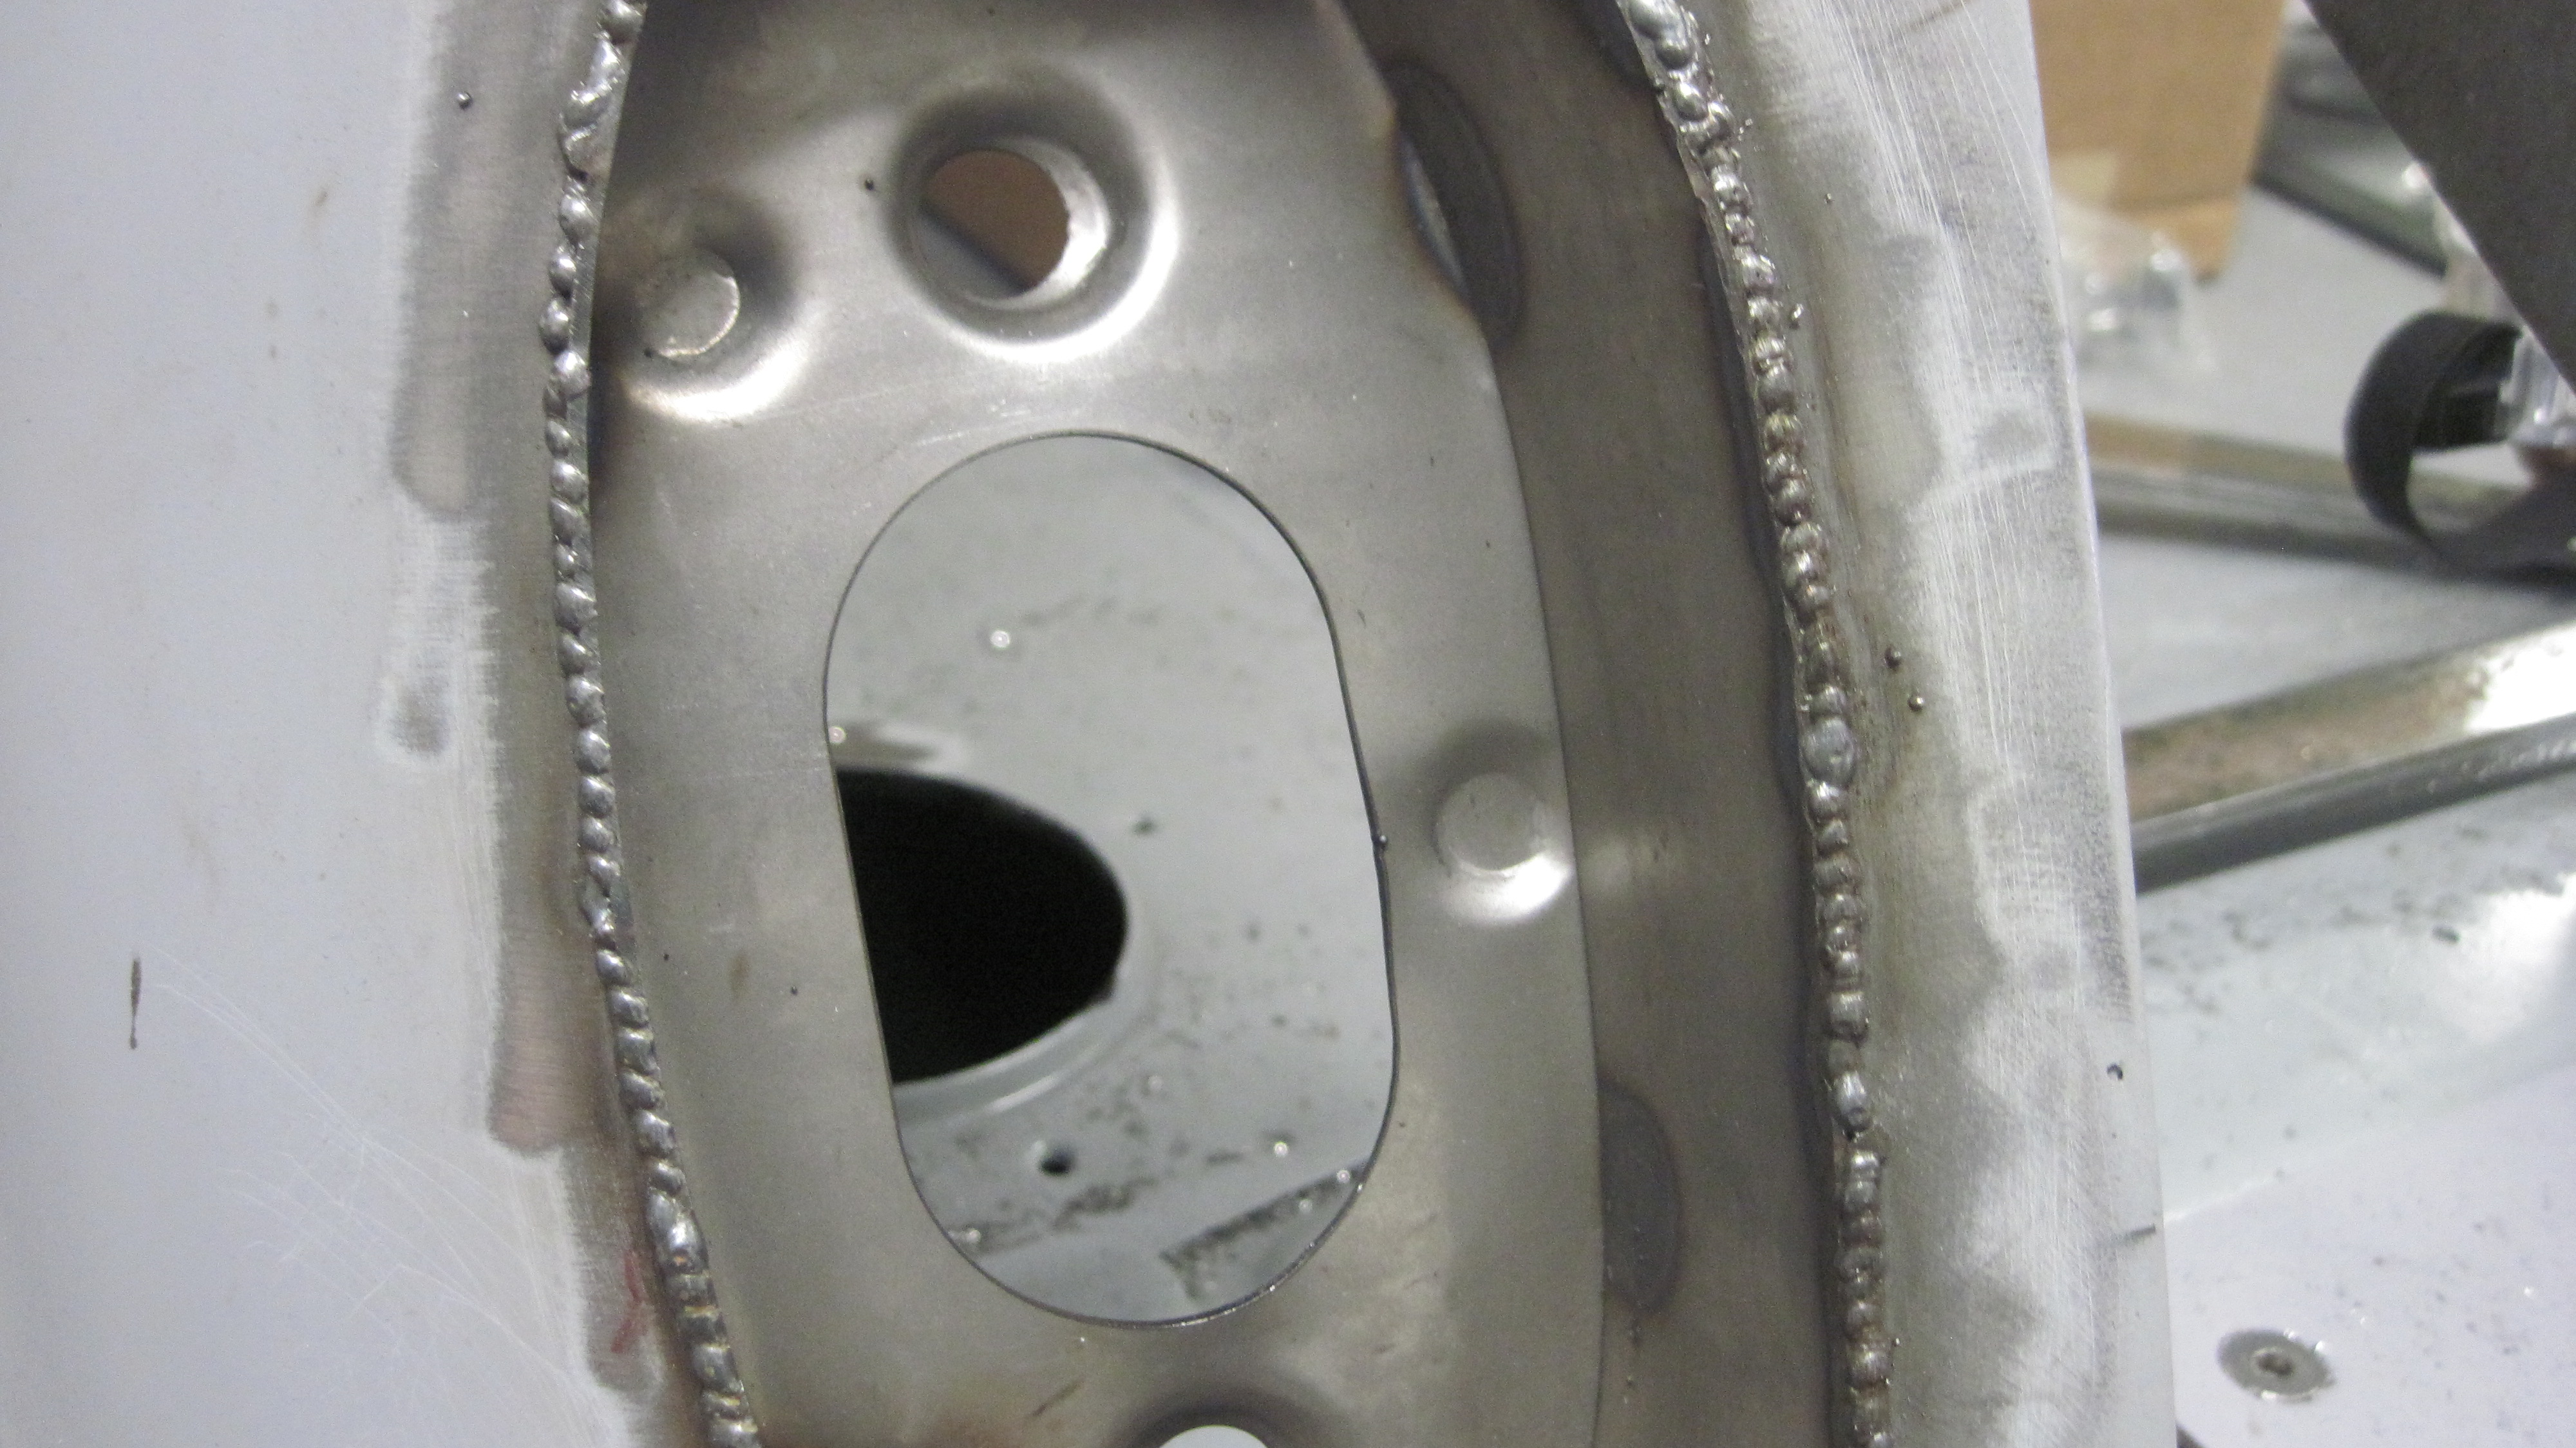
My sheetmetal welds are actually getting presentable with all of this practice.
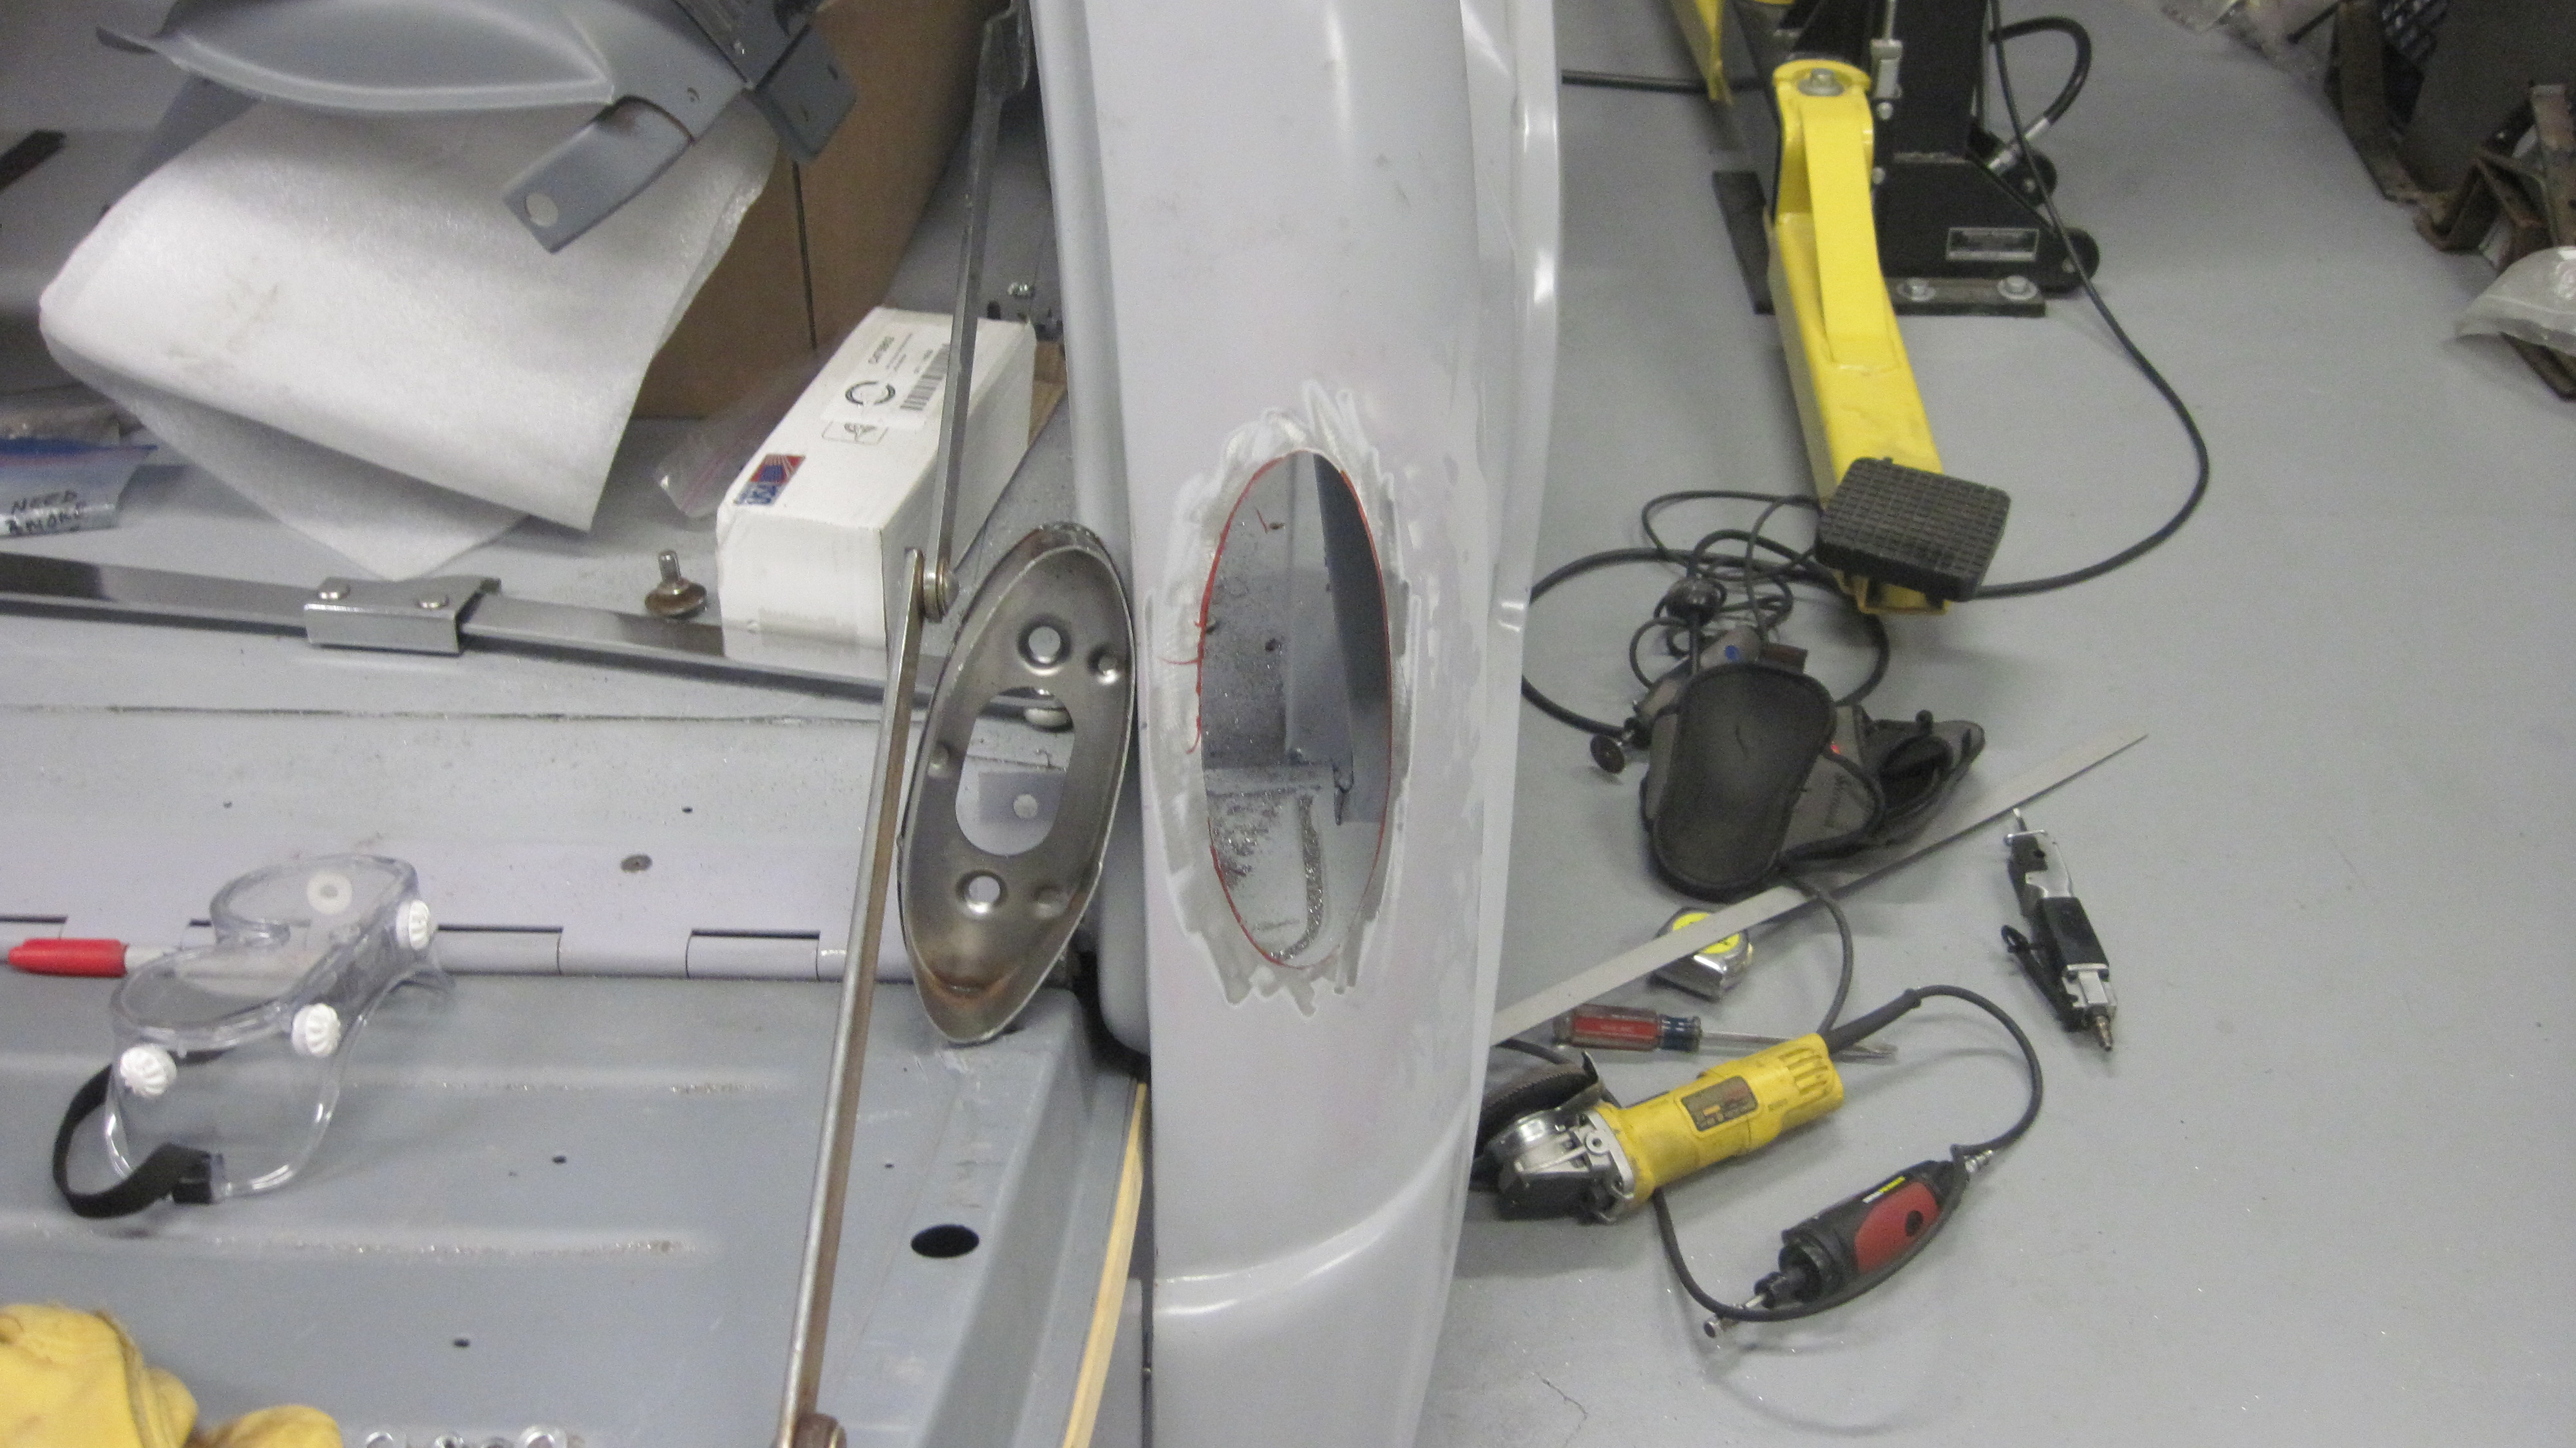
It took hours of measuring and getting all of the angles to match, but the tail lights came out really well.
I love the tail lights, now I need to re-do the valance panel one more time to get the radius correct.
The valance panel will get fully welded up. I'm pretty sure I also want to add rectangular cut-outs for the exhaust tips and add "eyebrows" around the cut-outs.
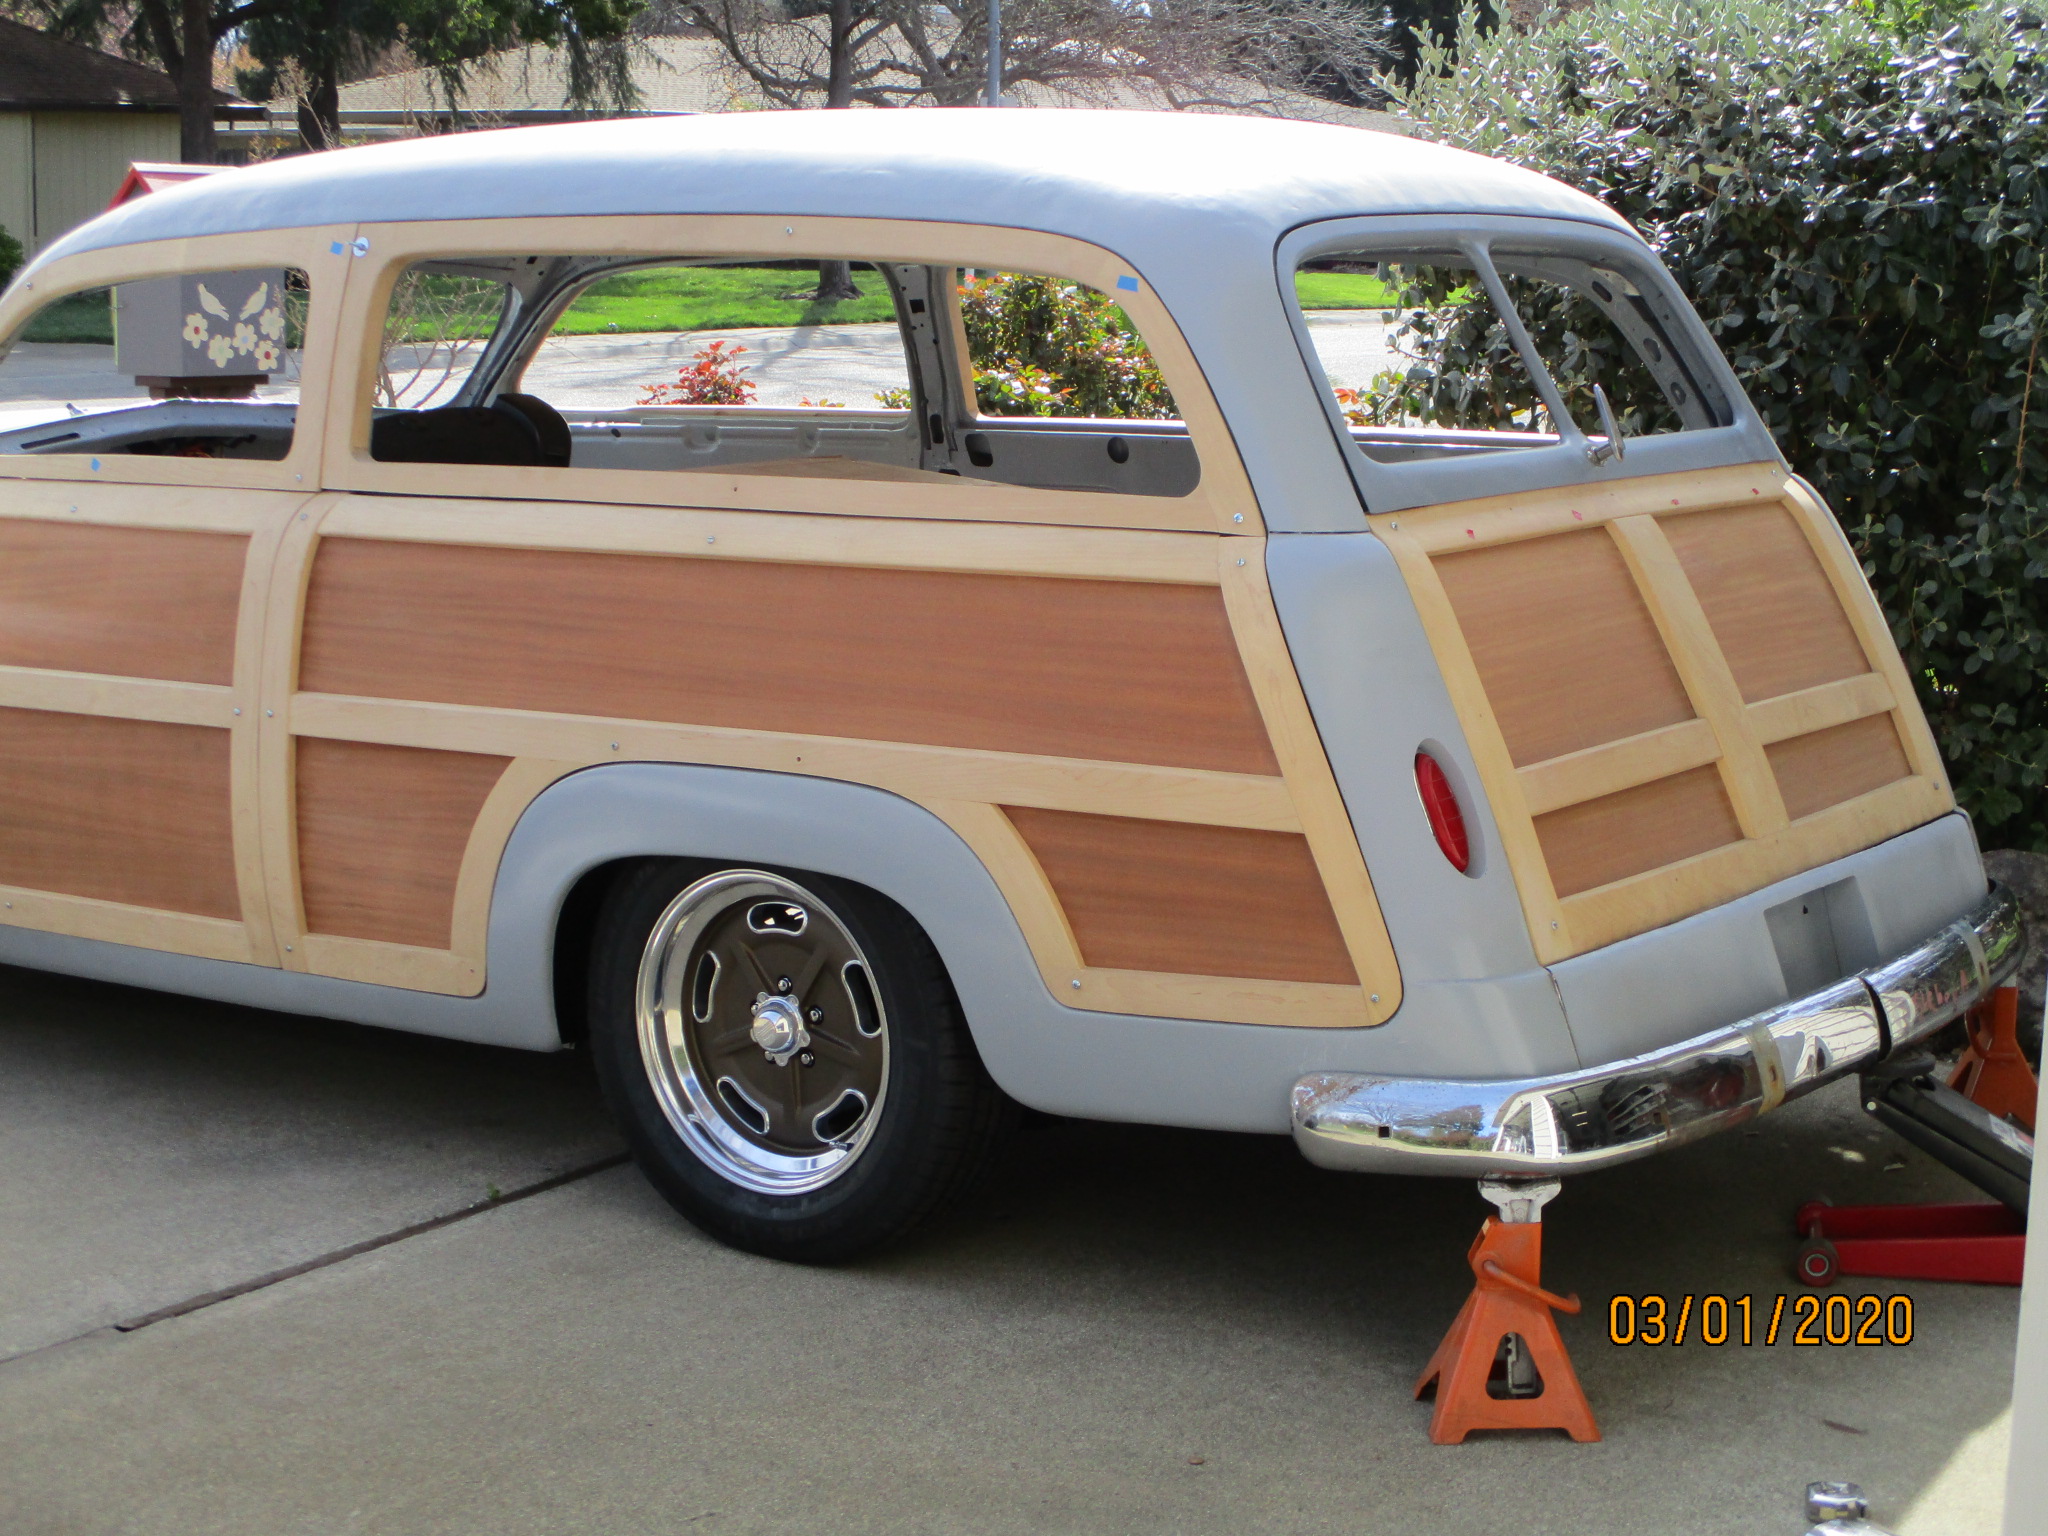
I also started on the front and rear bumpers. They're off of a '51 Chevy, they 're very narrow compared to Merc bumpers, and will allow me to keep them tucked in closer to the body.
I'll have to notch the bumper for the license plate clearance once I have everything fit-checked and positioned.
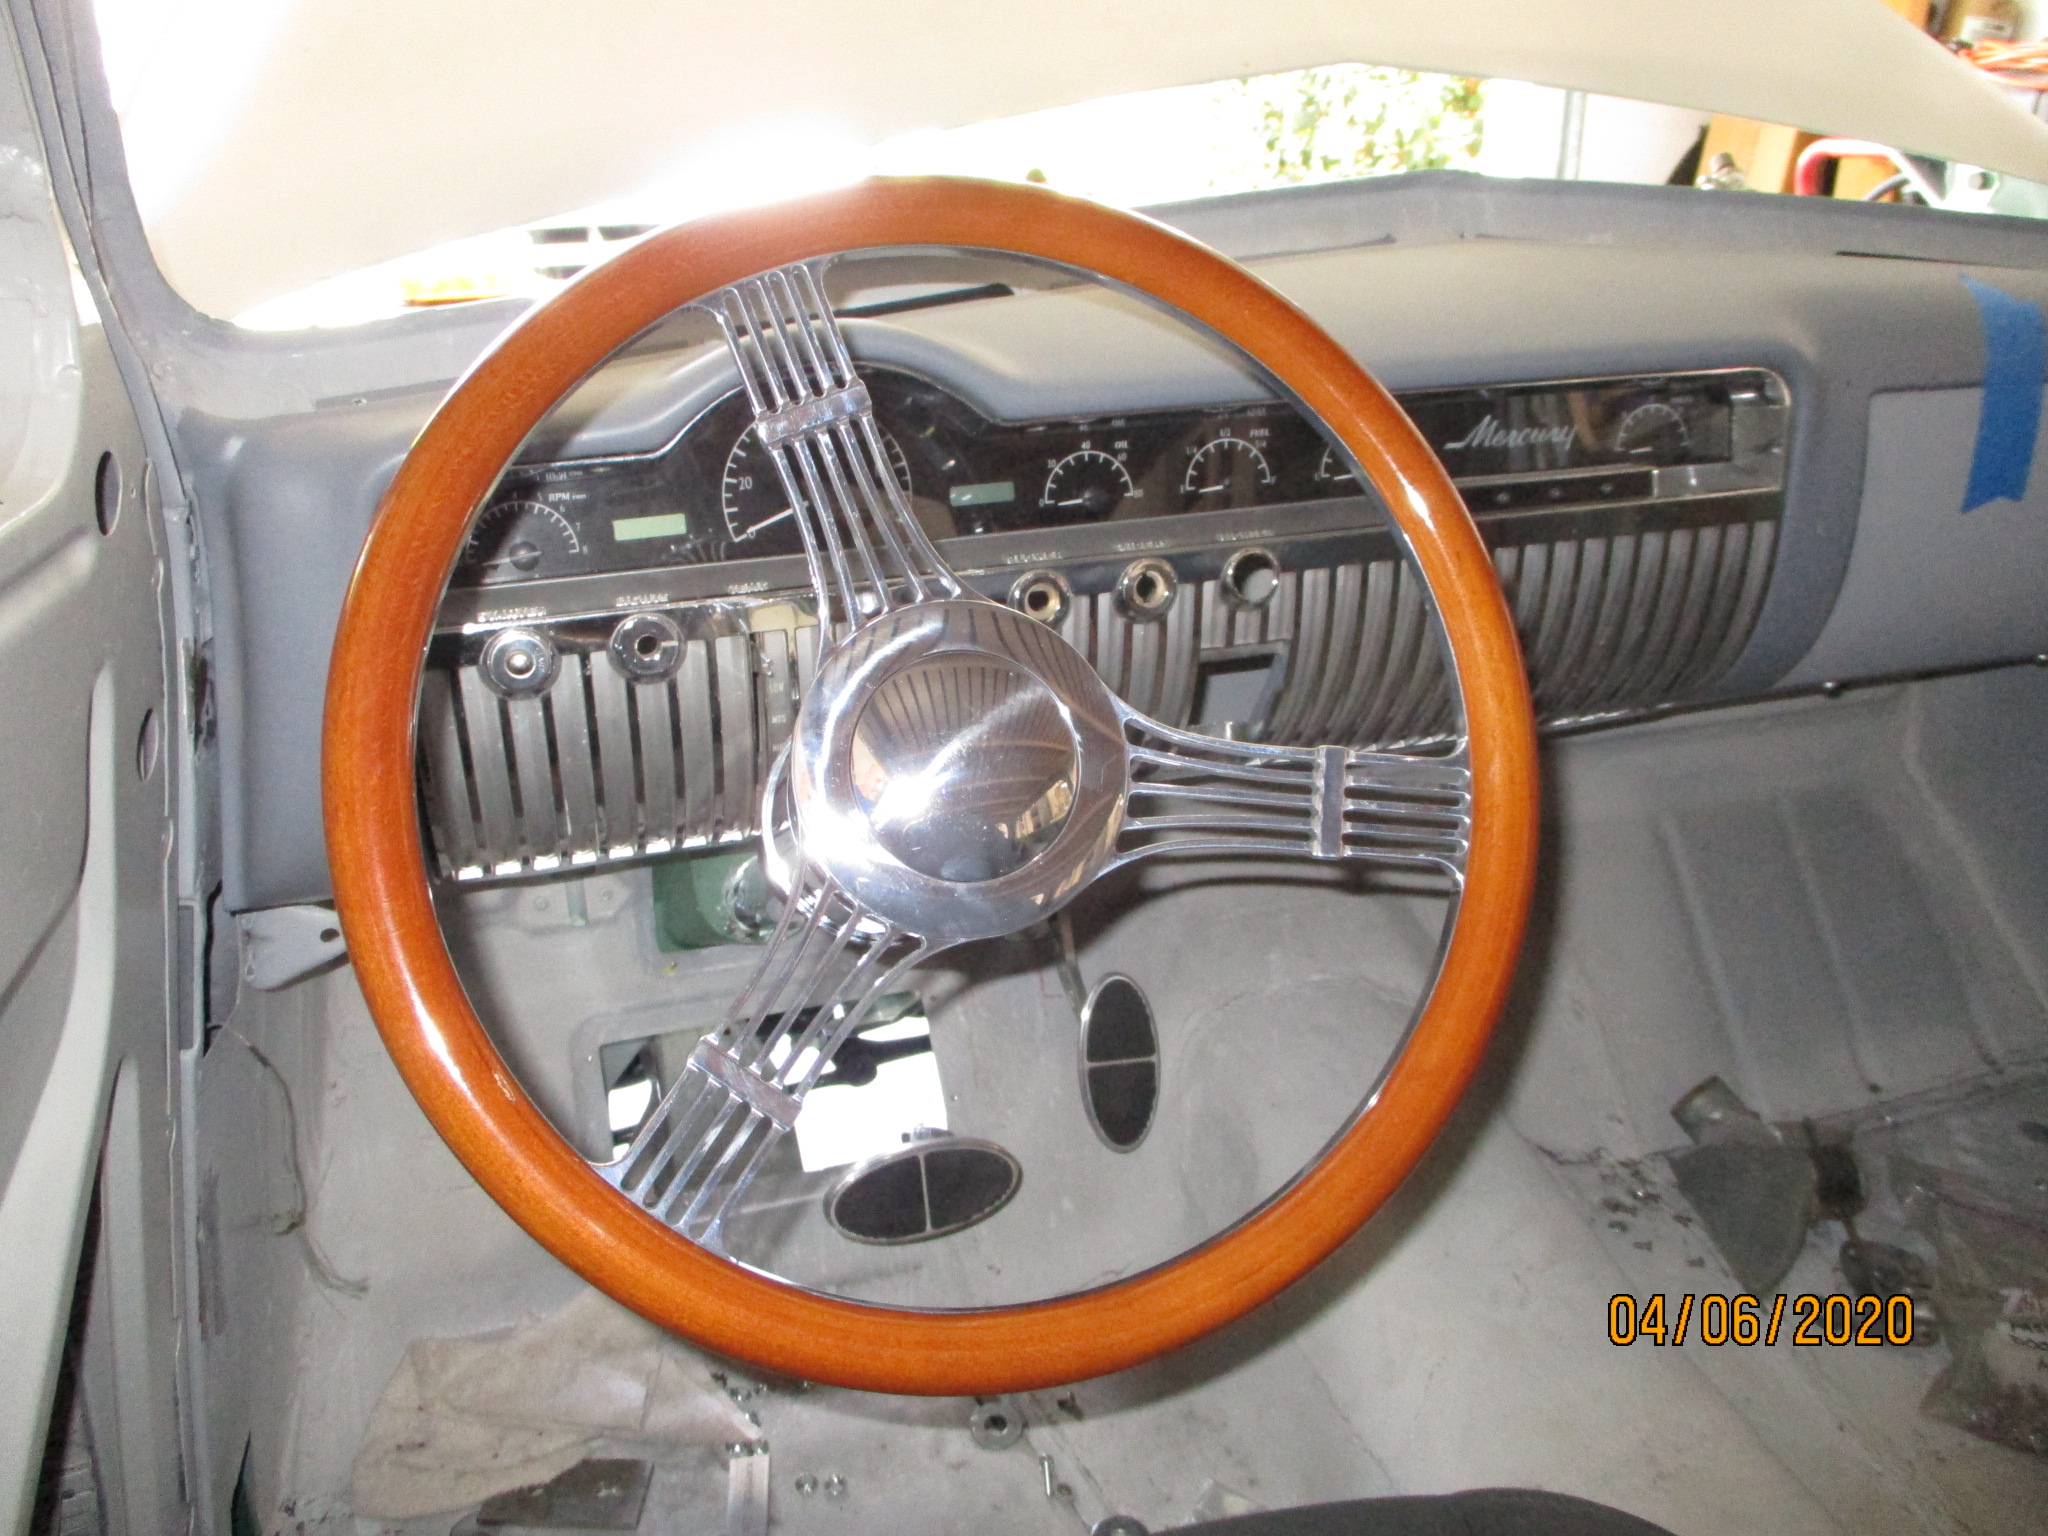
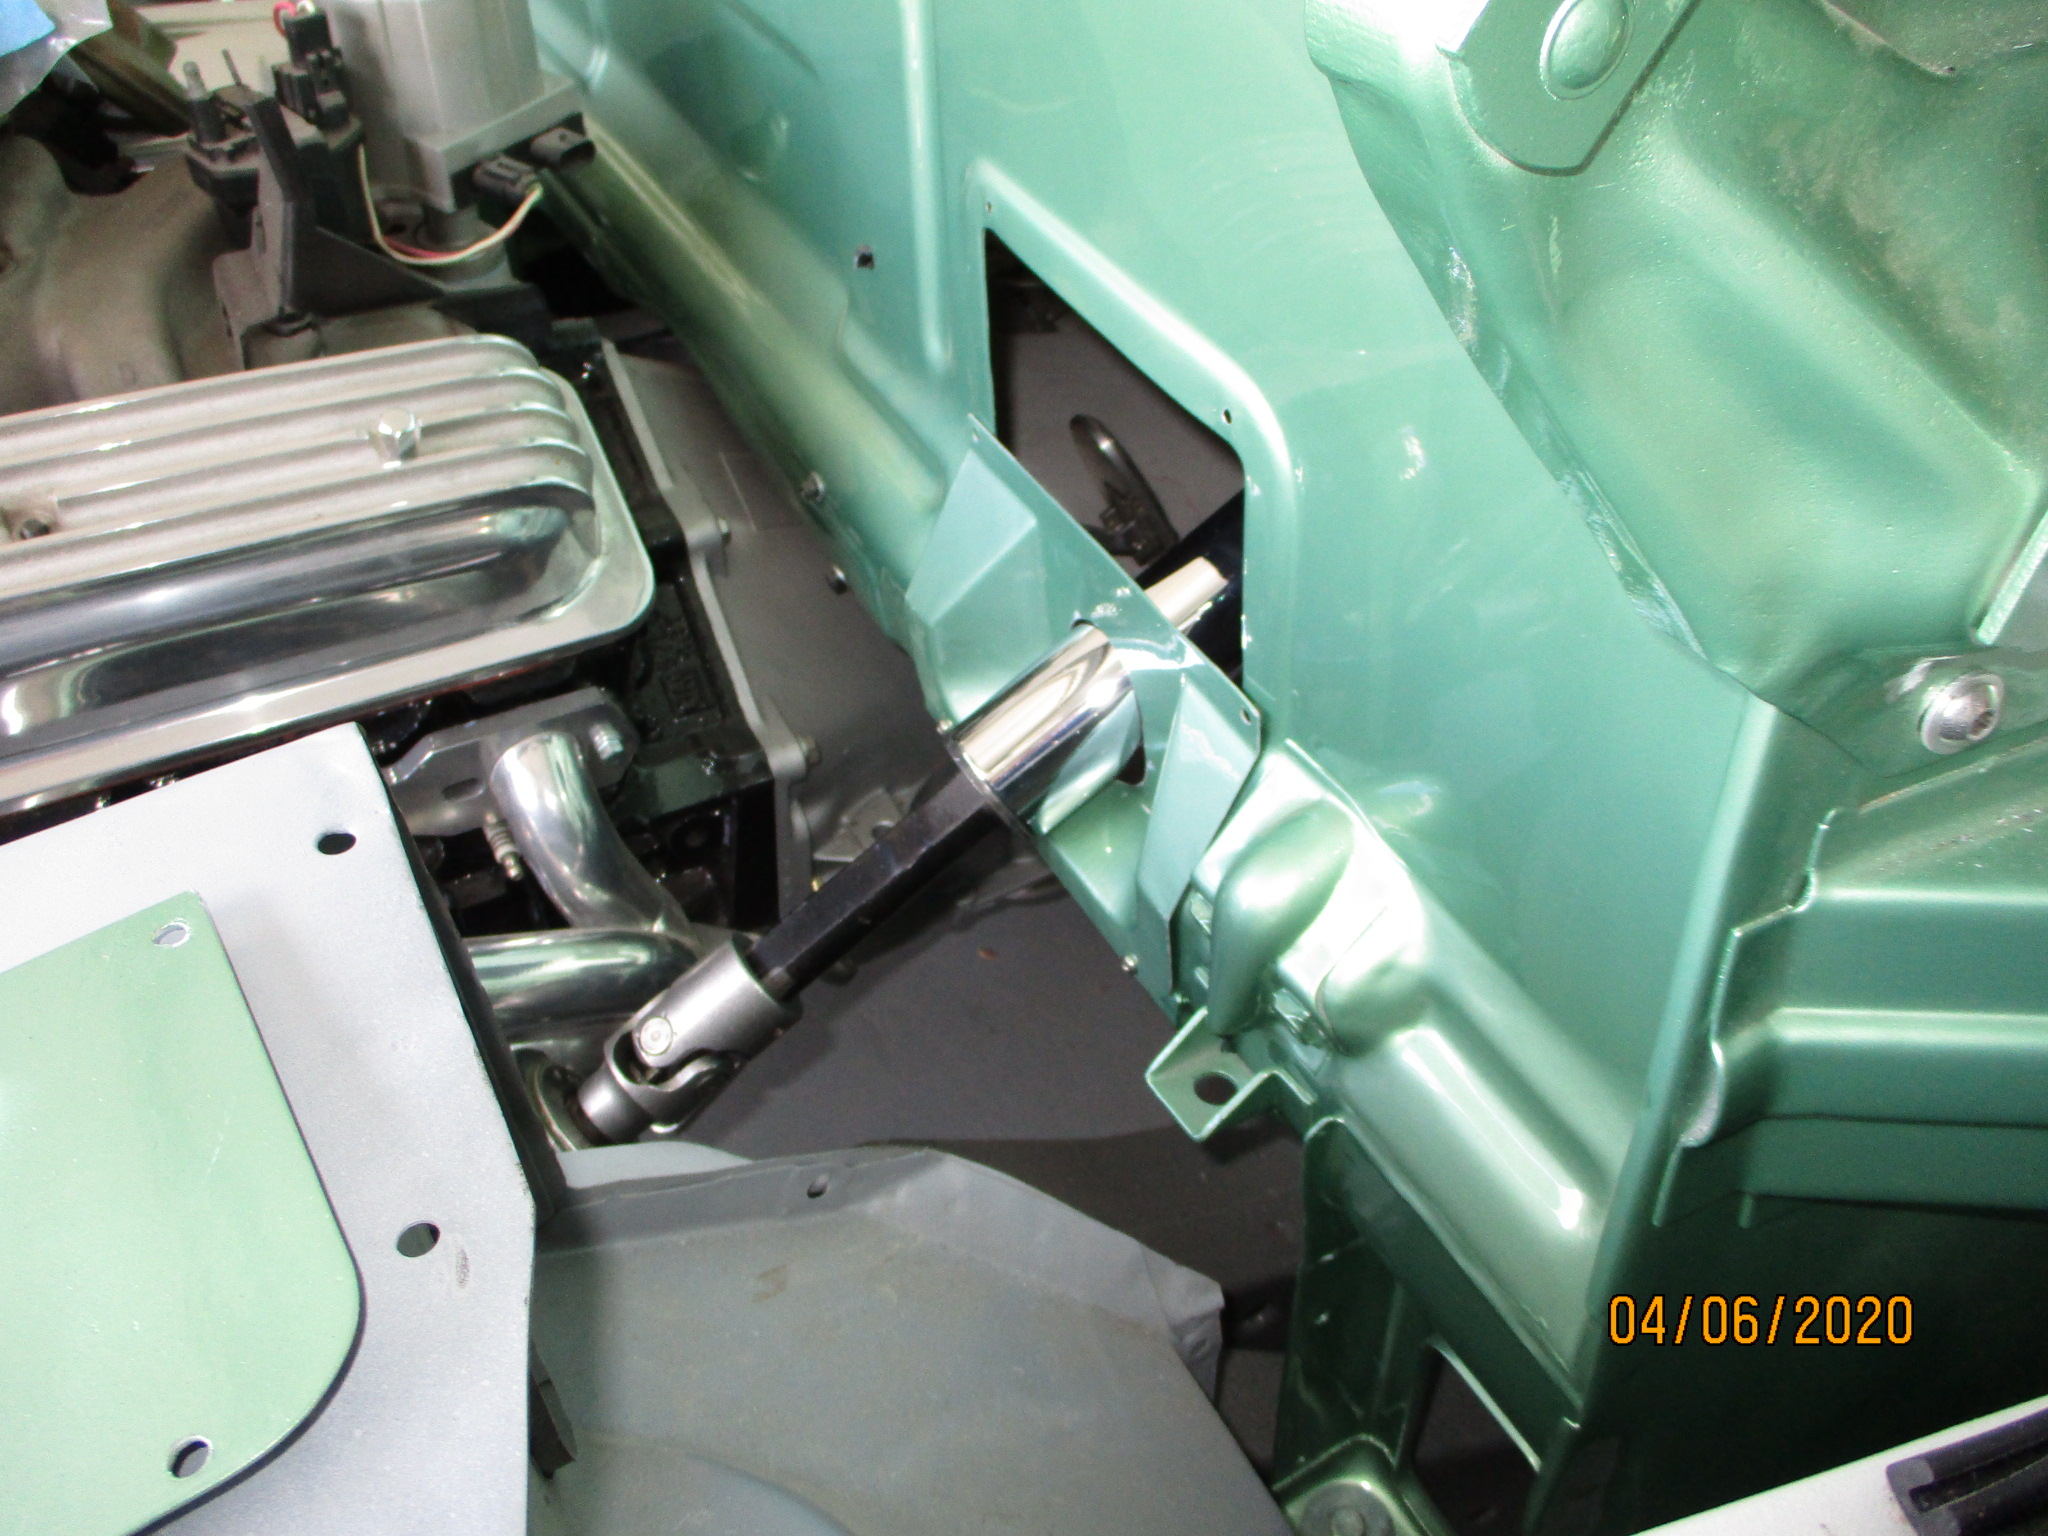
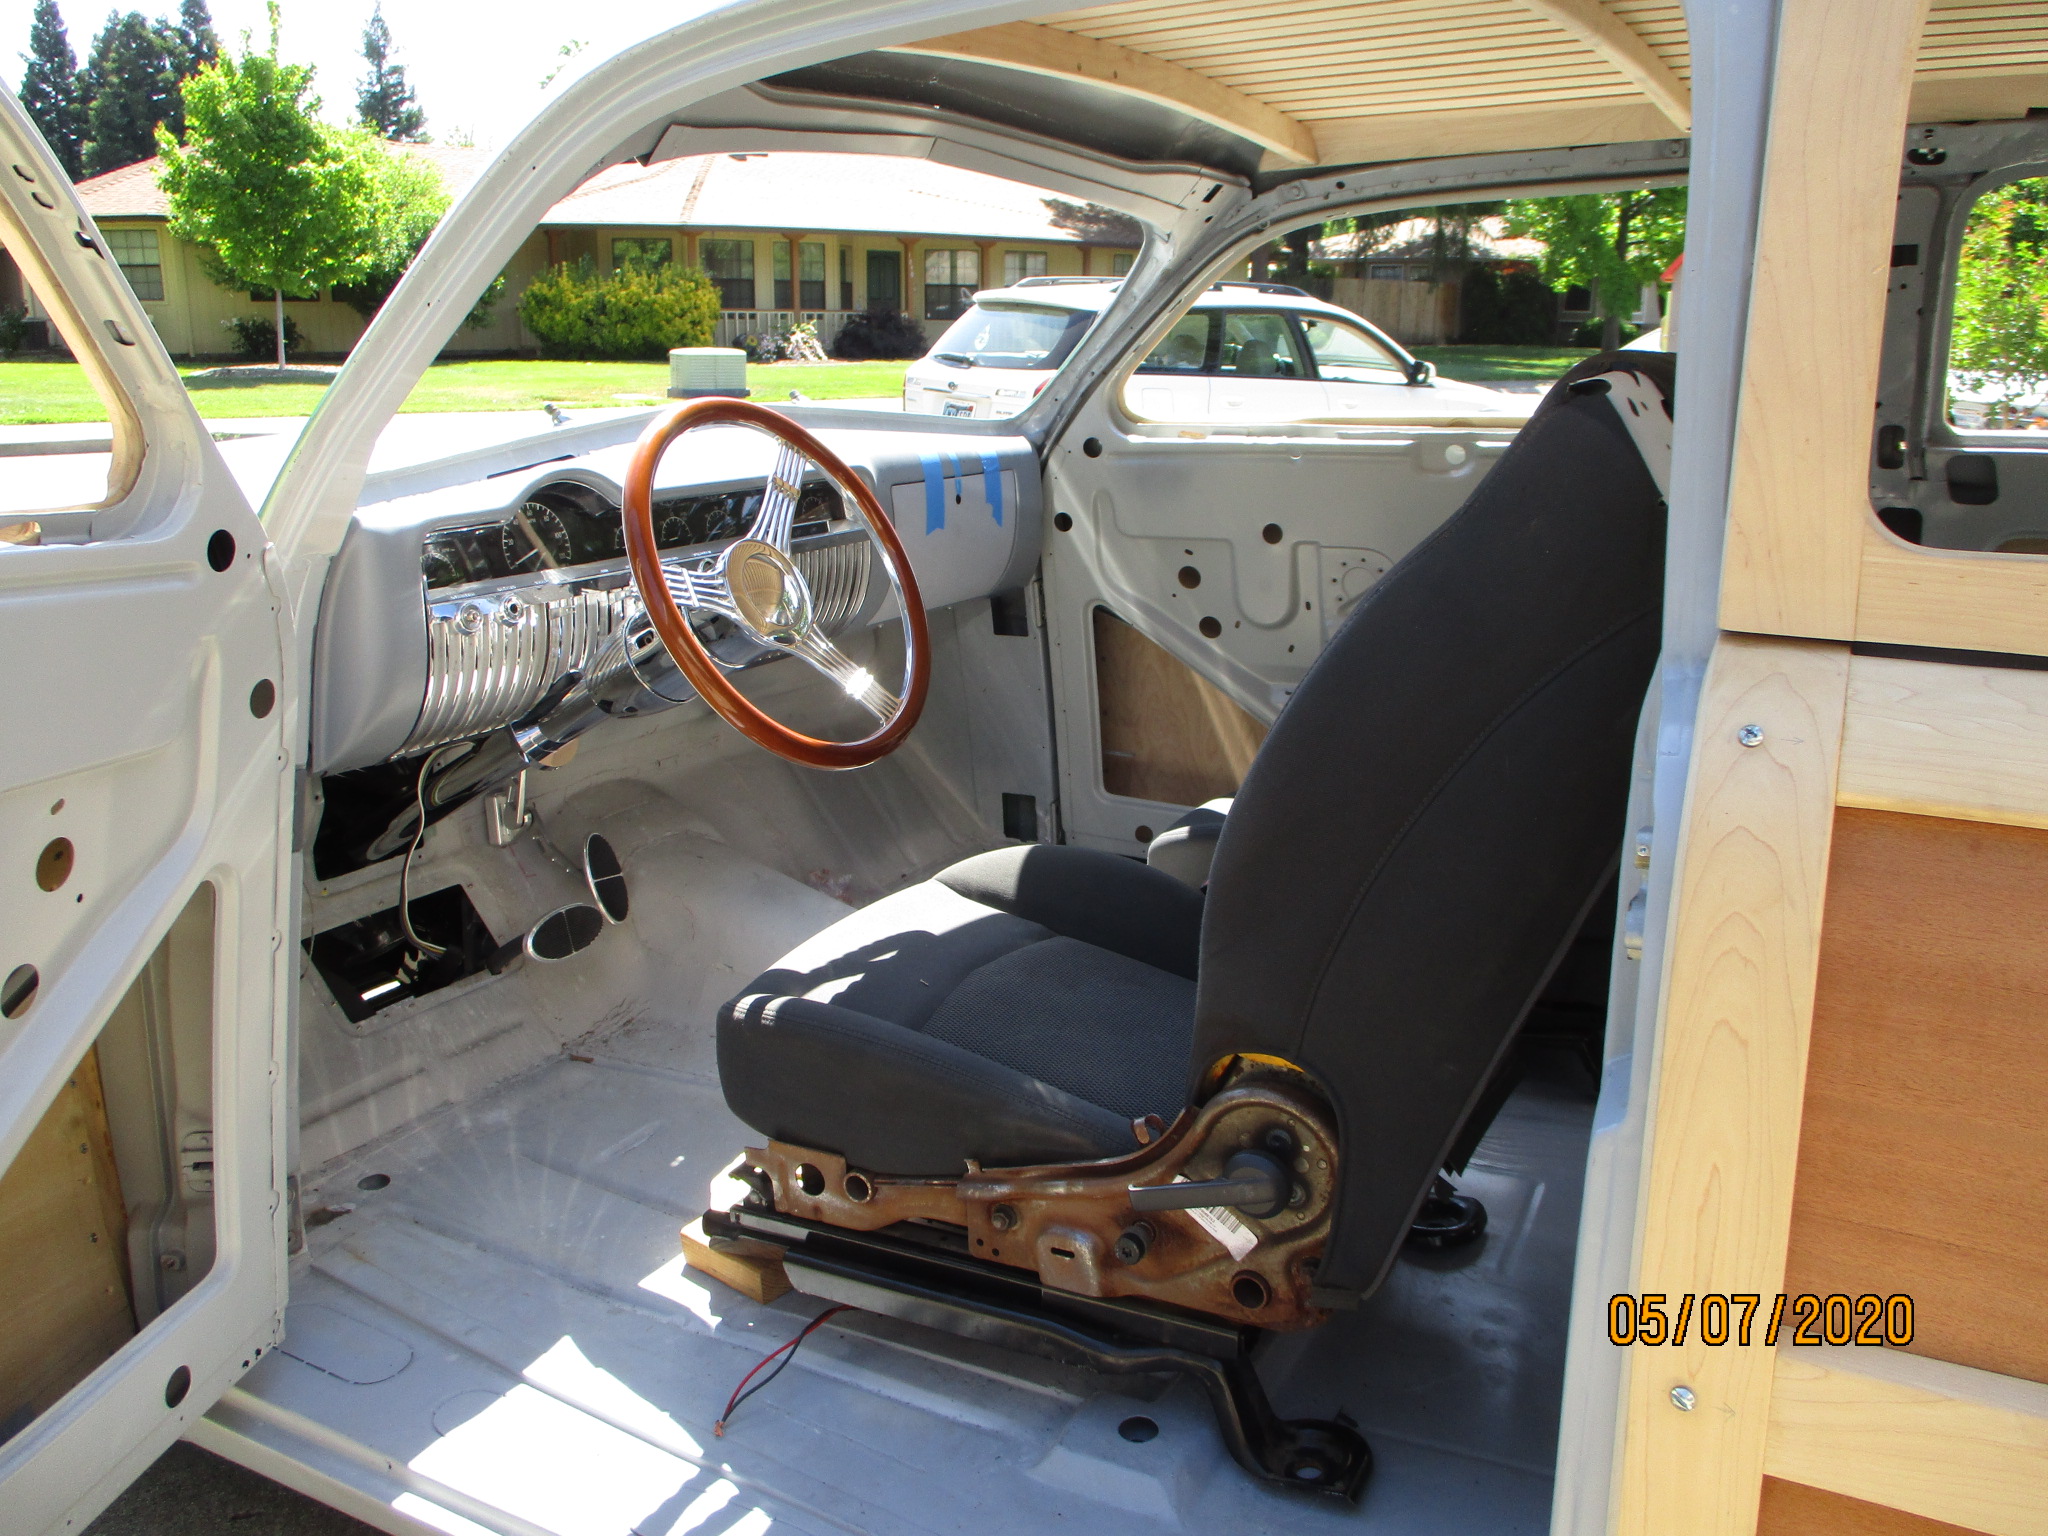
In order to roll the car around, I needed to put in a steering wheel and column. I wanted to stay "period authentic" so I went with a banjo style wheel.
Of course, the wheel that I spec'd wasn't available. My next option has a 2" smaller dish, which means I had to add 2" to the column length. Fortunately there's inner and outer sleeve material available to do this.
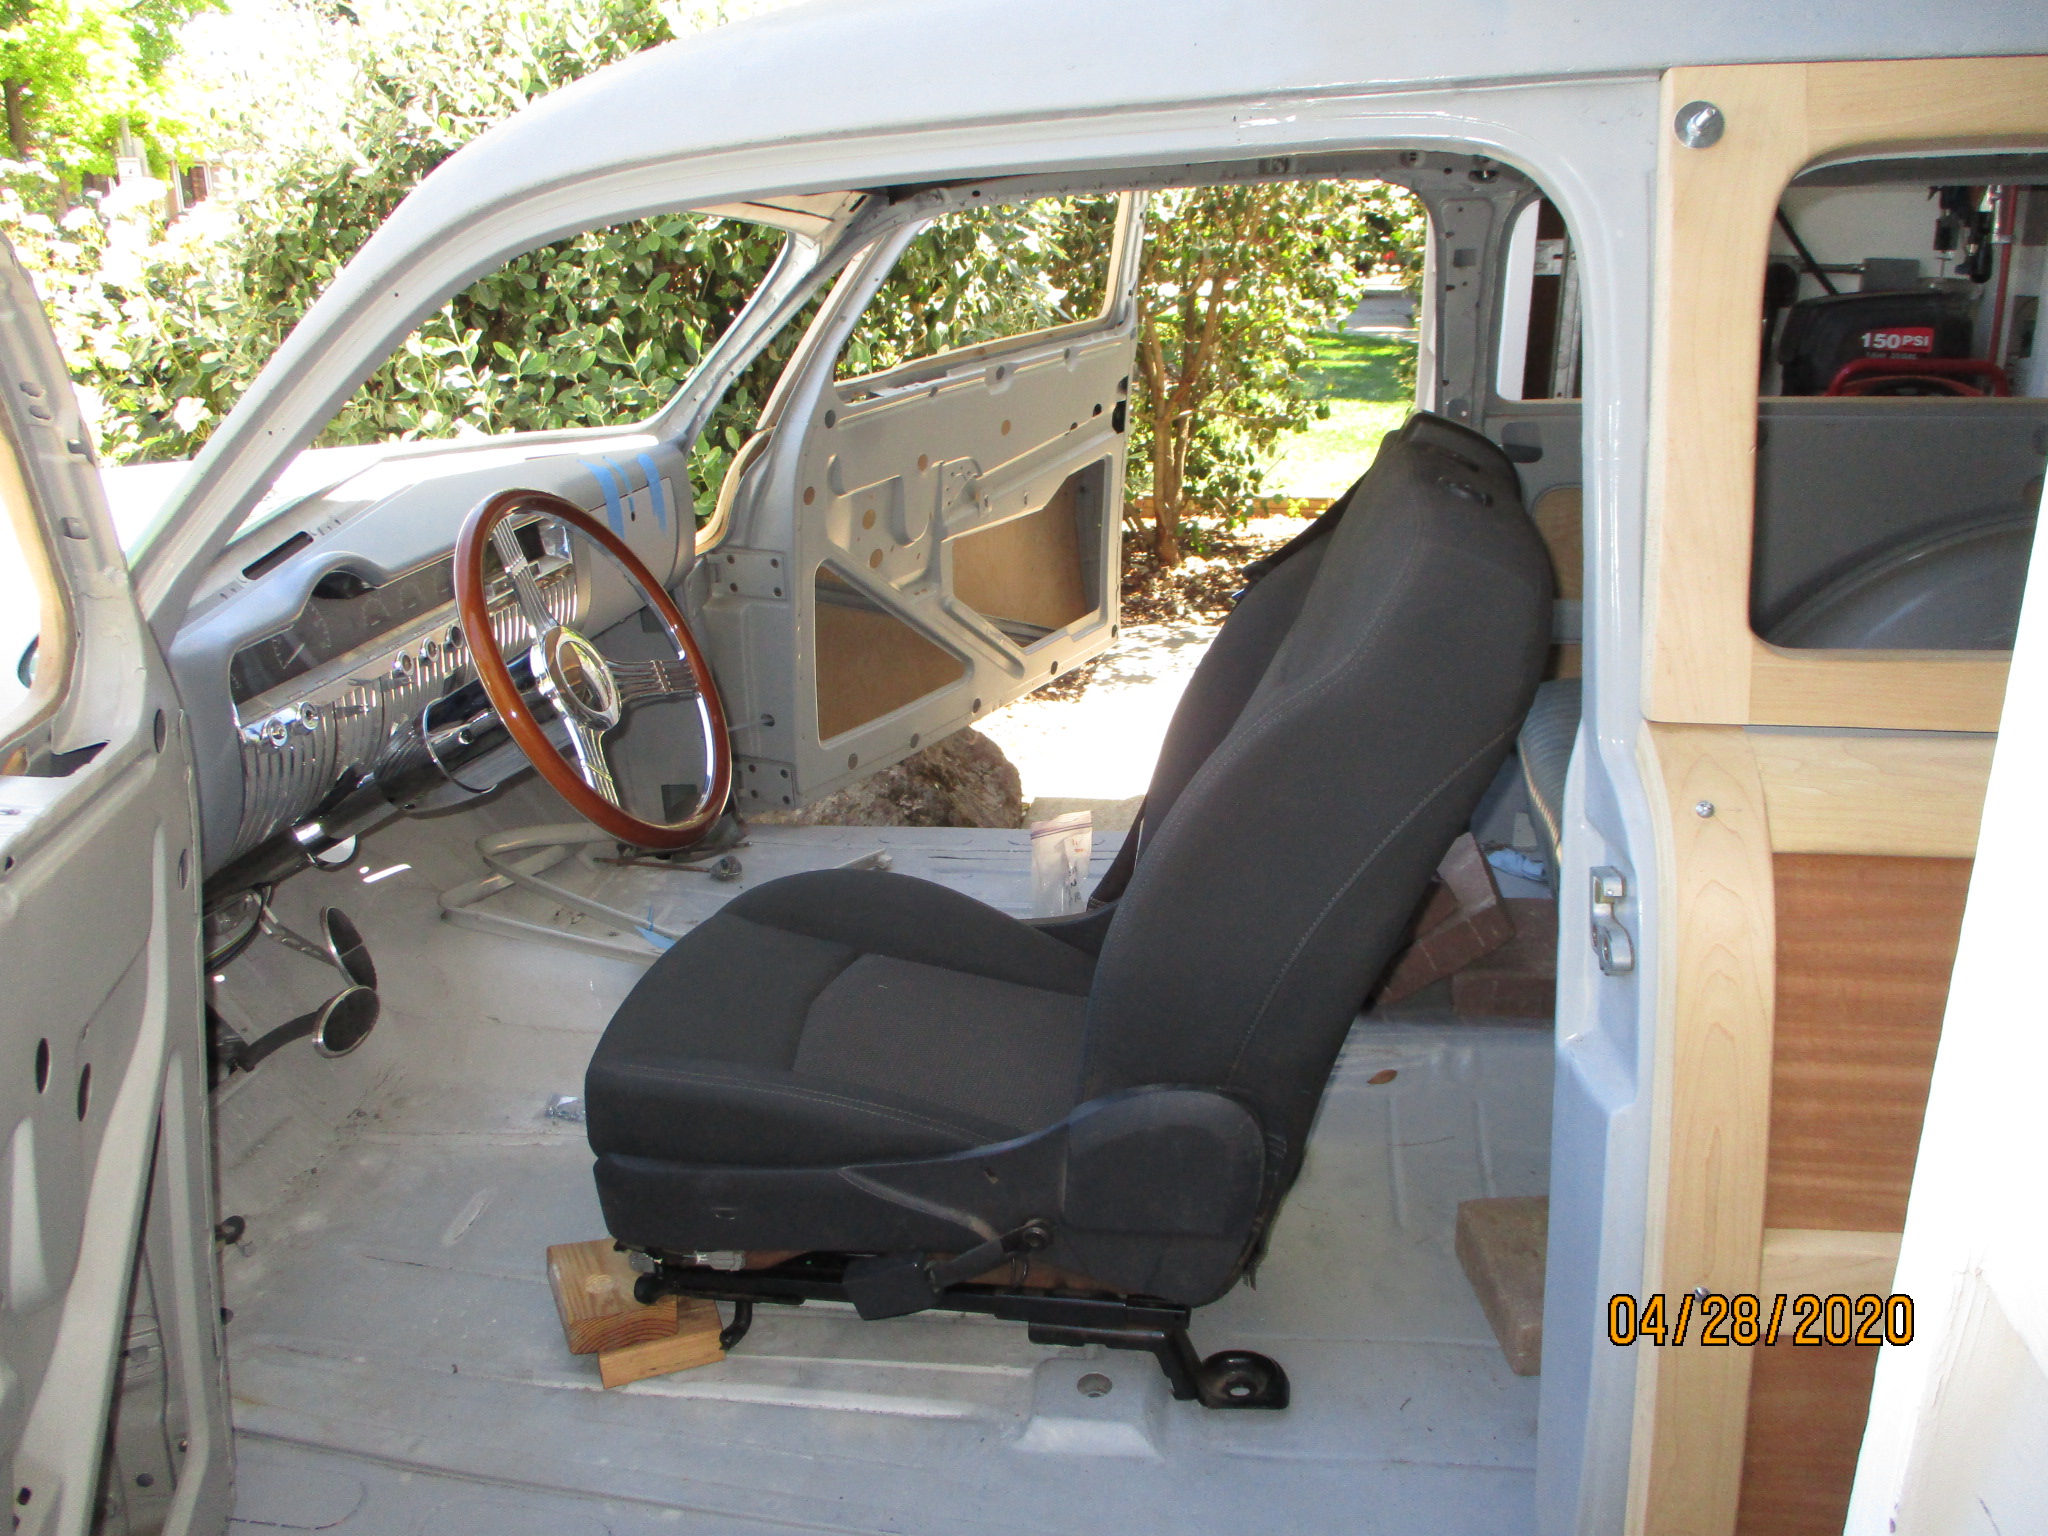
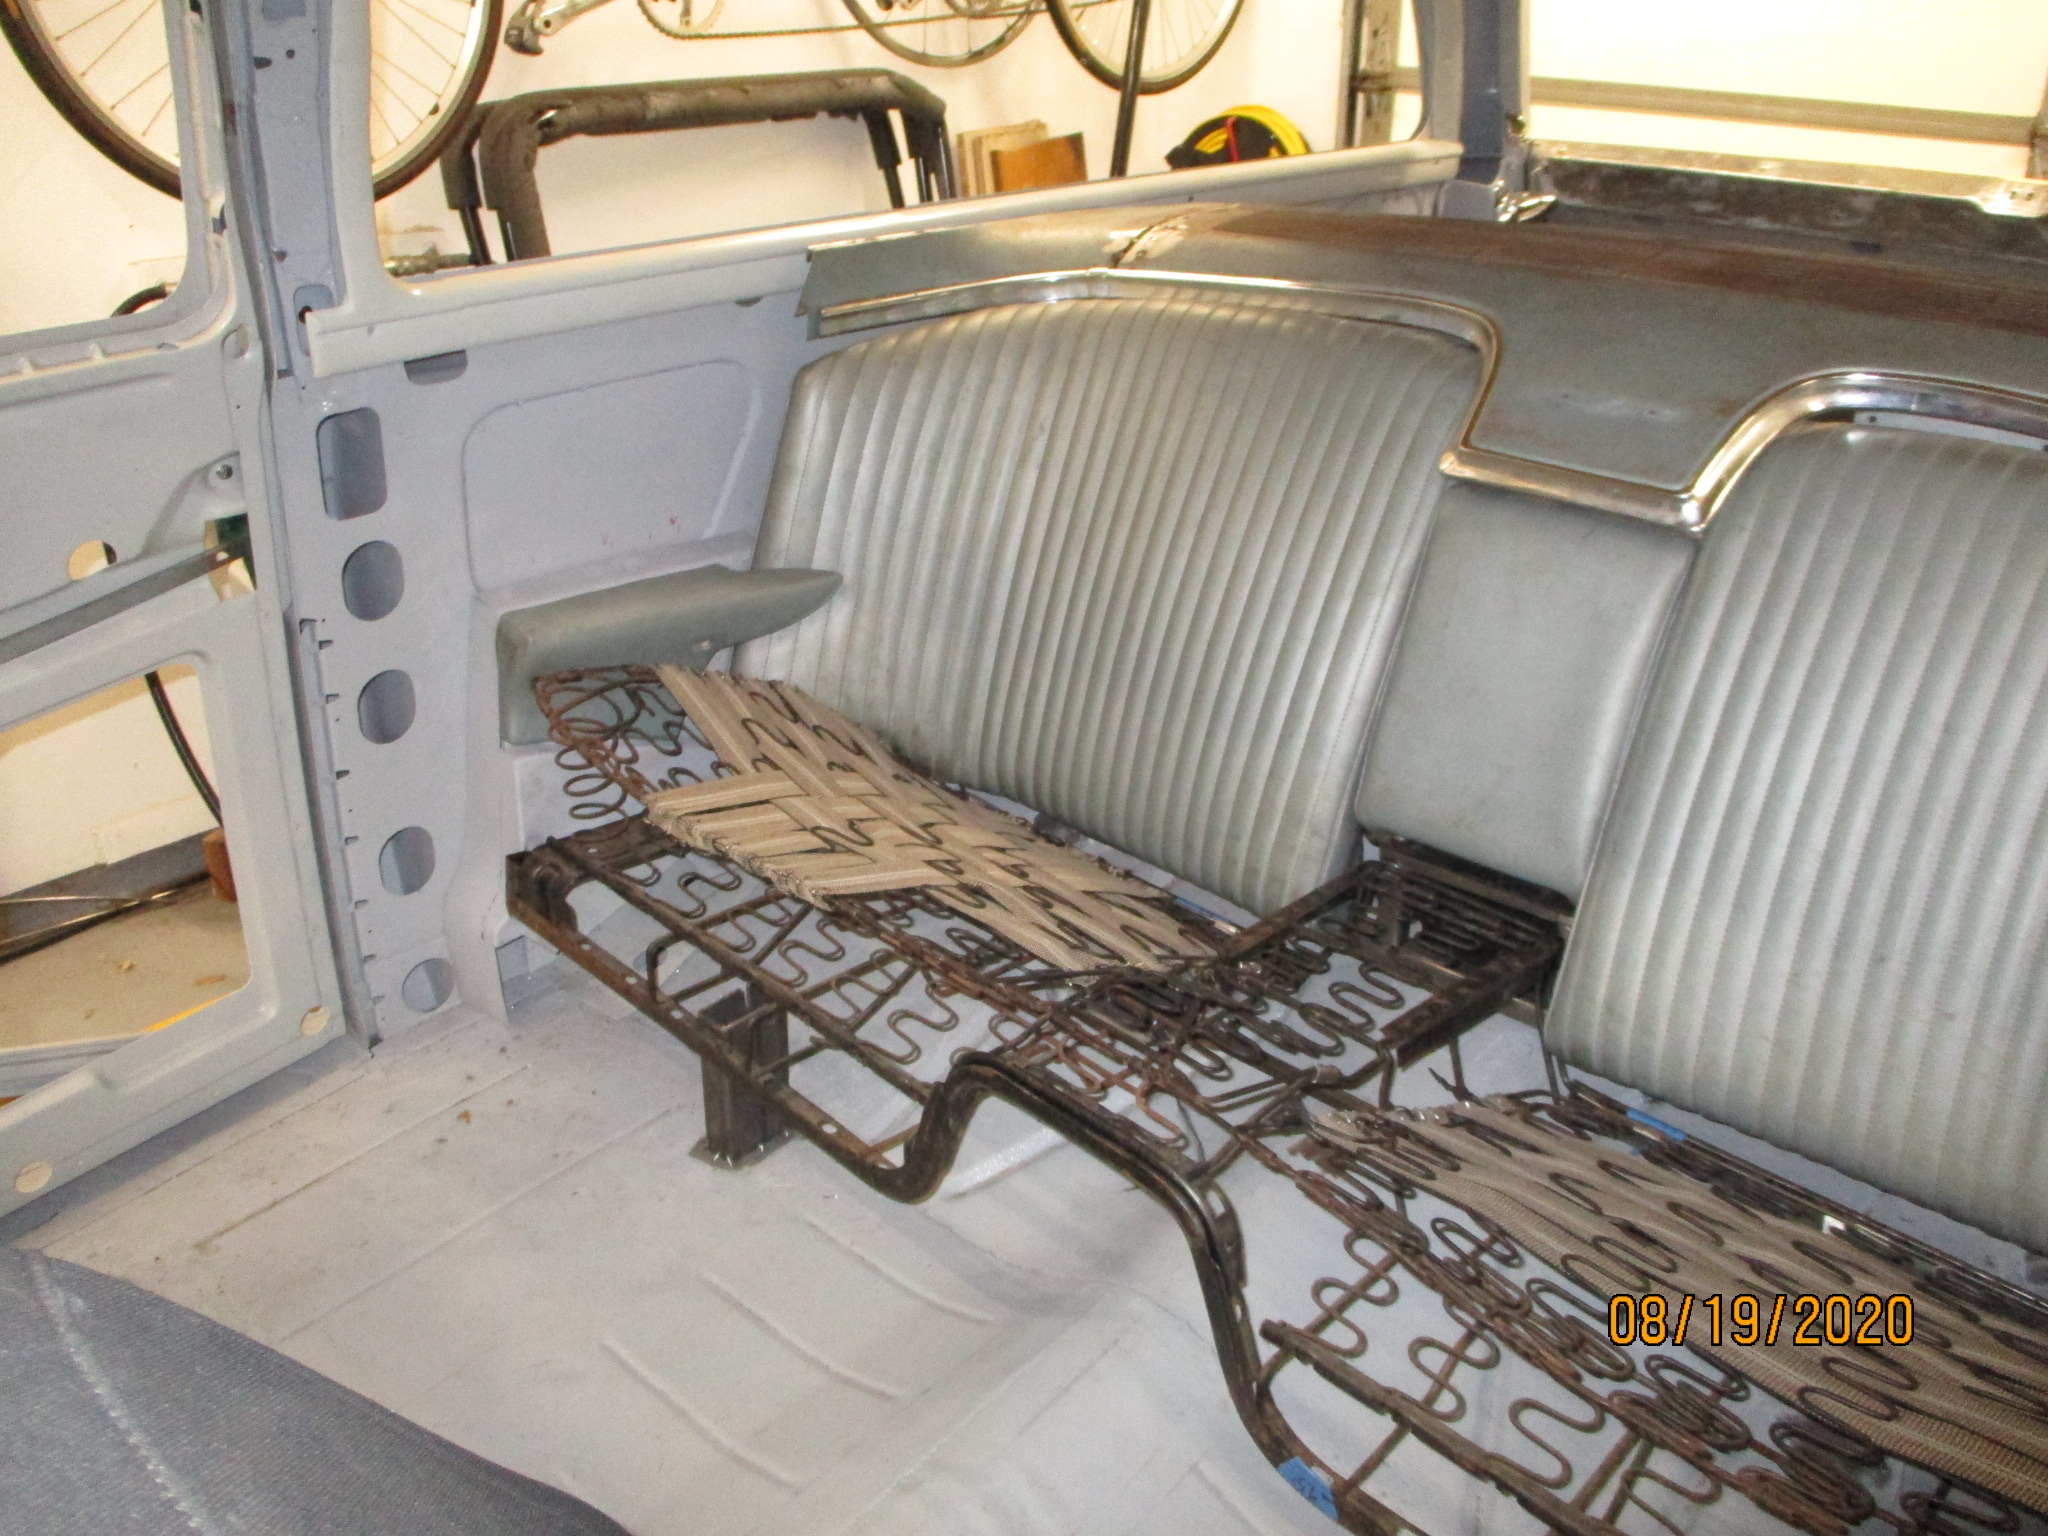
These cars weren't designed for the use of seat belts. I could've welded in mounting points for 3-point belts, but they'd get in the way of people getting in the back seats.
I'm gonna use seats from a Chrysler Sebring convertible. They have 3-point harnesses built-in. As a result, they'll need to be mounted in a VERY sturdy manner so I don't fly out in an accident.
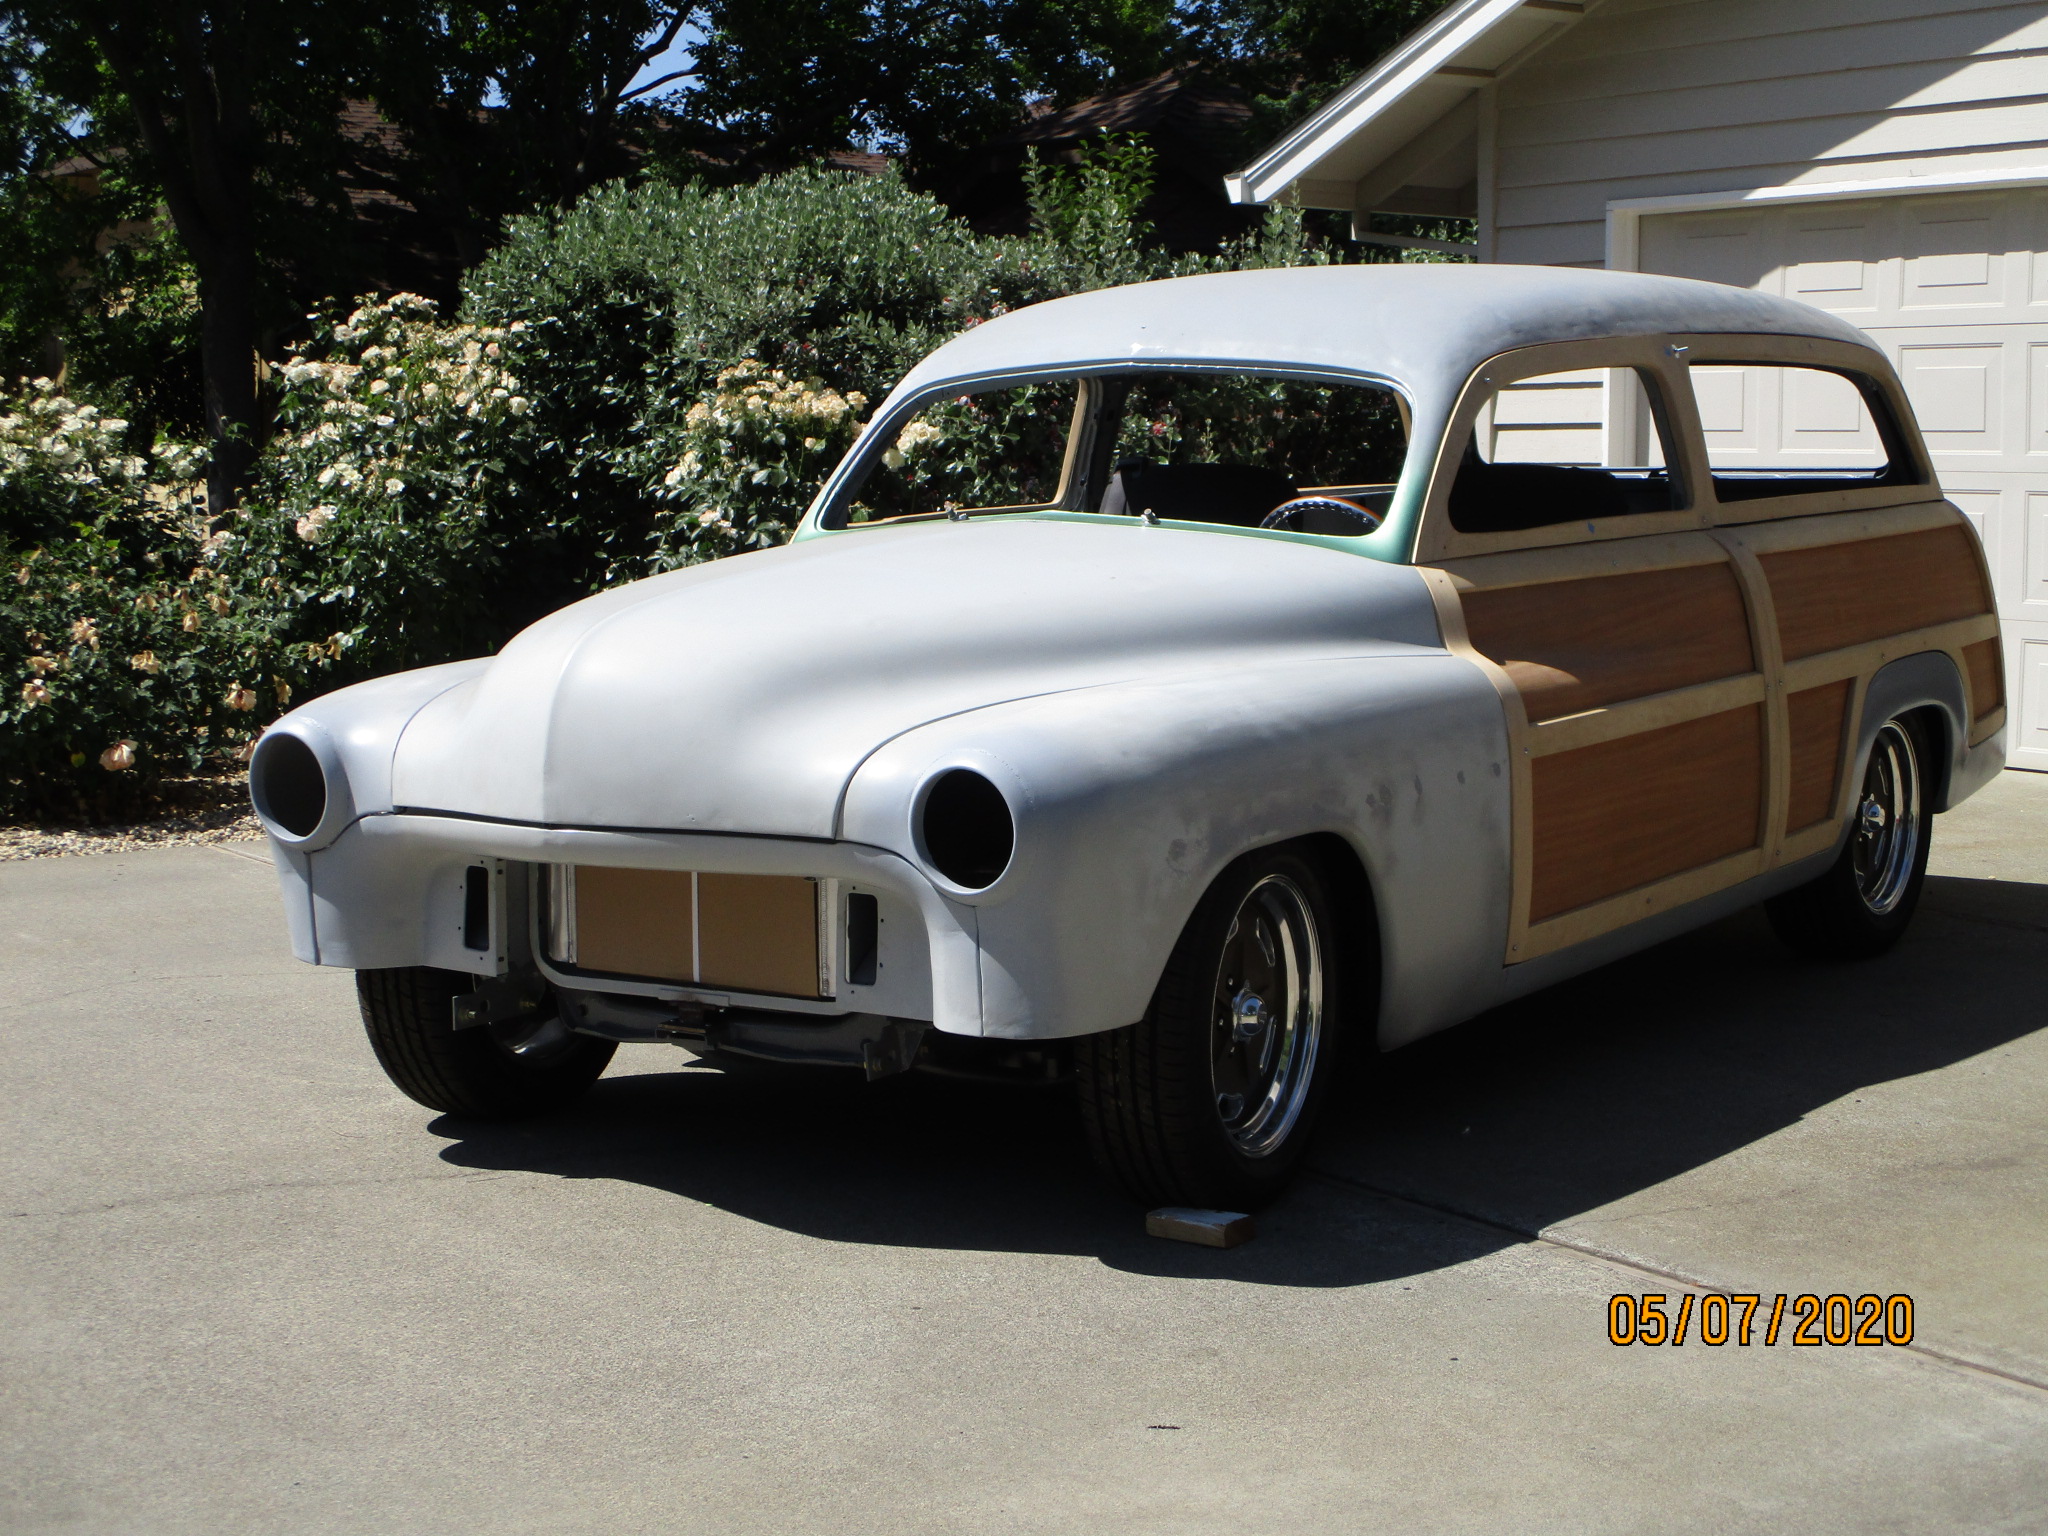
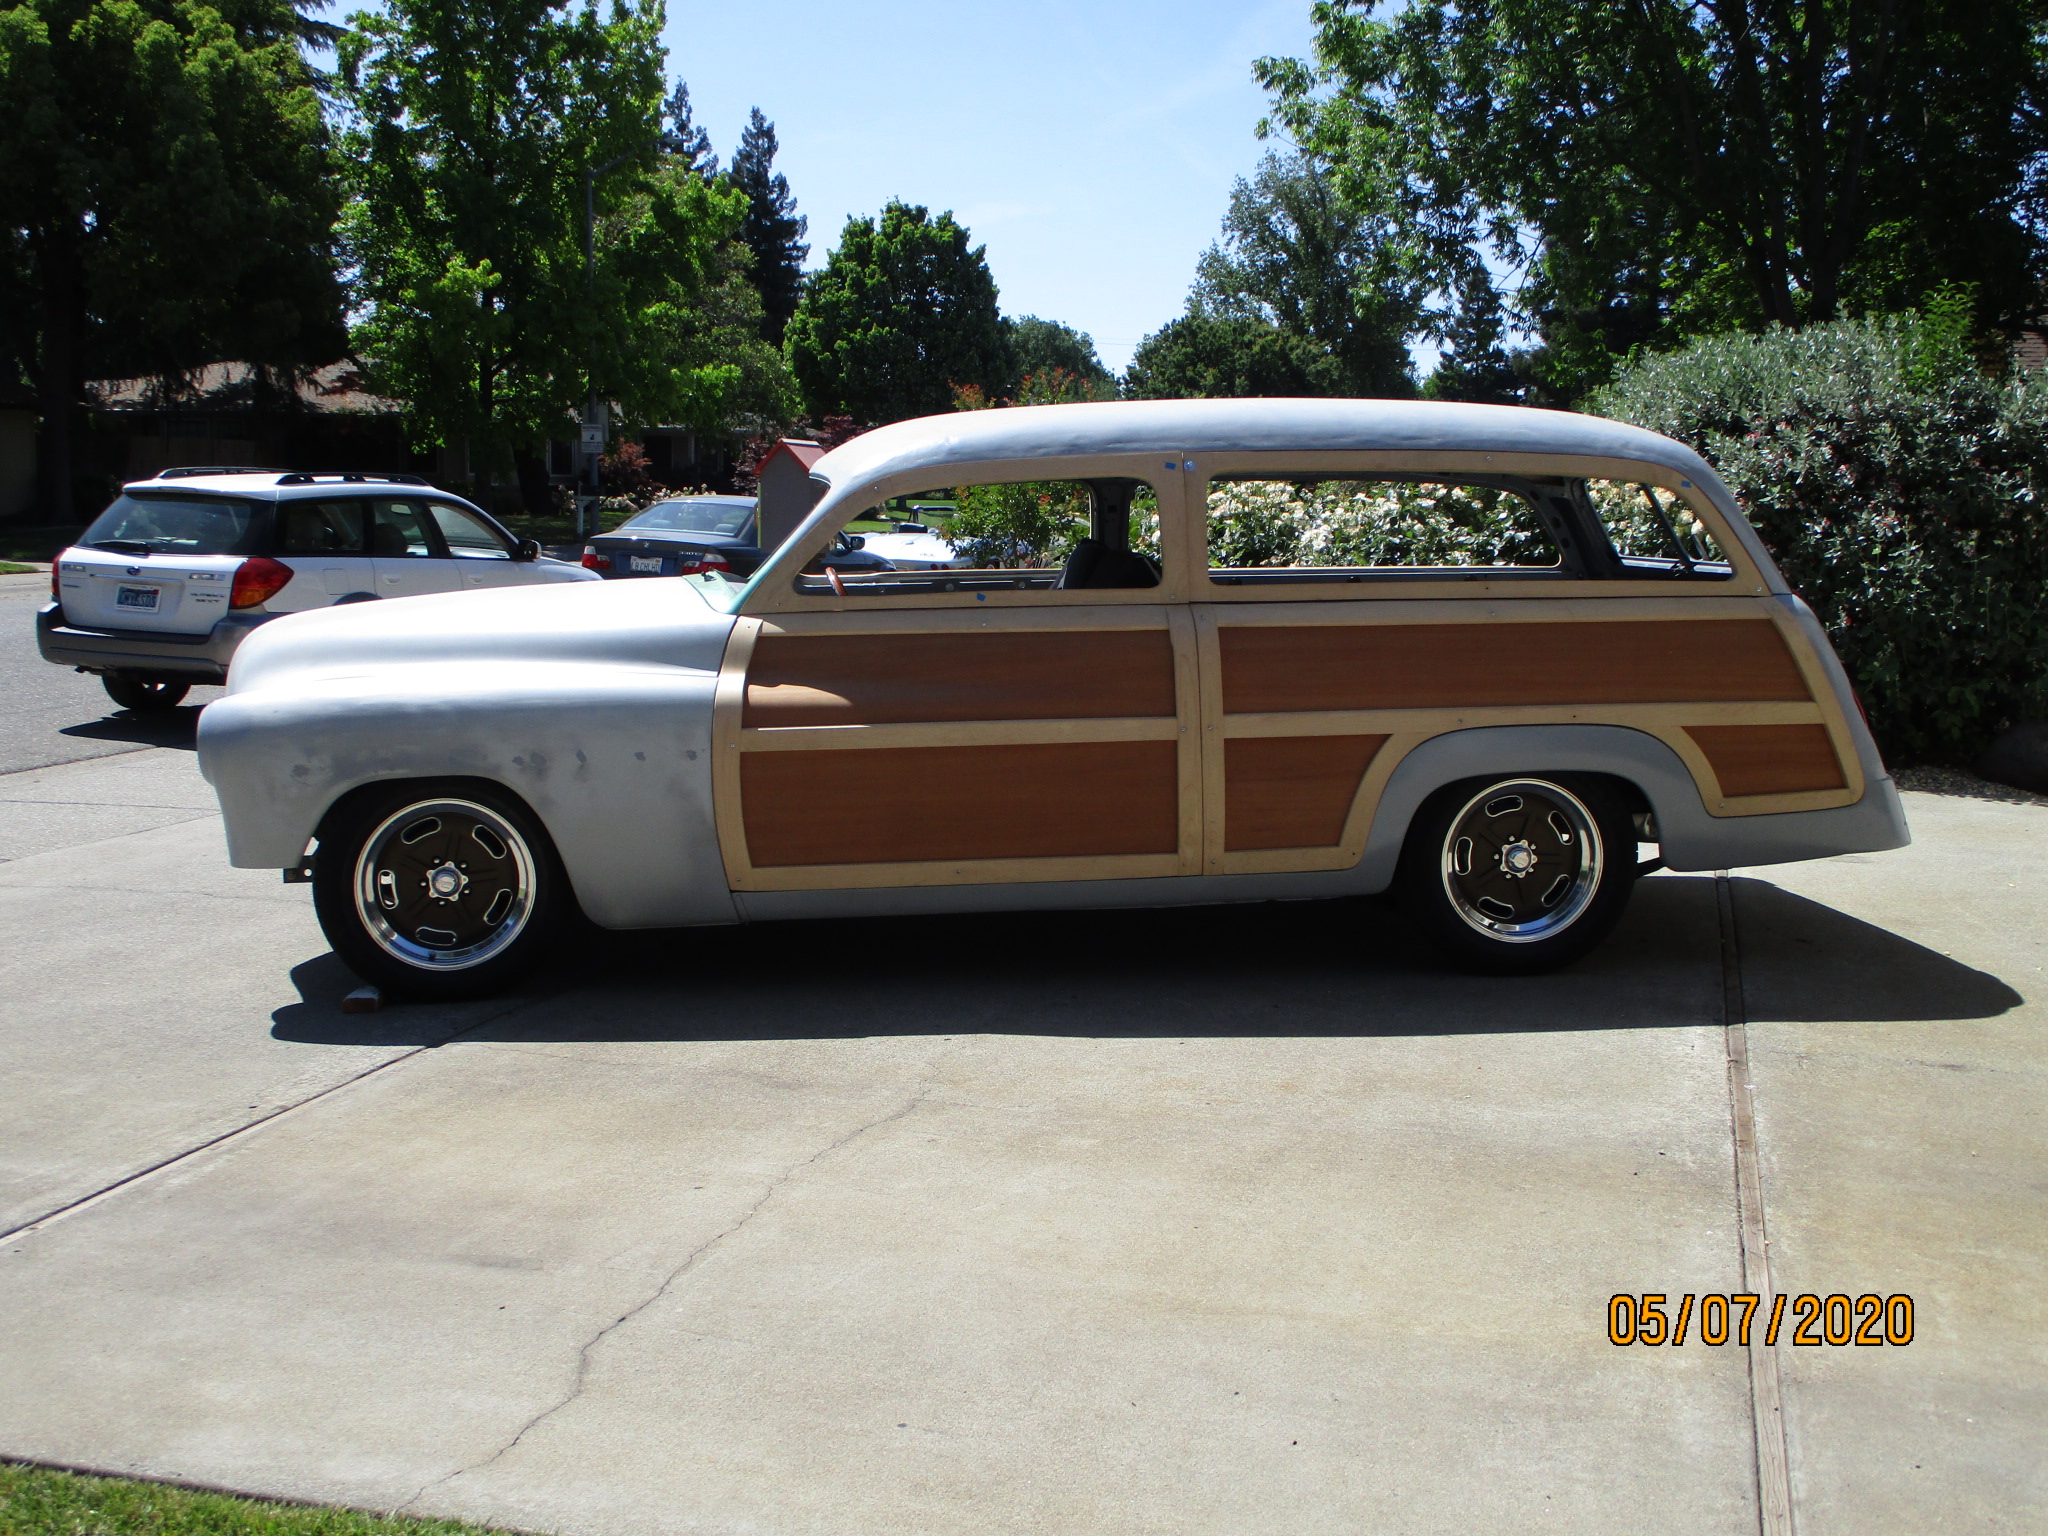
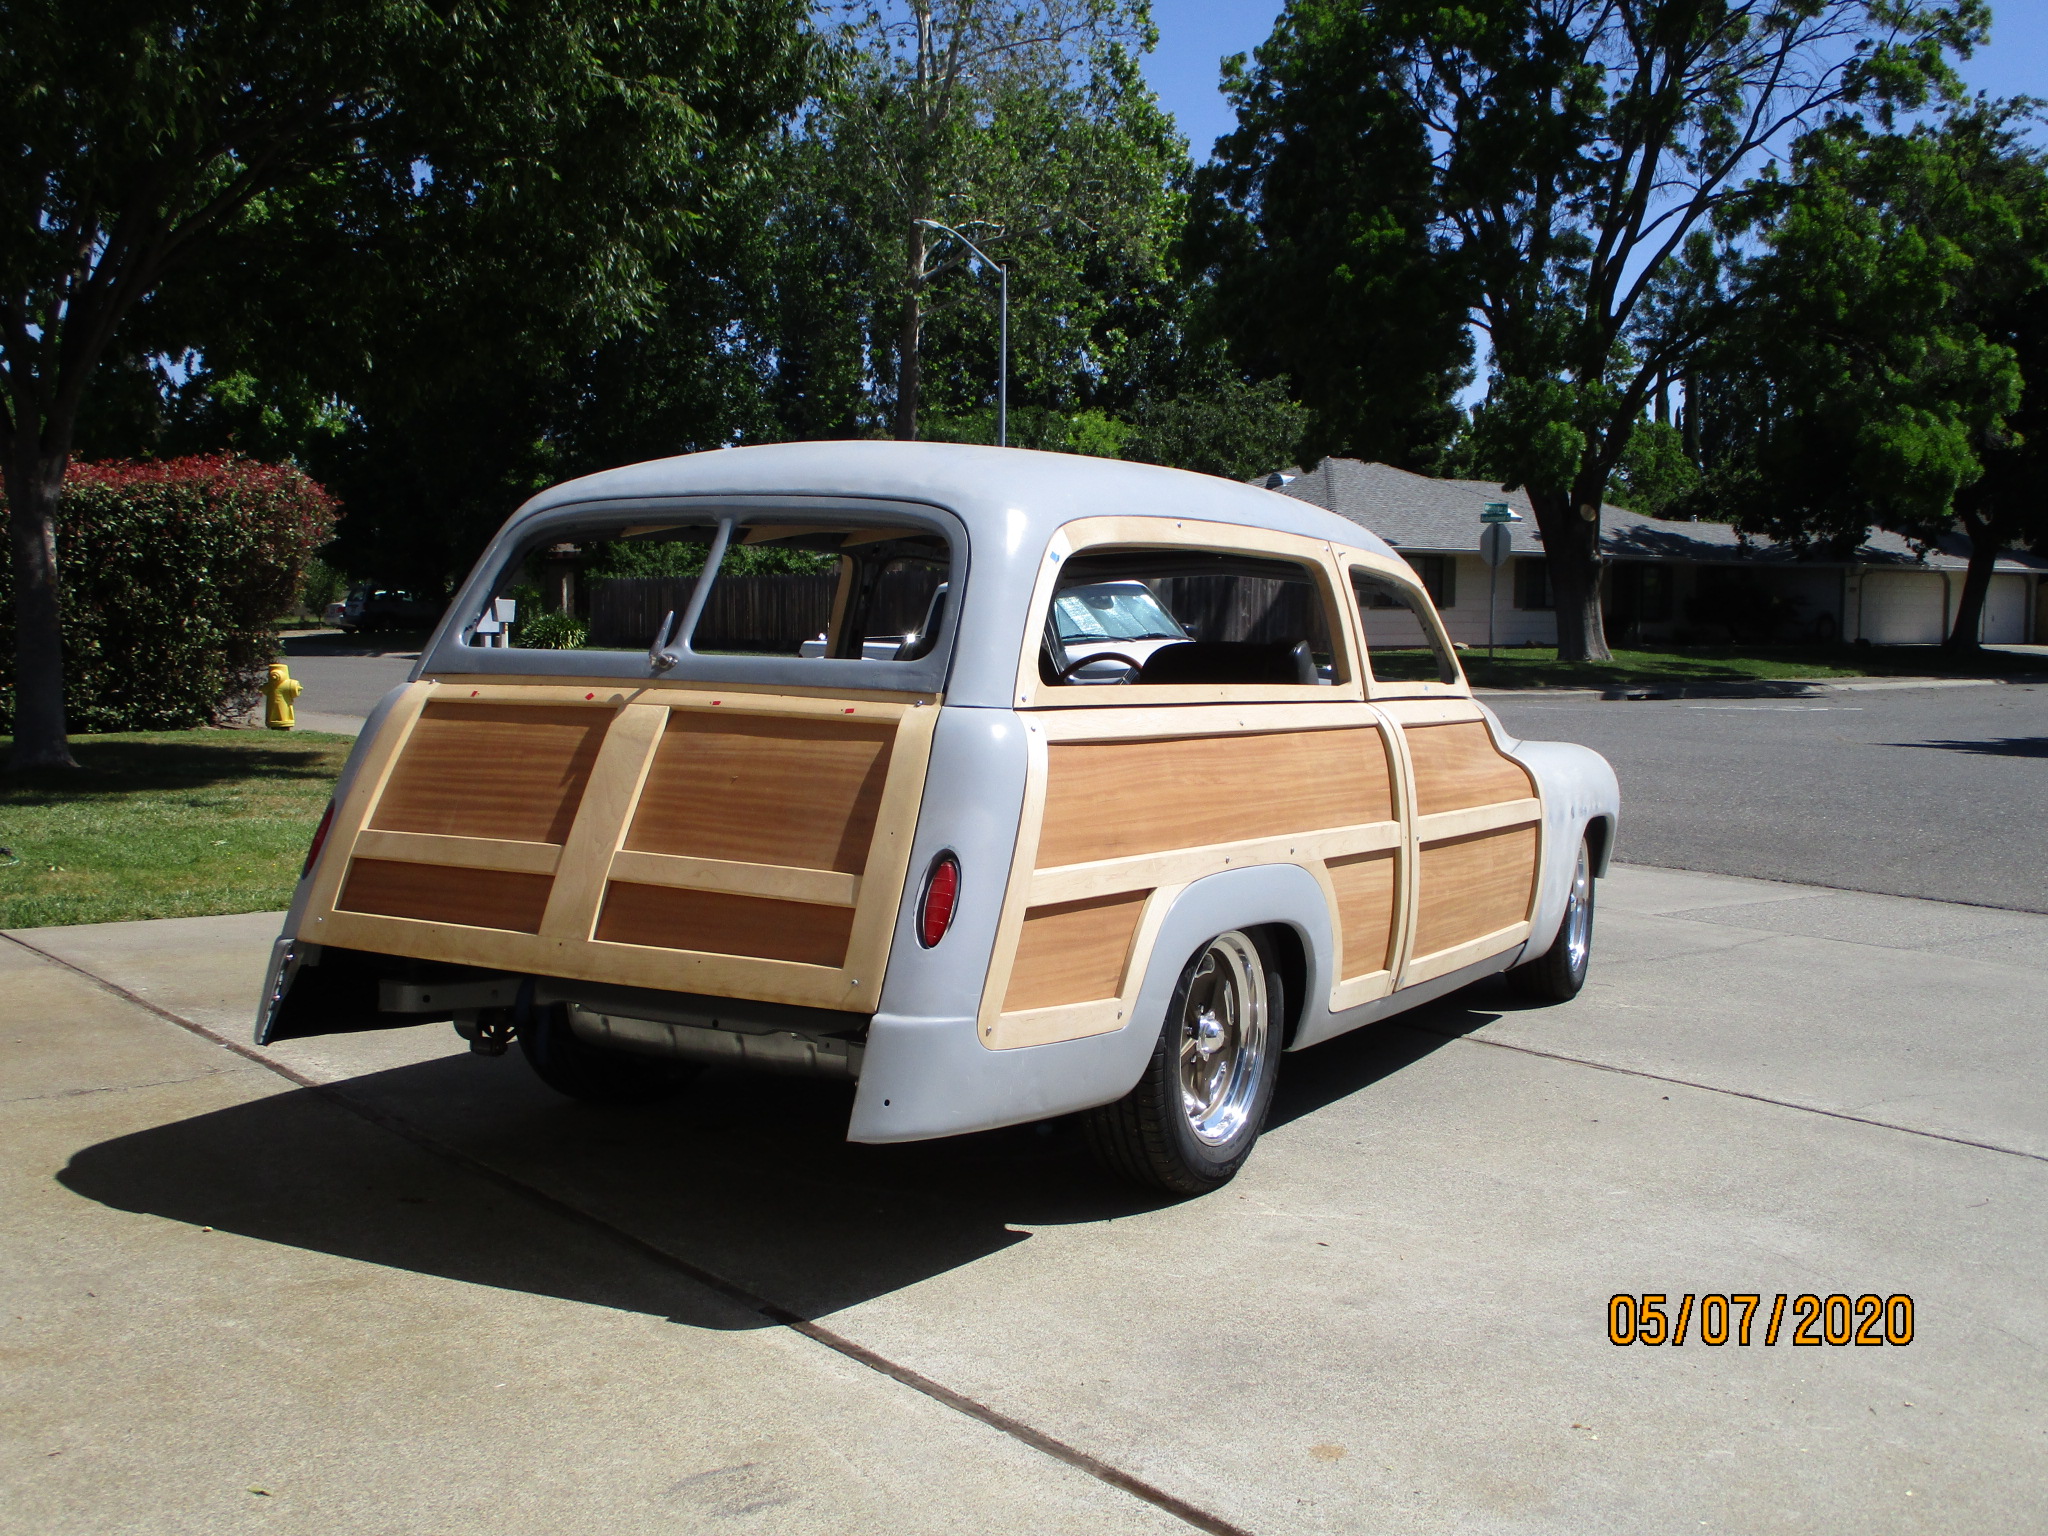
I had the wagon out in the sun, so I took a couple of minutes to show how it'll sit. I'm probably gonna have to raise the front an inch or so for tire clearance.
This would be a good time to show what the stock wagon roof line looked like on '49-'51 Mercury and Ford wagons. The windows and roof were just too tall for my taste, and give the car a top-heavy look.
If the wagon's suspension is lowered it doesn't look as bad like on the example below. But it's still not the right proportions. Keep in mind in this era the gentlemen wore their fedoras on their way to work, and needed a lot of headroom.
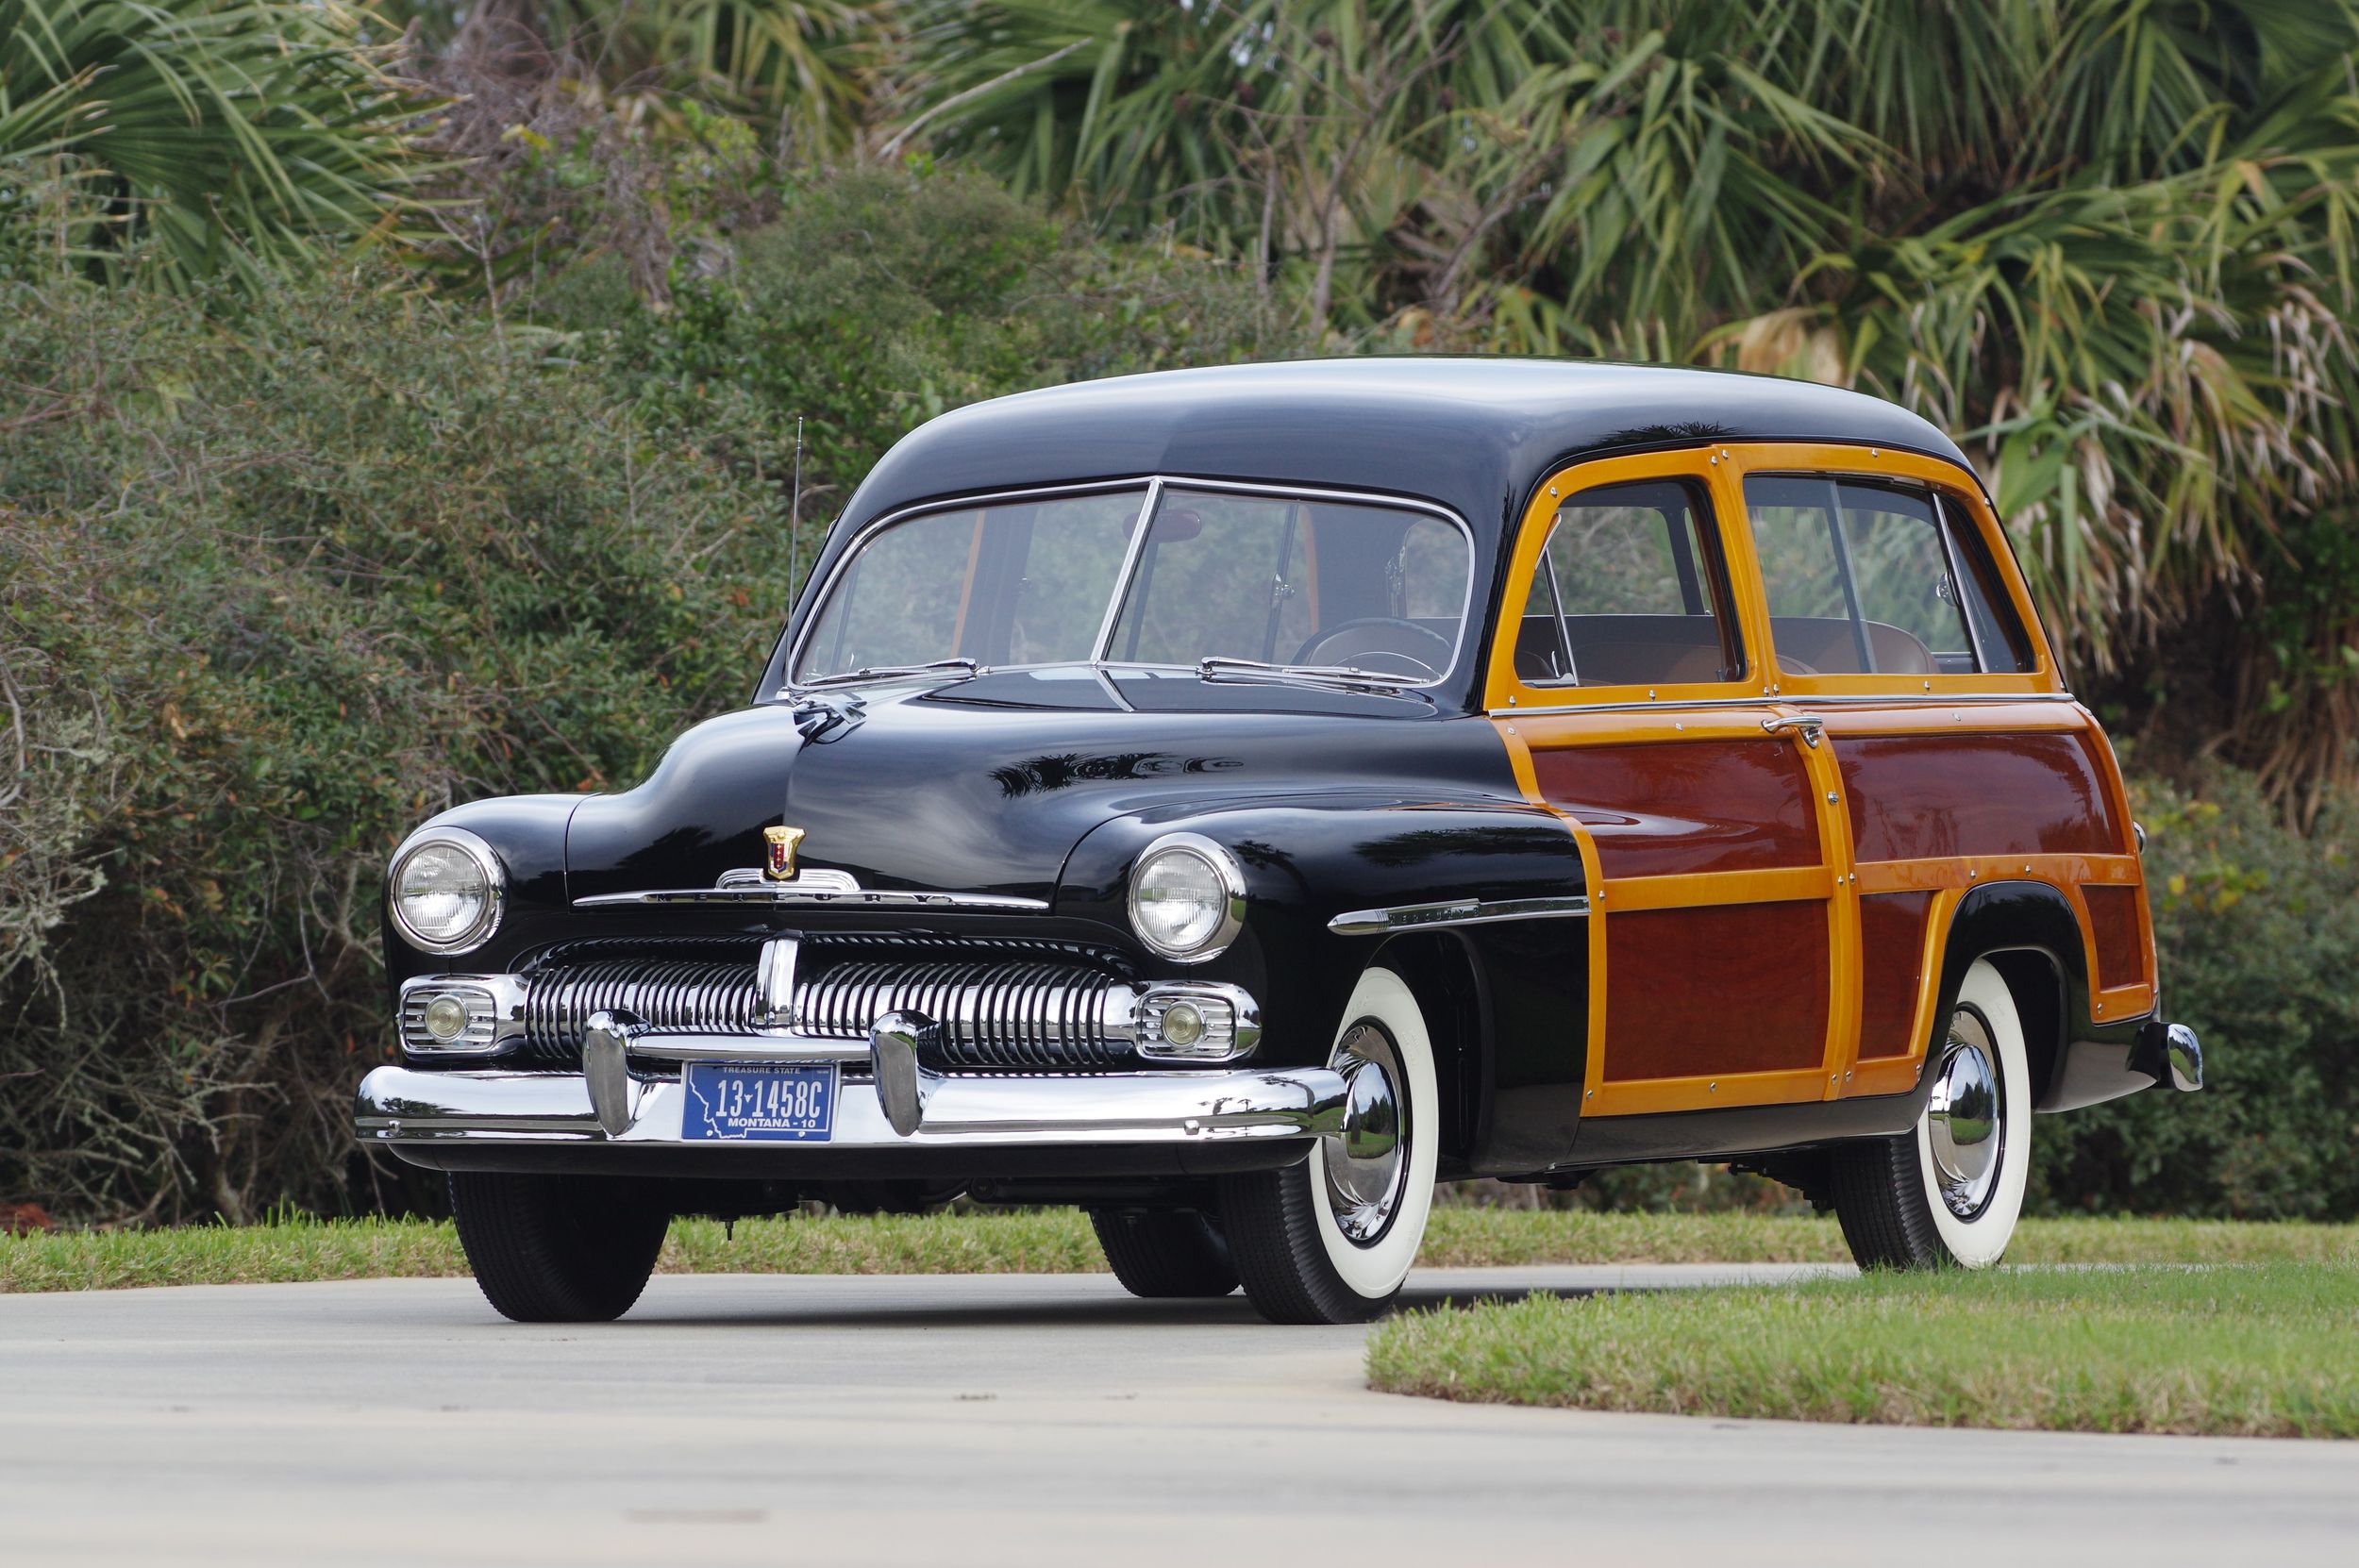
I want a car that looks "hunkered down" and more muscular than stock, without the excessive top chop of the "lead sled" era.
My goal is changes that are subtle enough that the average person won't really recognize it's not stock.
But the amount of money and time I'm spending to accomplish that look is a little hard to justify. "The heart wants what the heart wants"
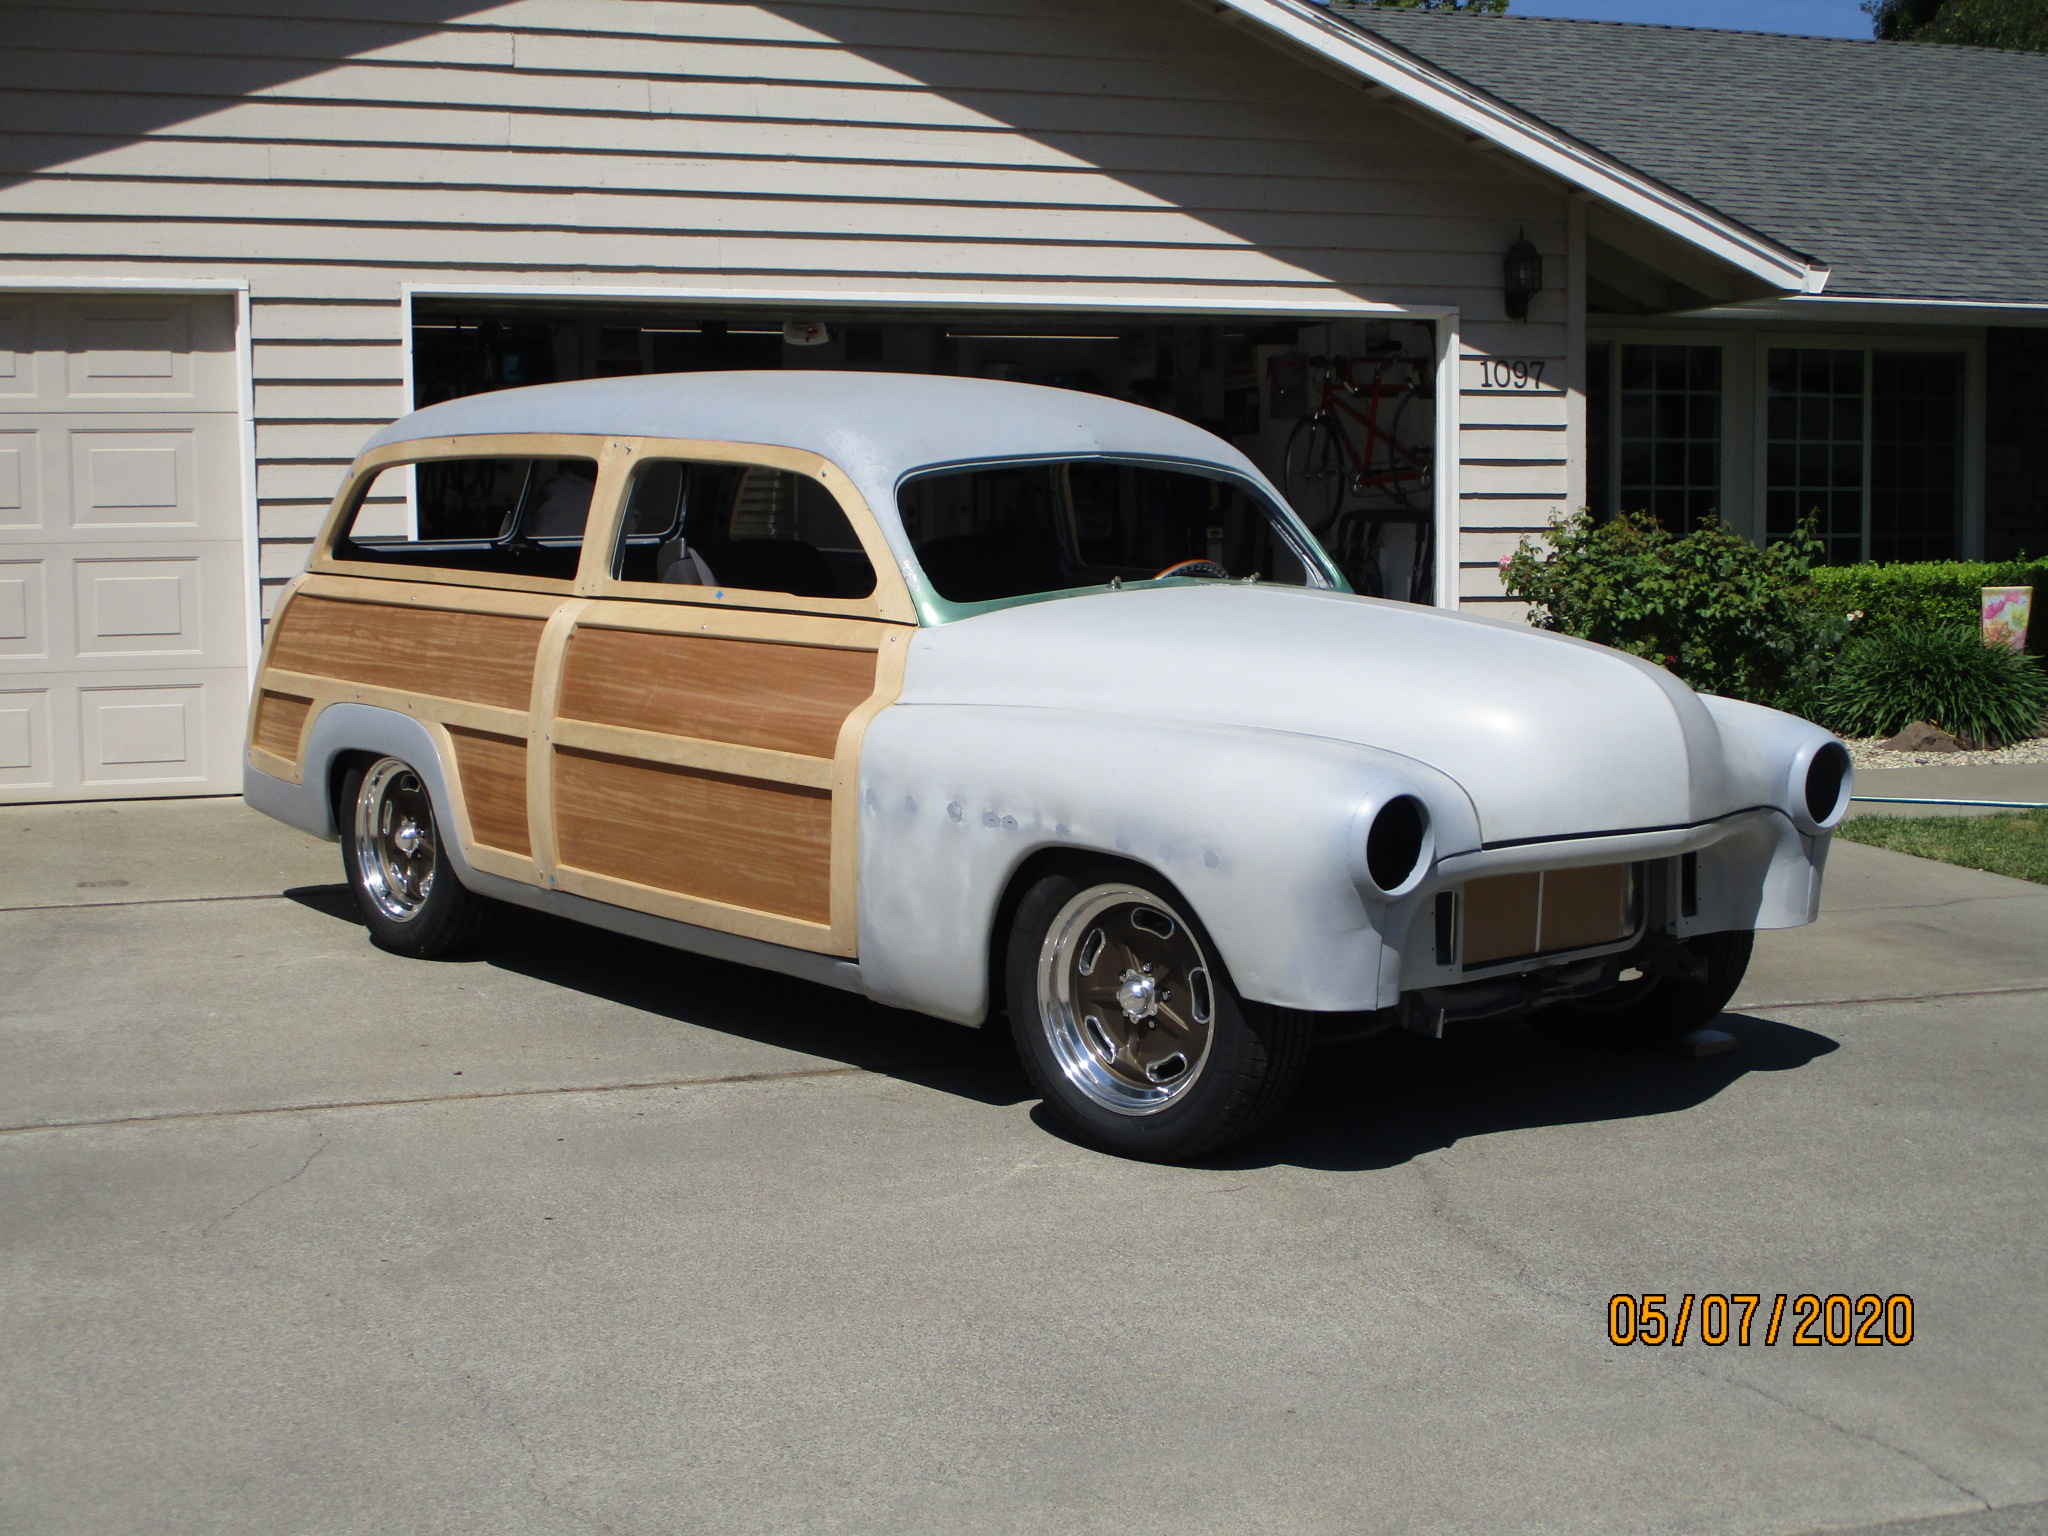
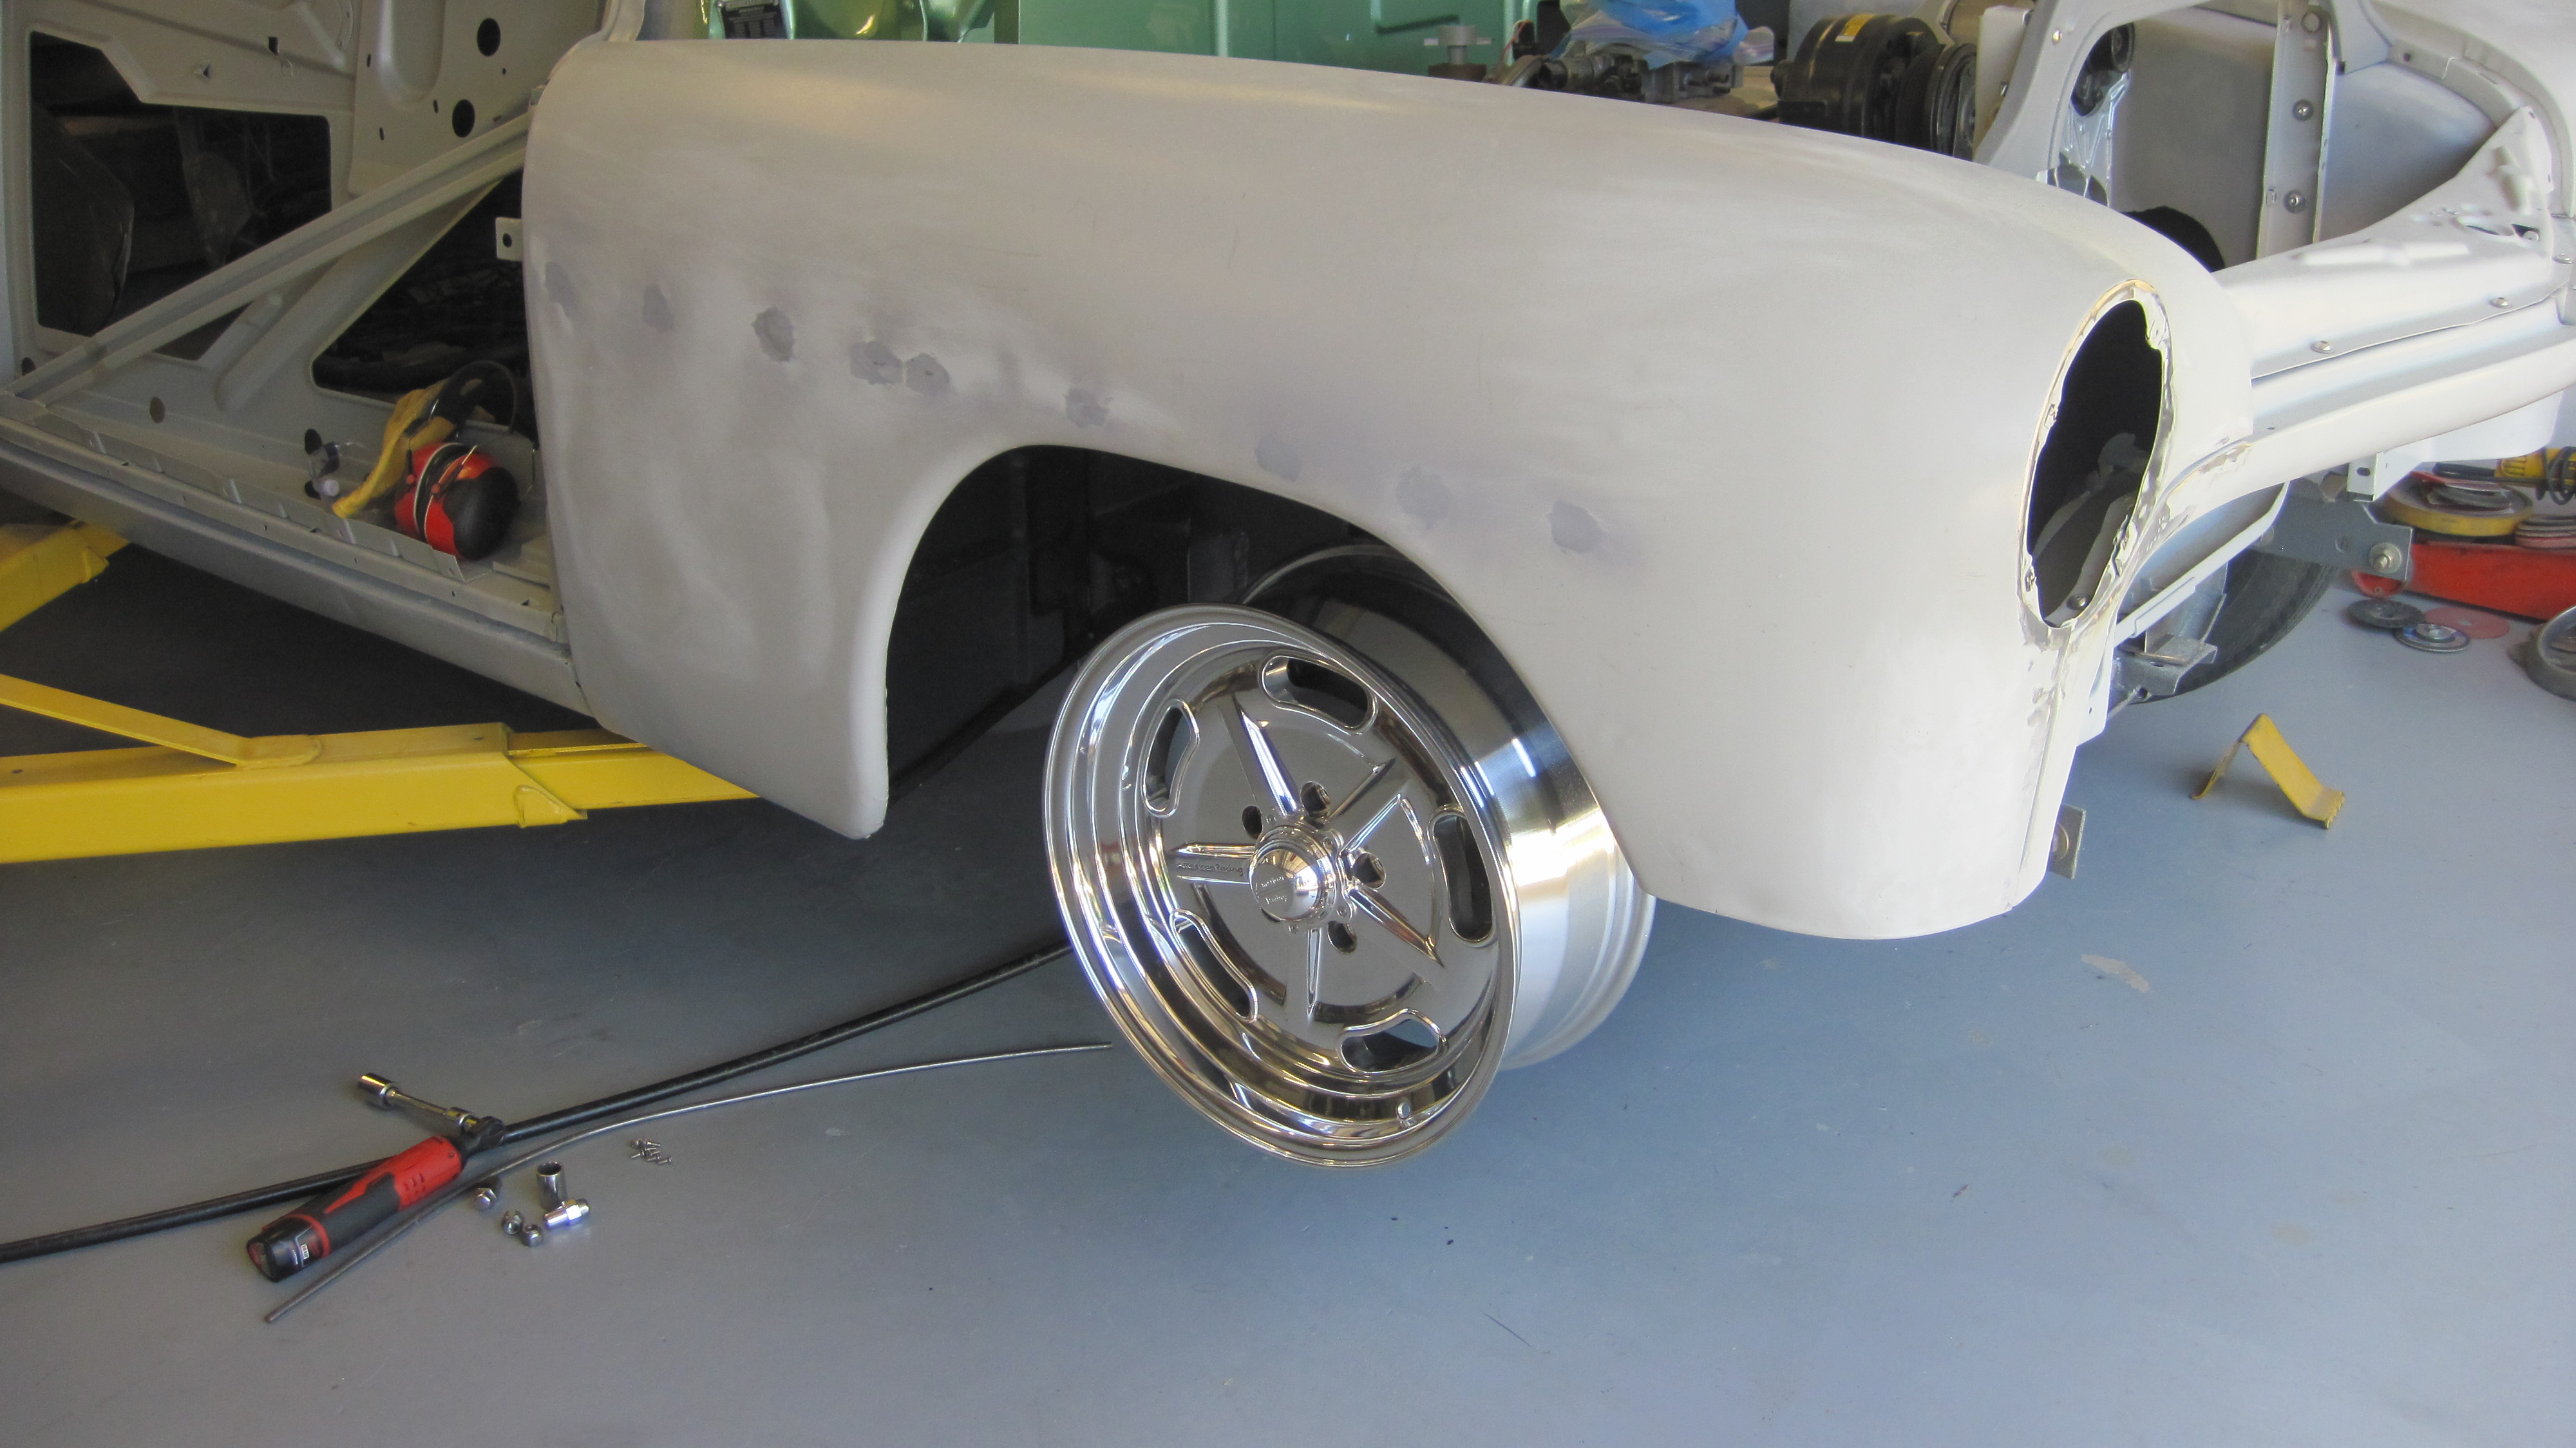
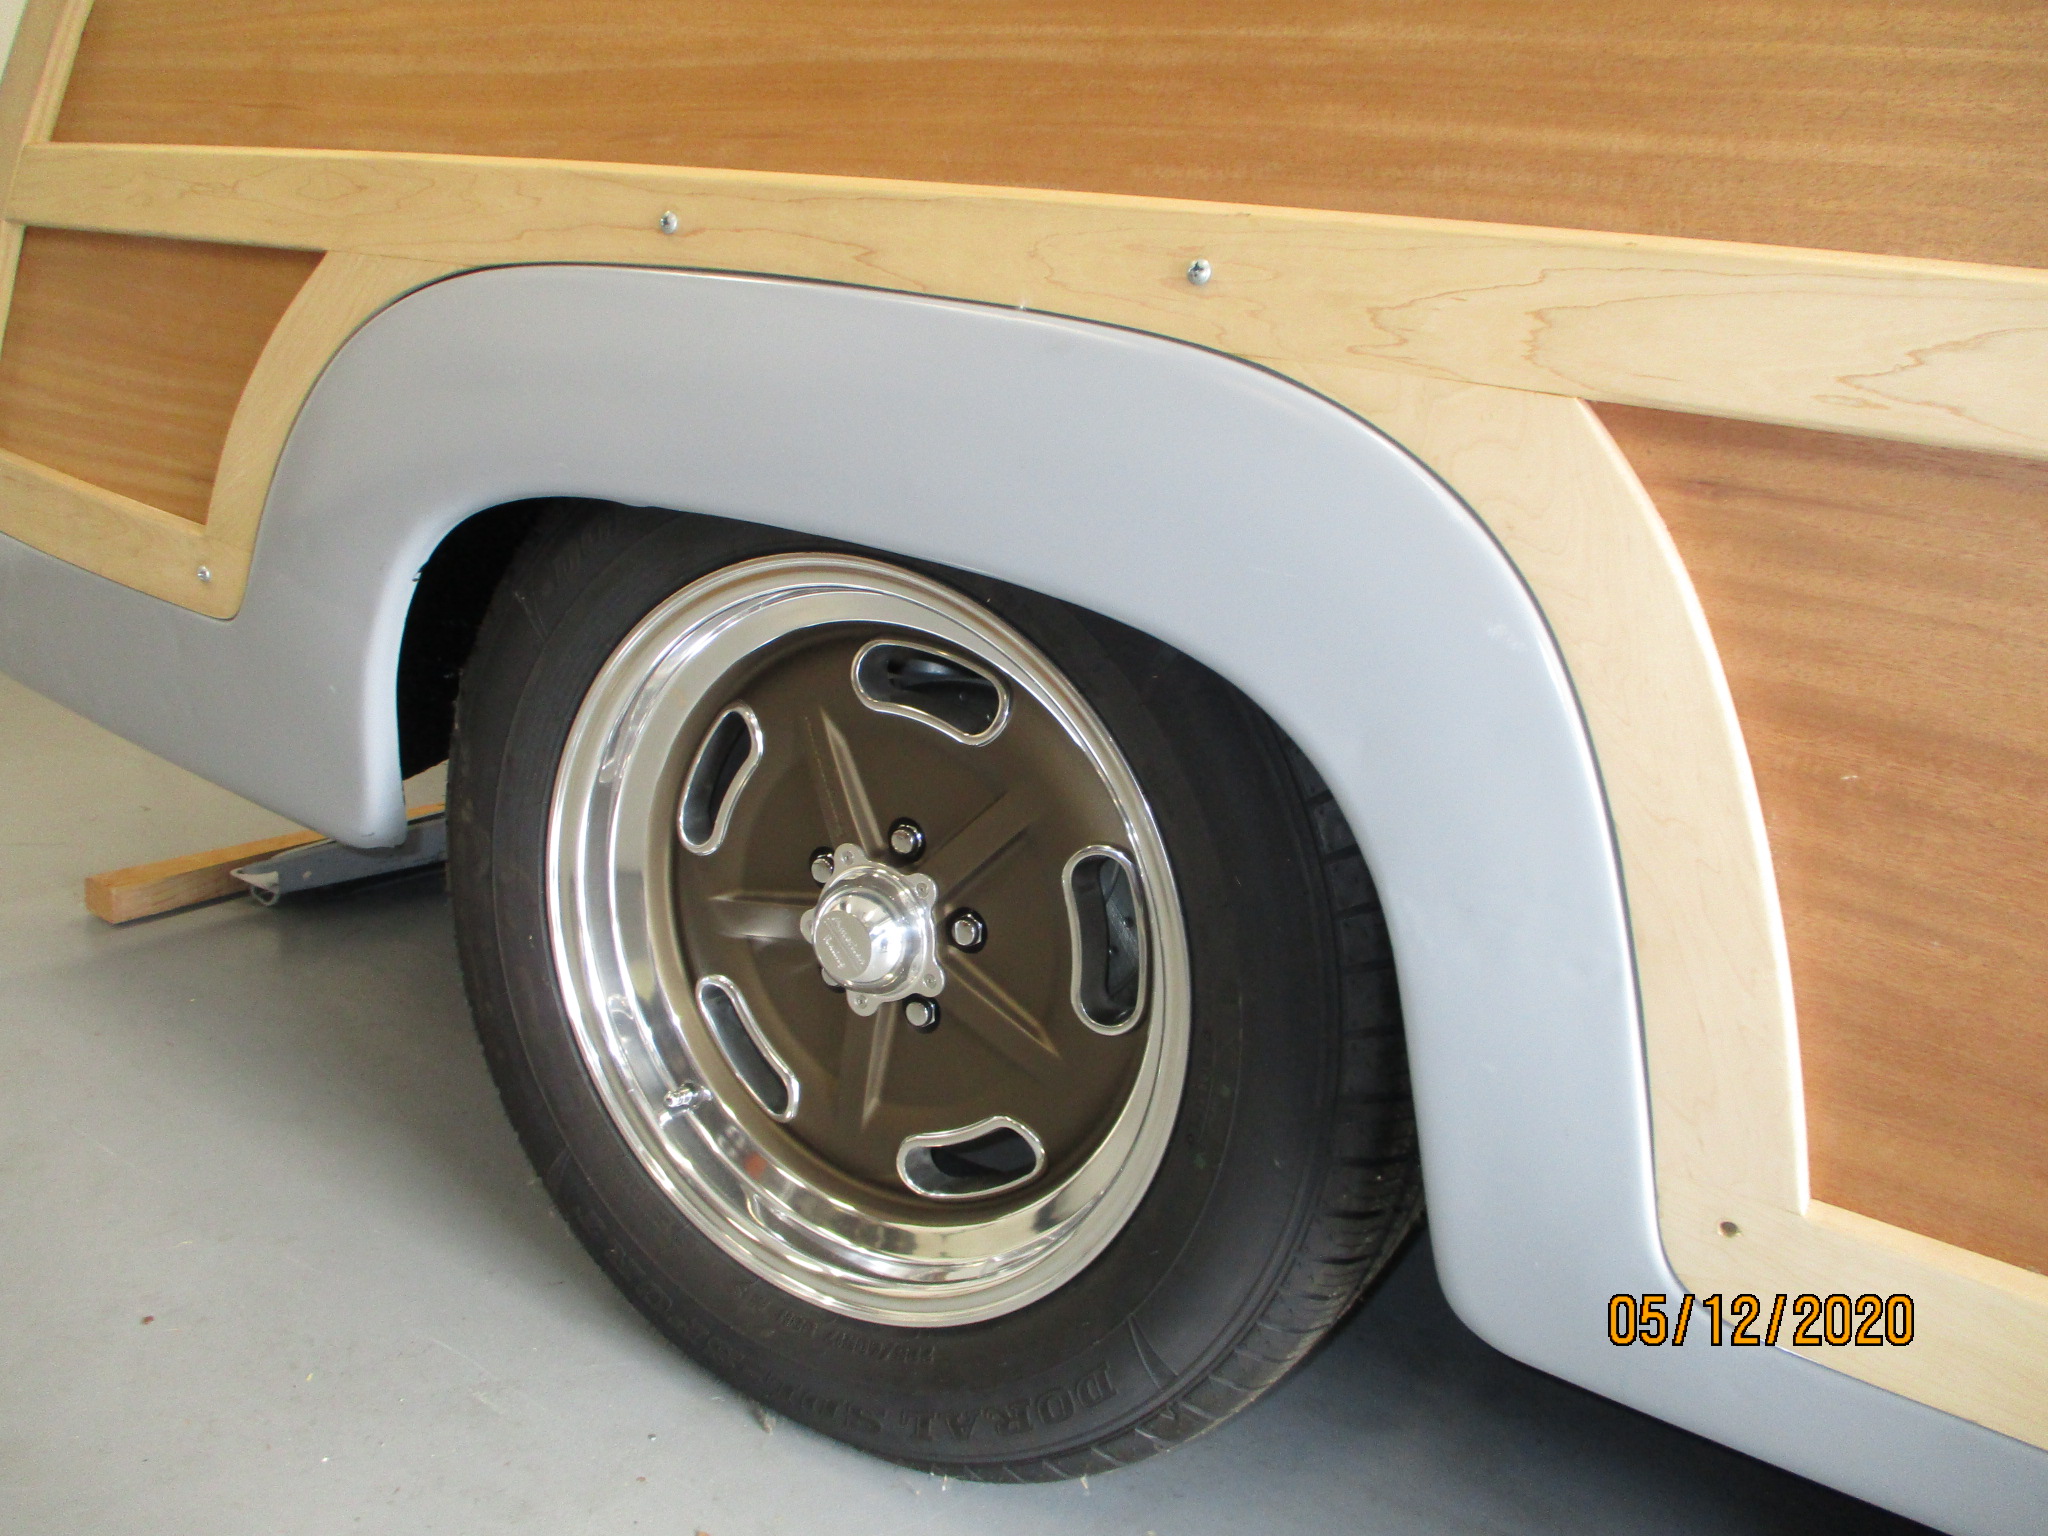
I'd neglected to show pics of the wheels I went with. I saw wheels in the old Halibrand-style with a dark bronze ceramic coating from Coddington Wheels. They were PERFECT for the look I'm after, but they were almost $1000 each.
So, I figured out which ceramic coating to use, ordered a set of Halibrand-style wheels from American Racing for $200 each....
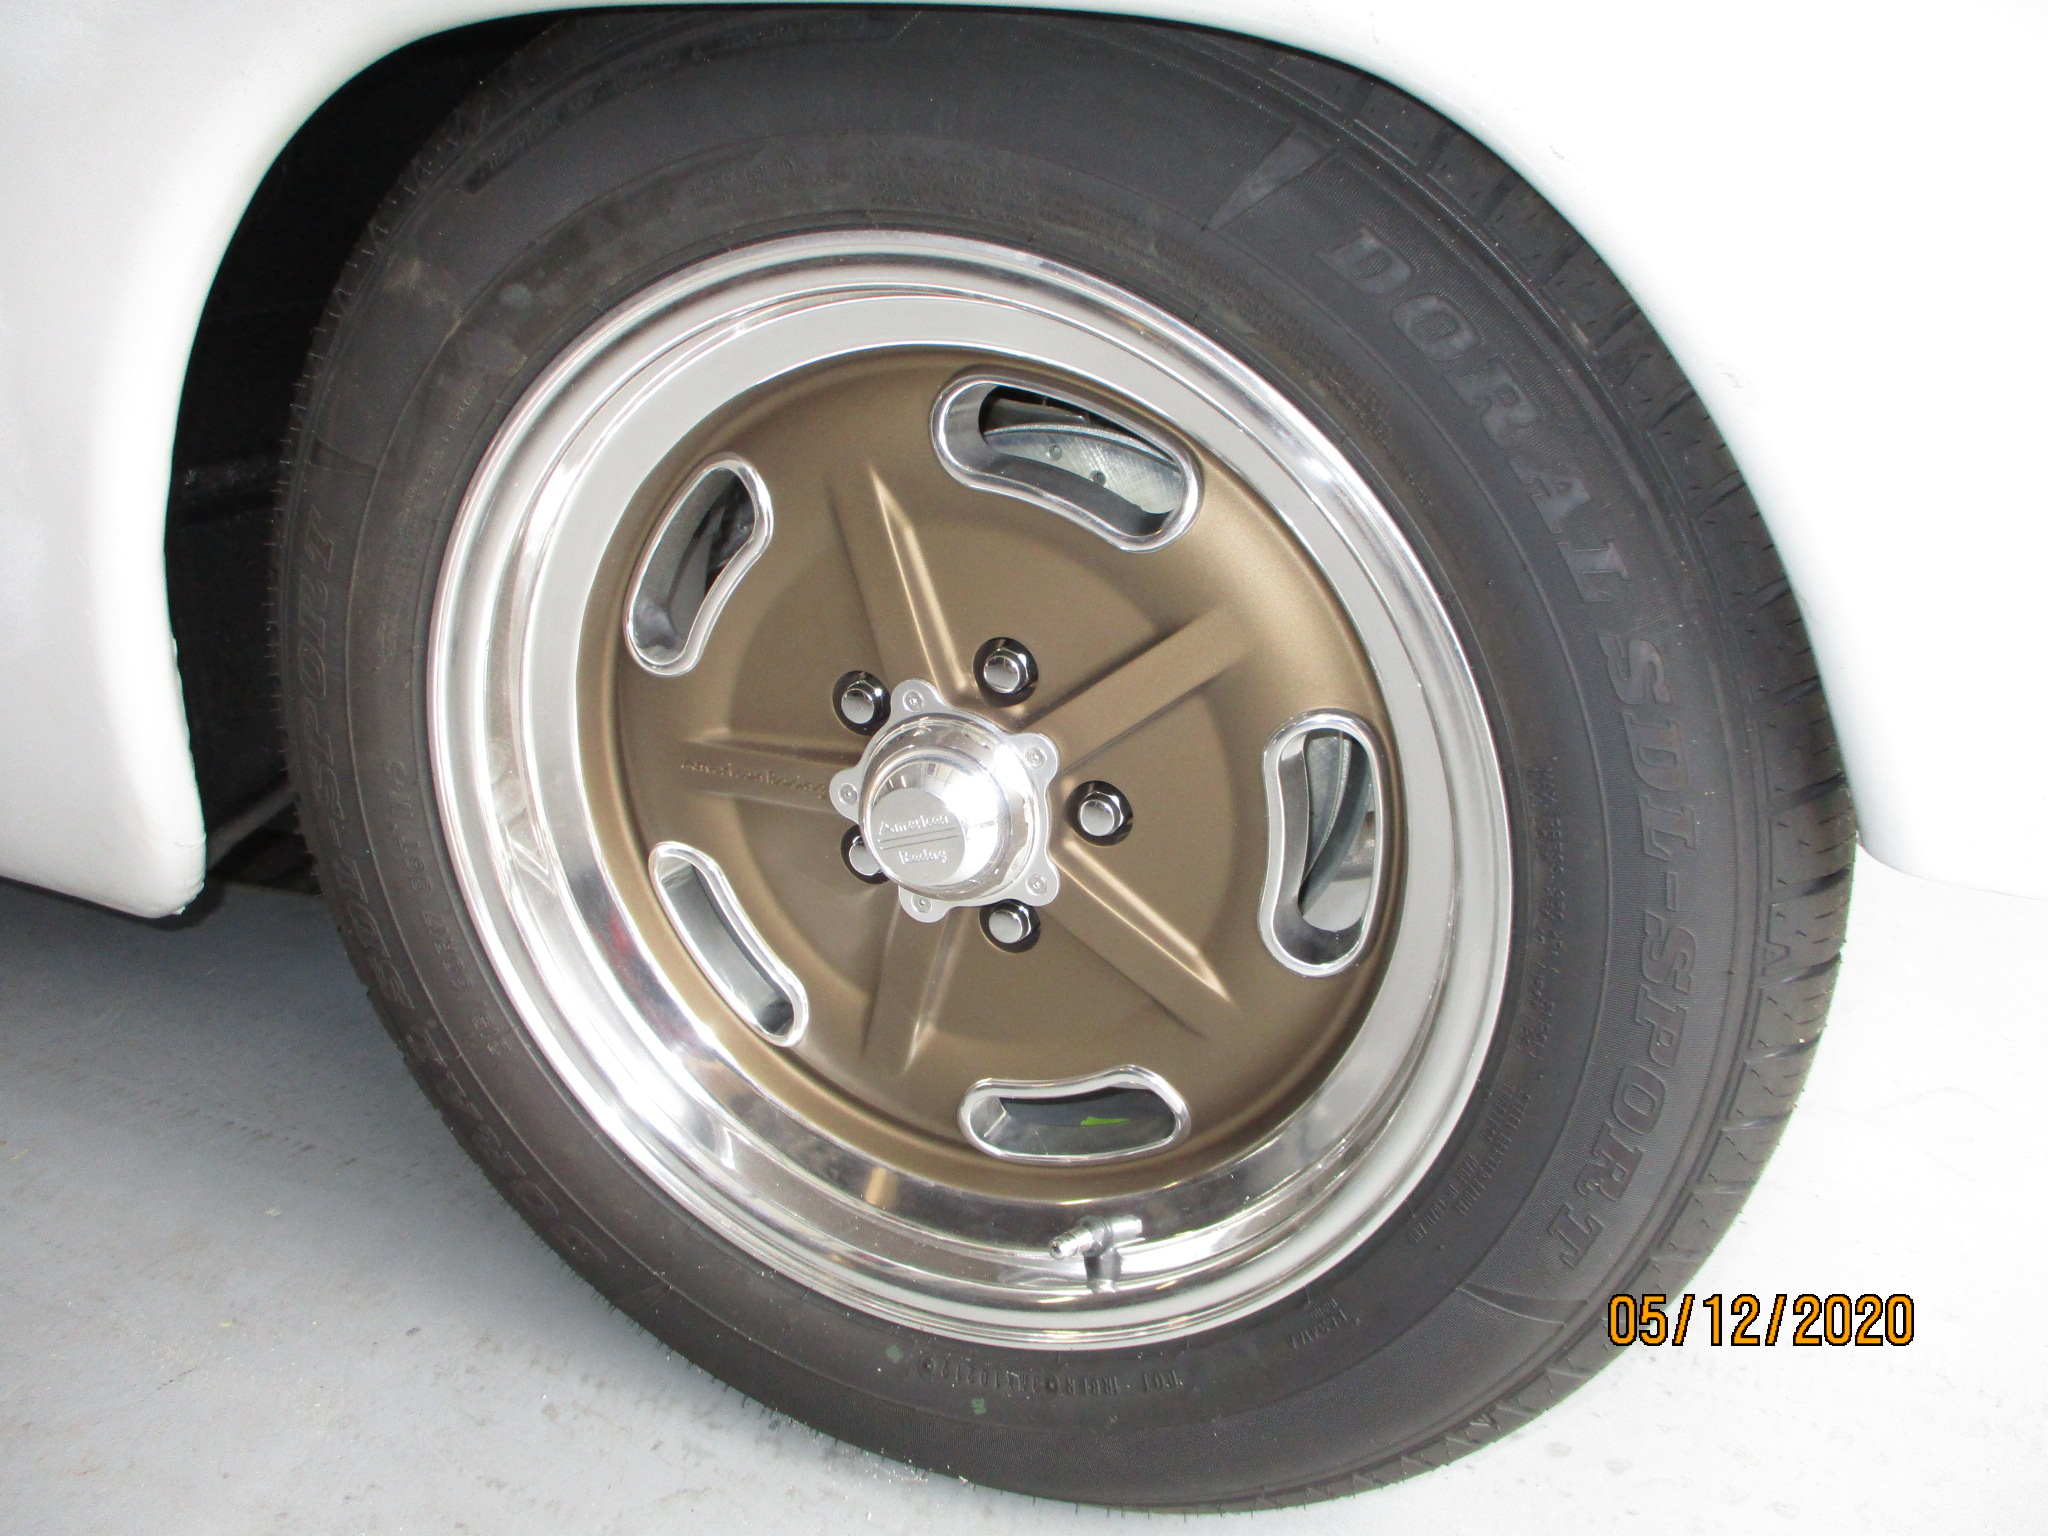
...and took them to my local powder coater and had them sprayed. The ceramic coating cost more than the wheels, but the wheels and coating combined came to half what the Coddington wheels would've been.
Once I varnish the mahogany wood it'll darken up. The wheels should accent the wood nicely.
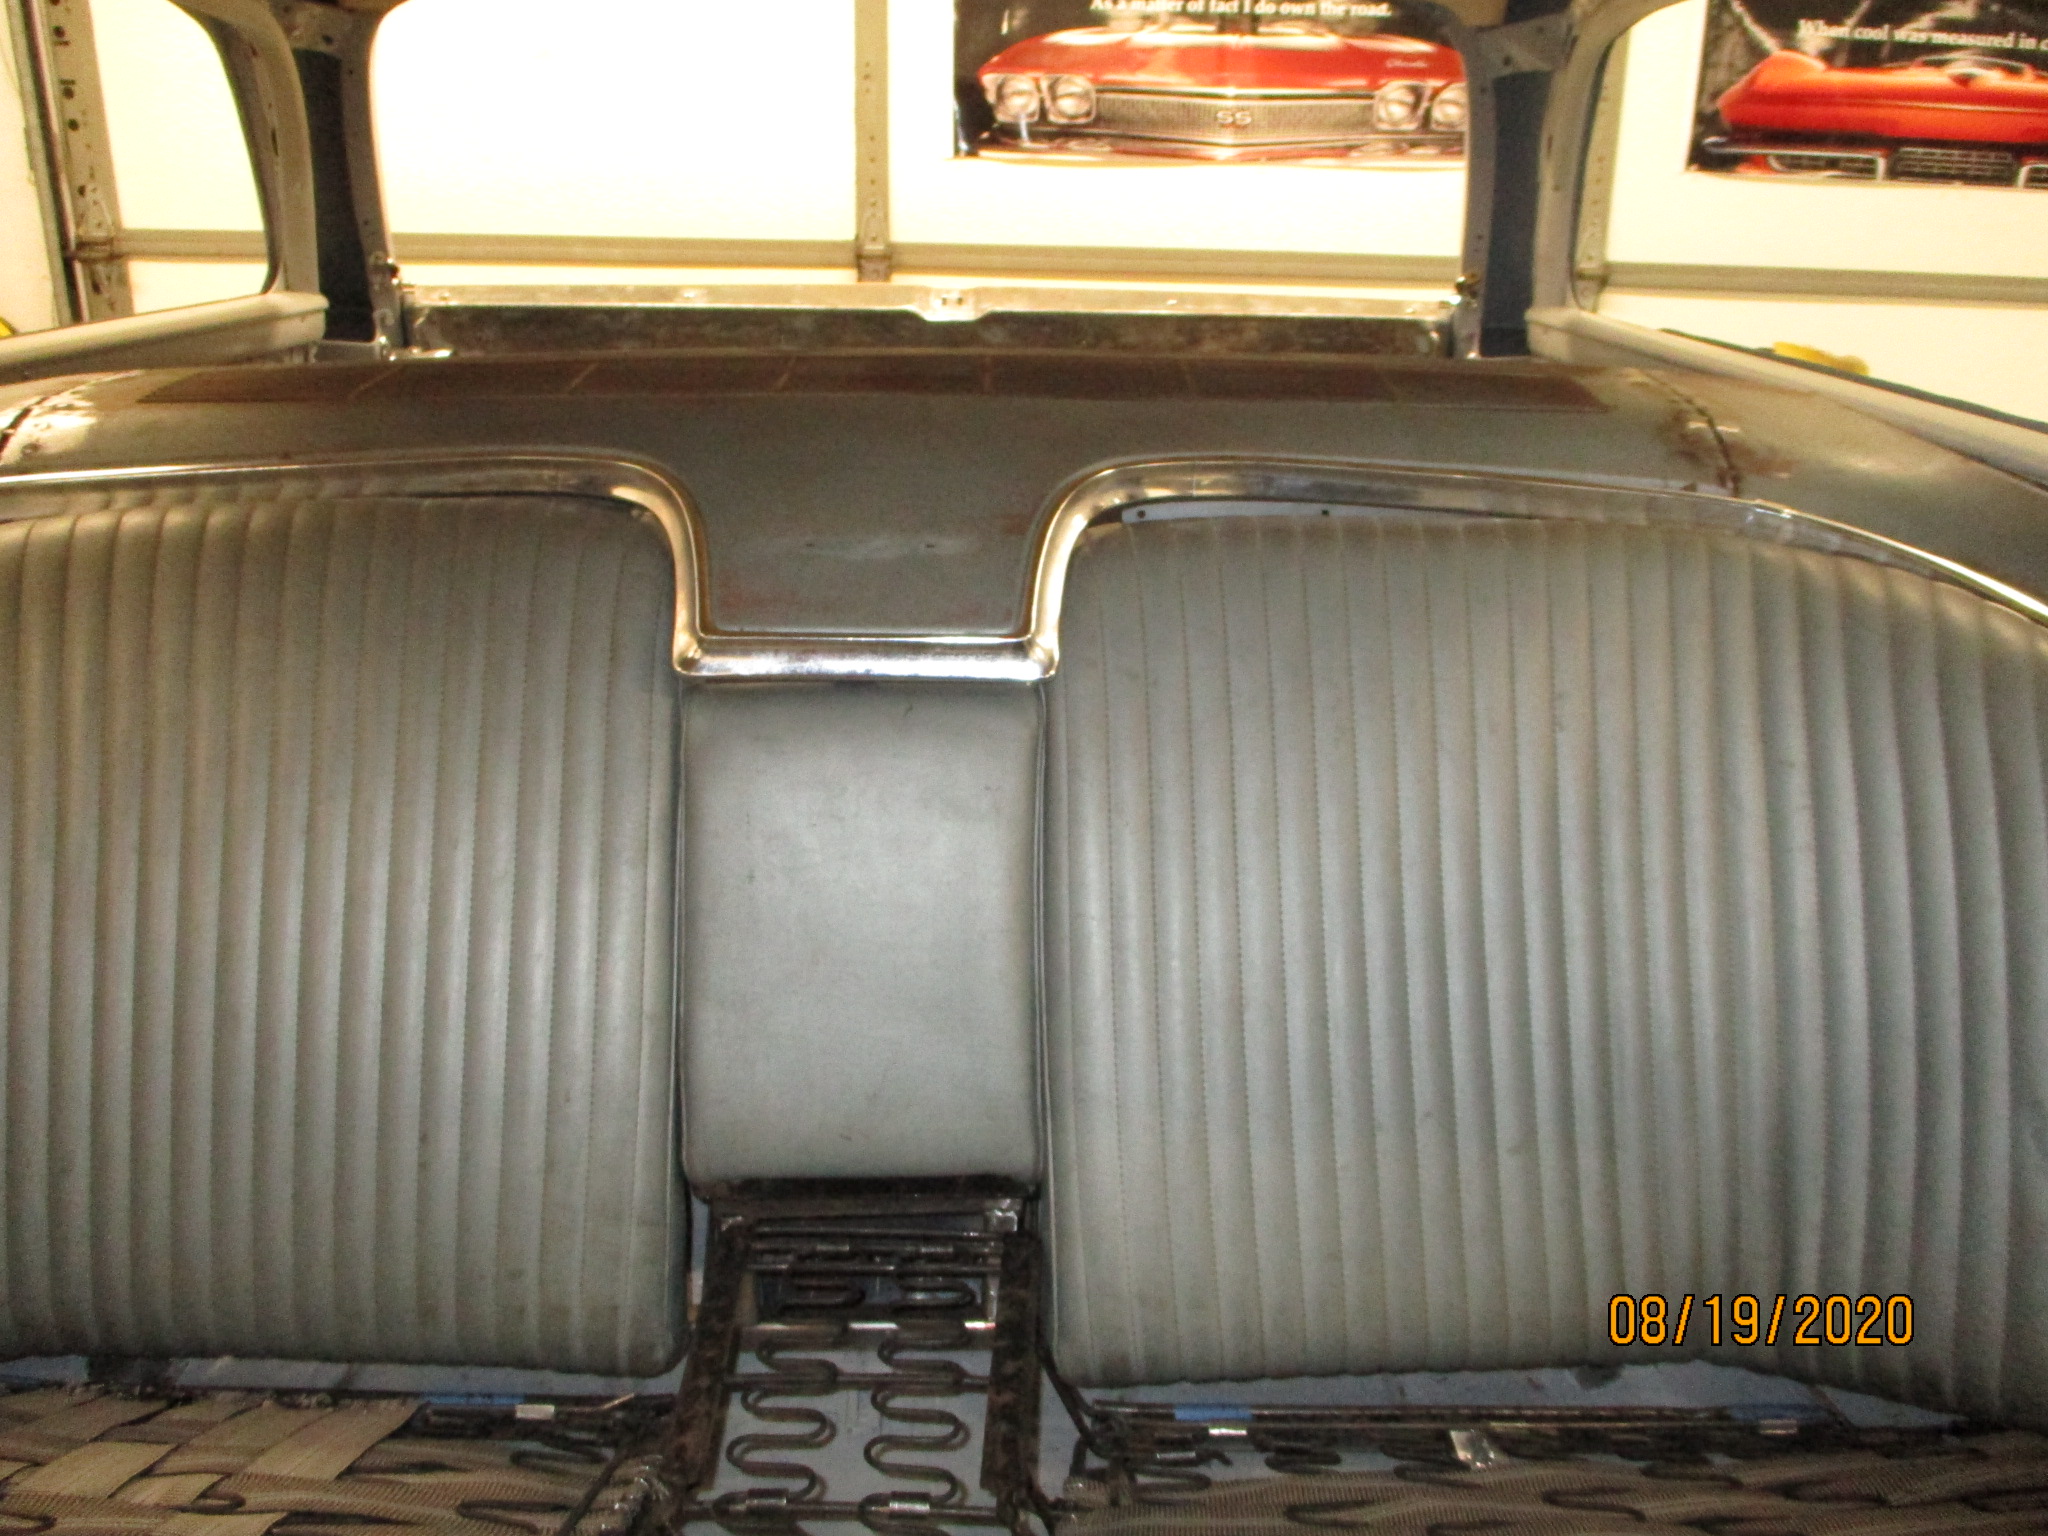
For the back seat I'm using back seats out of a mid-sixties Ford Thunderbird. This was common with Mercury custom coupes in the day, but using the cool sheetmetal waterfall piece would mean losing the functionality of a fold-down rear seat. No problem. This car won't be hauling lumber or cement anymore. The waterfall piece will hide the battery, the rear A/C unit, and the fuse panel.

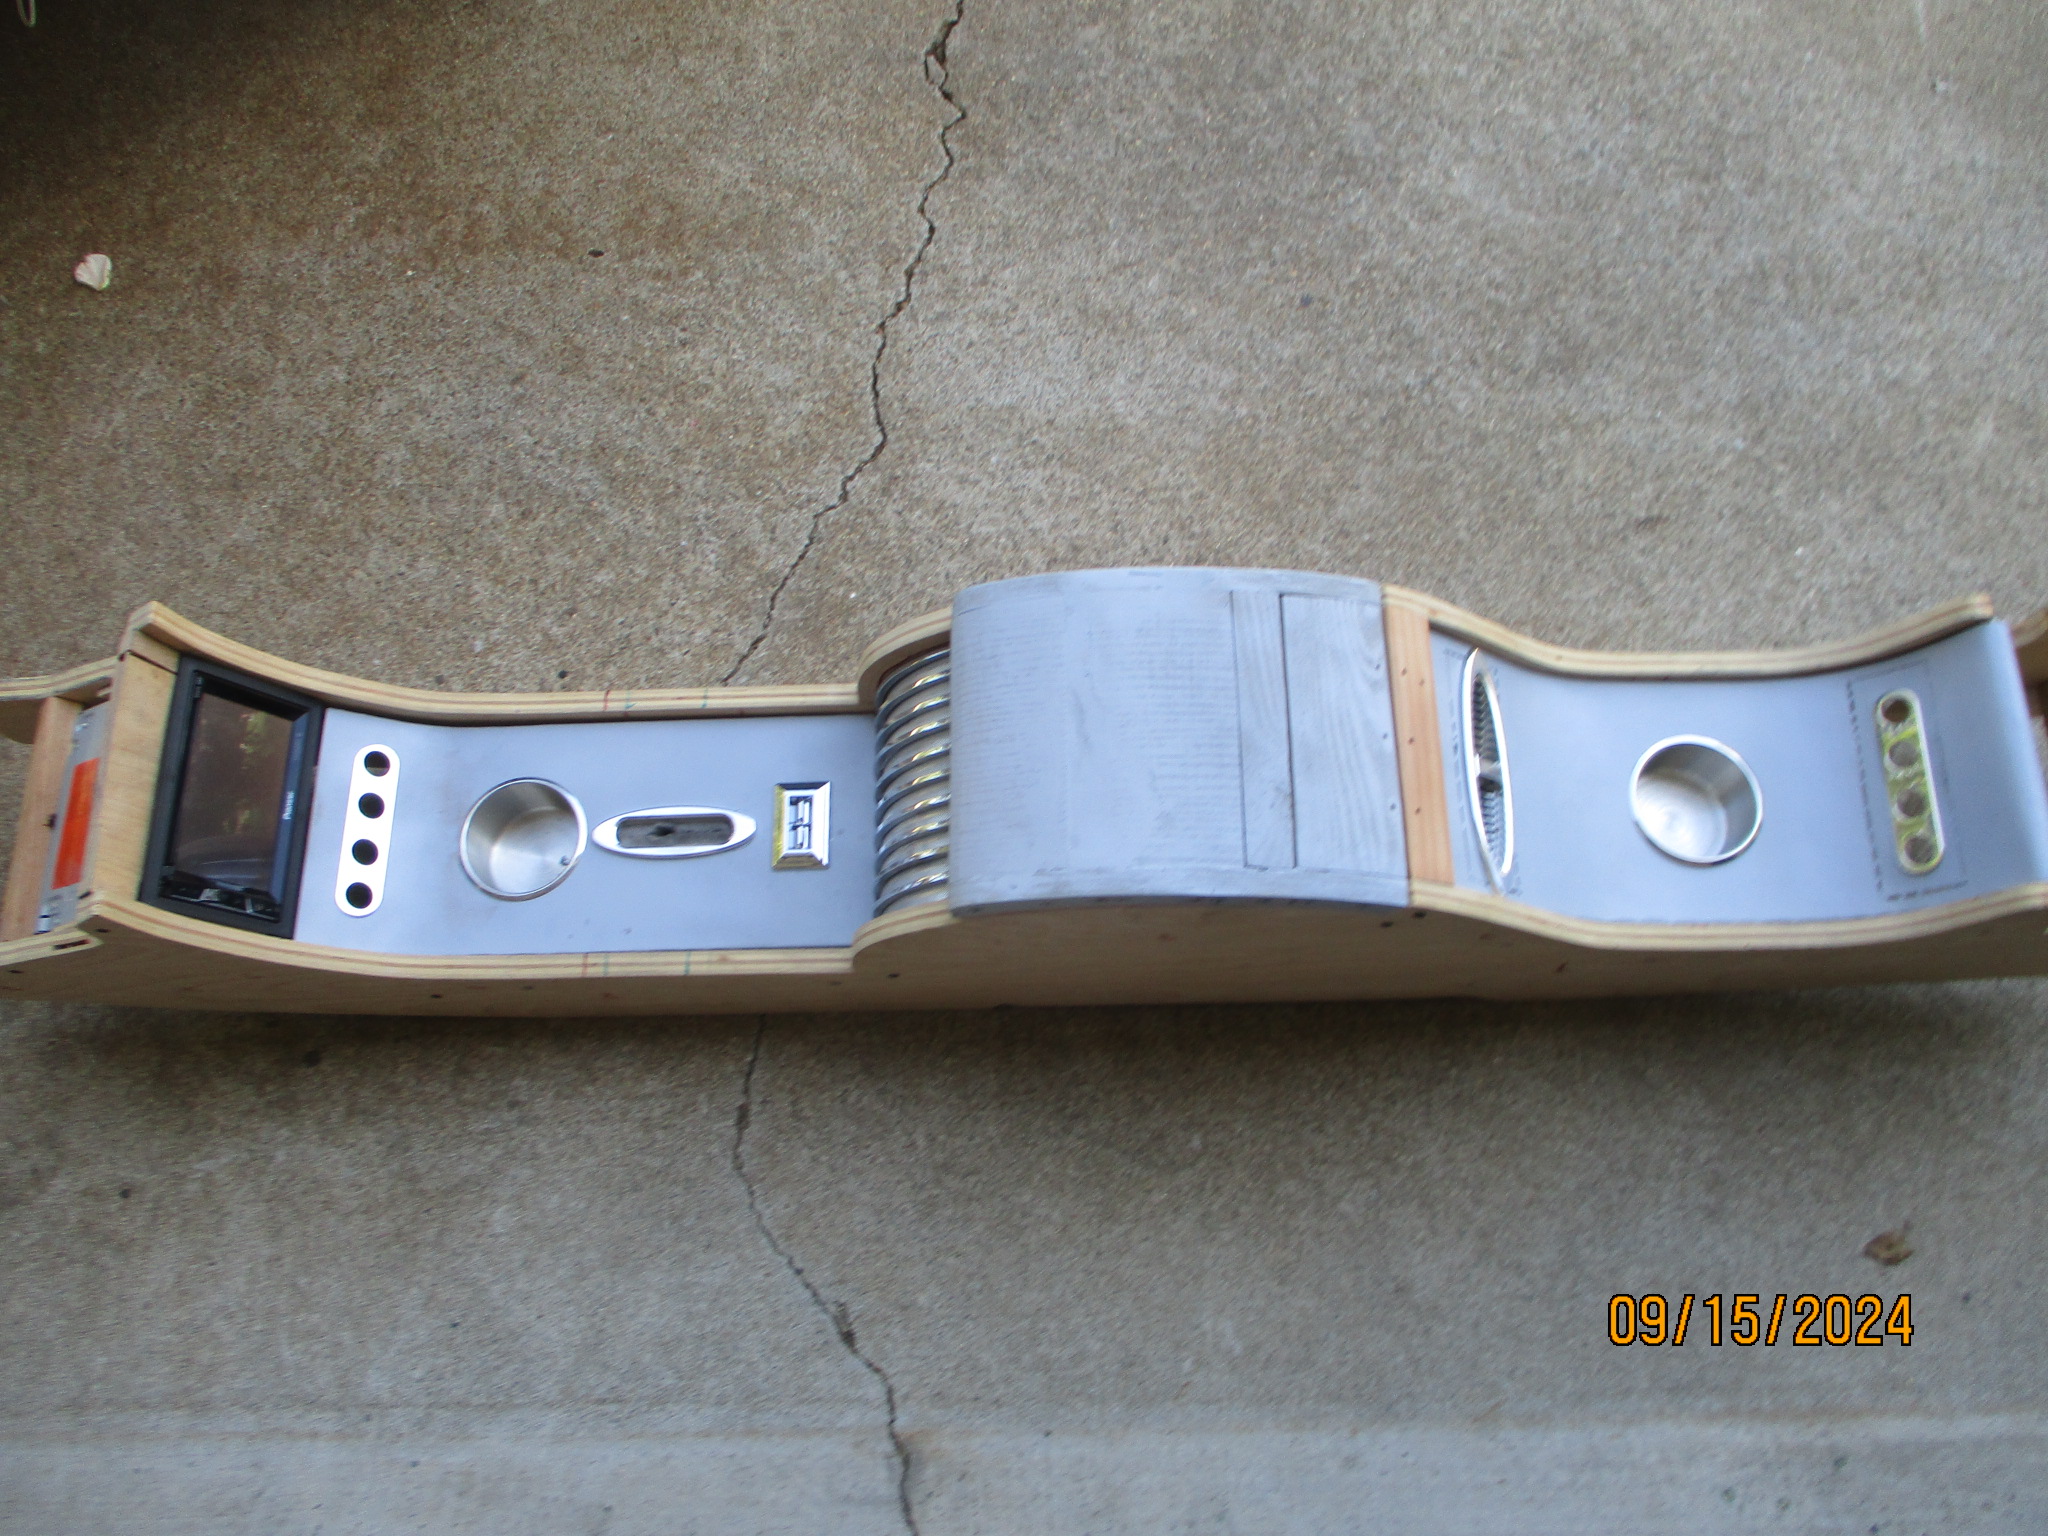
My plan, as if I have one, is to run a full length center console that will mount the two A/C controls, stereo with back-up camera, power window controls, two of the back seat A/C vents, and the obligatory cup holders.
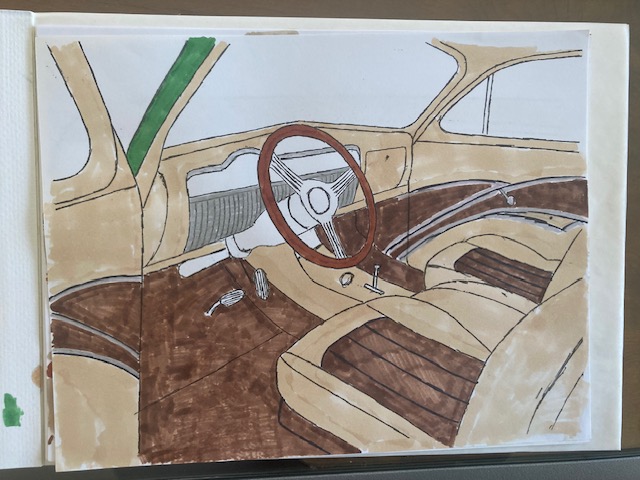
But before I could design a center console, I needed to design the entire interior that would incorporate the console.
So I installed the front and back seats, then took some pics, and went over those with tracing paper to get an outline.
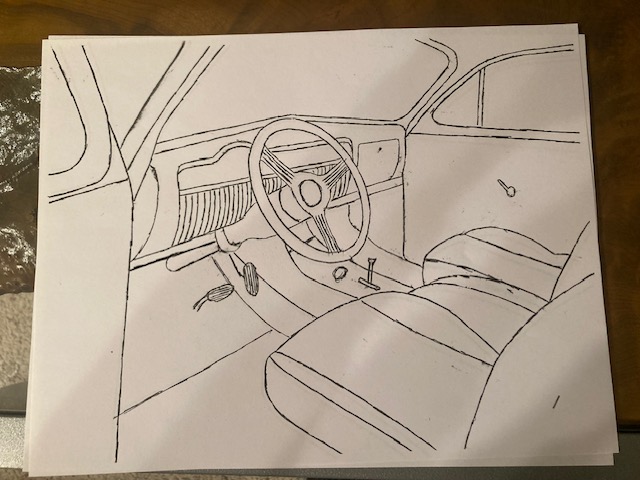
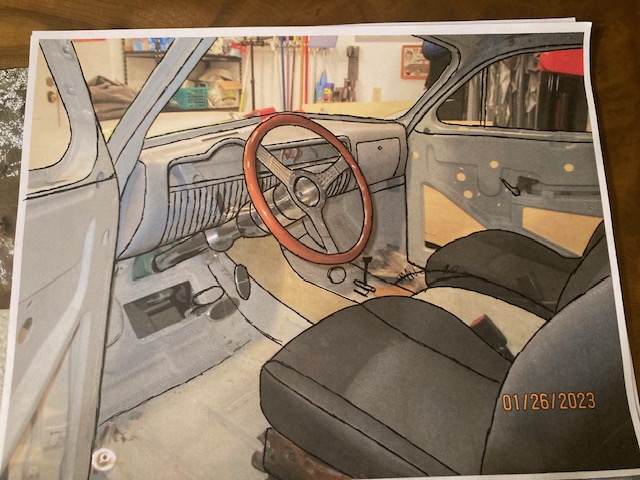
Then I was able to work on an overall design for the interior.
[1].jpg)
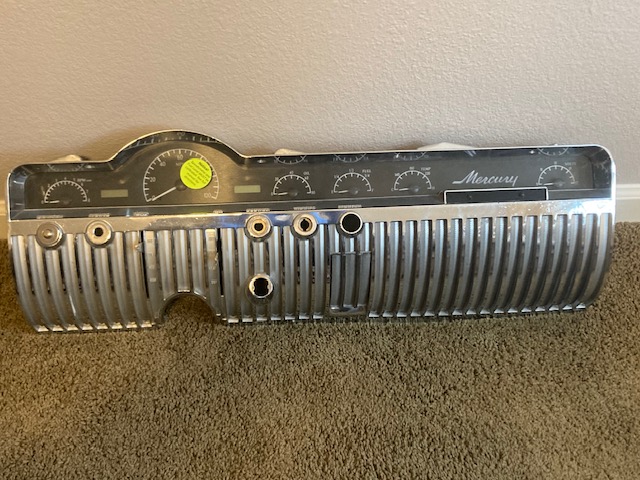
And I had an extra dash piece that I wanted to incorporate into the center console to match the dash. My original design used plywood for the sides, and shaped (the process is called "kerfing") wood center pieces.
I'd decided early on that I was gonna use the Dakota Digital dash. The extremely low height of the gauge opening pretty much eliminated any other aftermarket gauges.
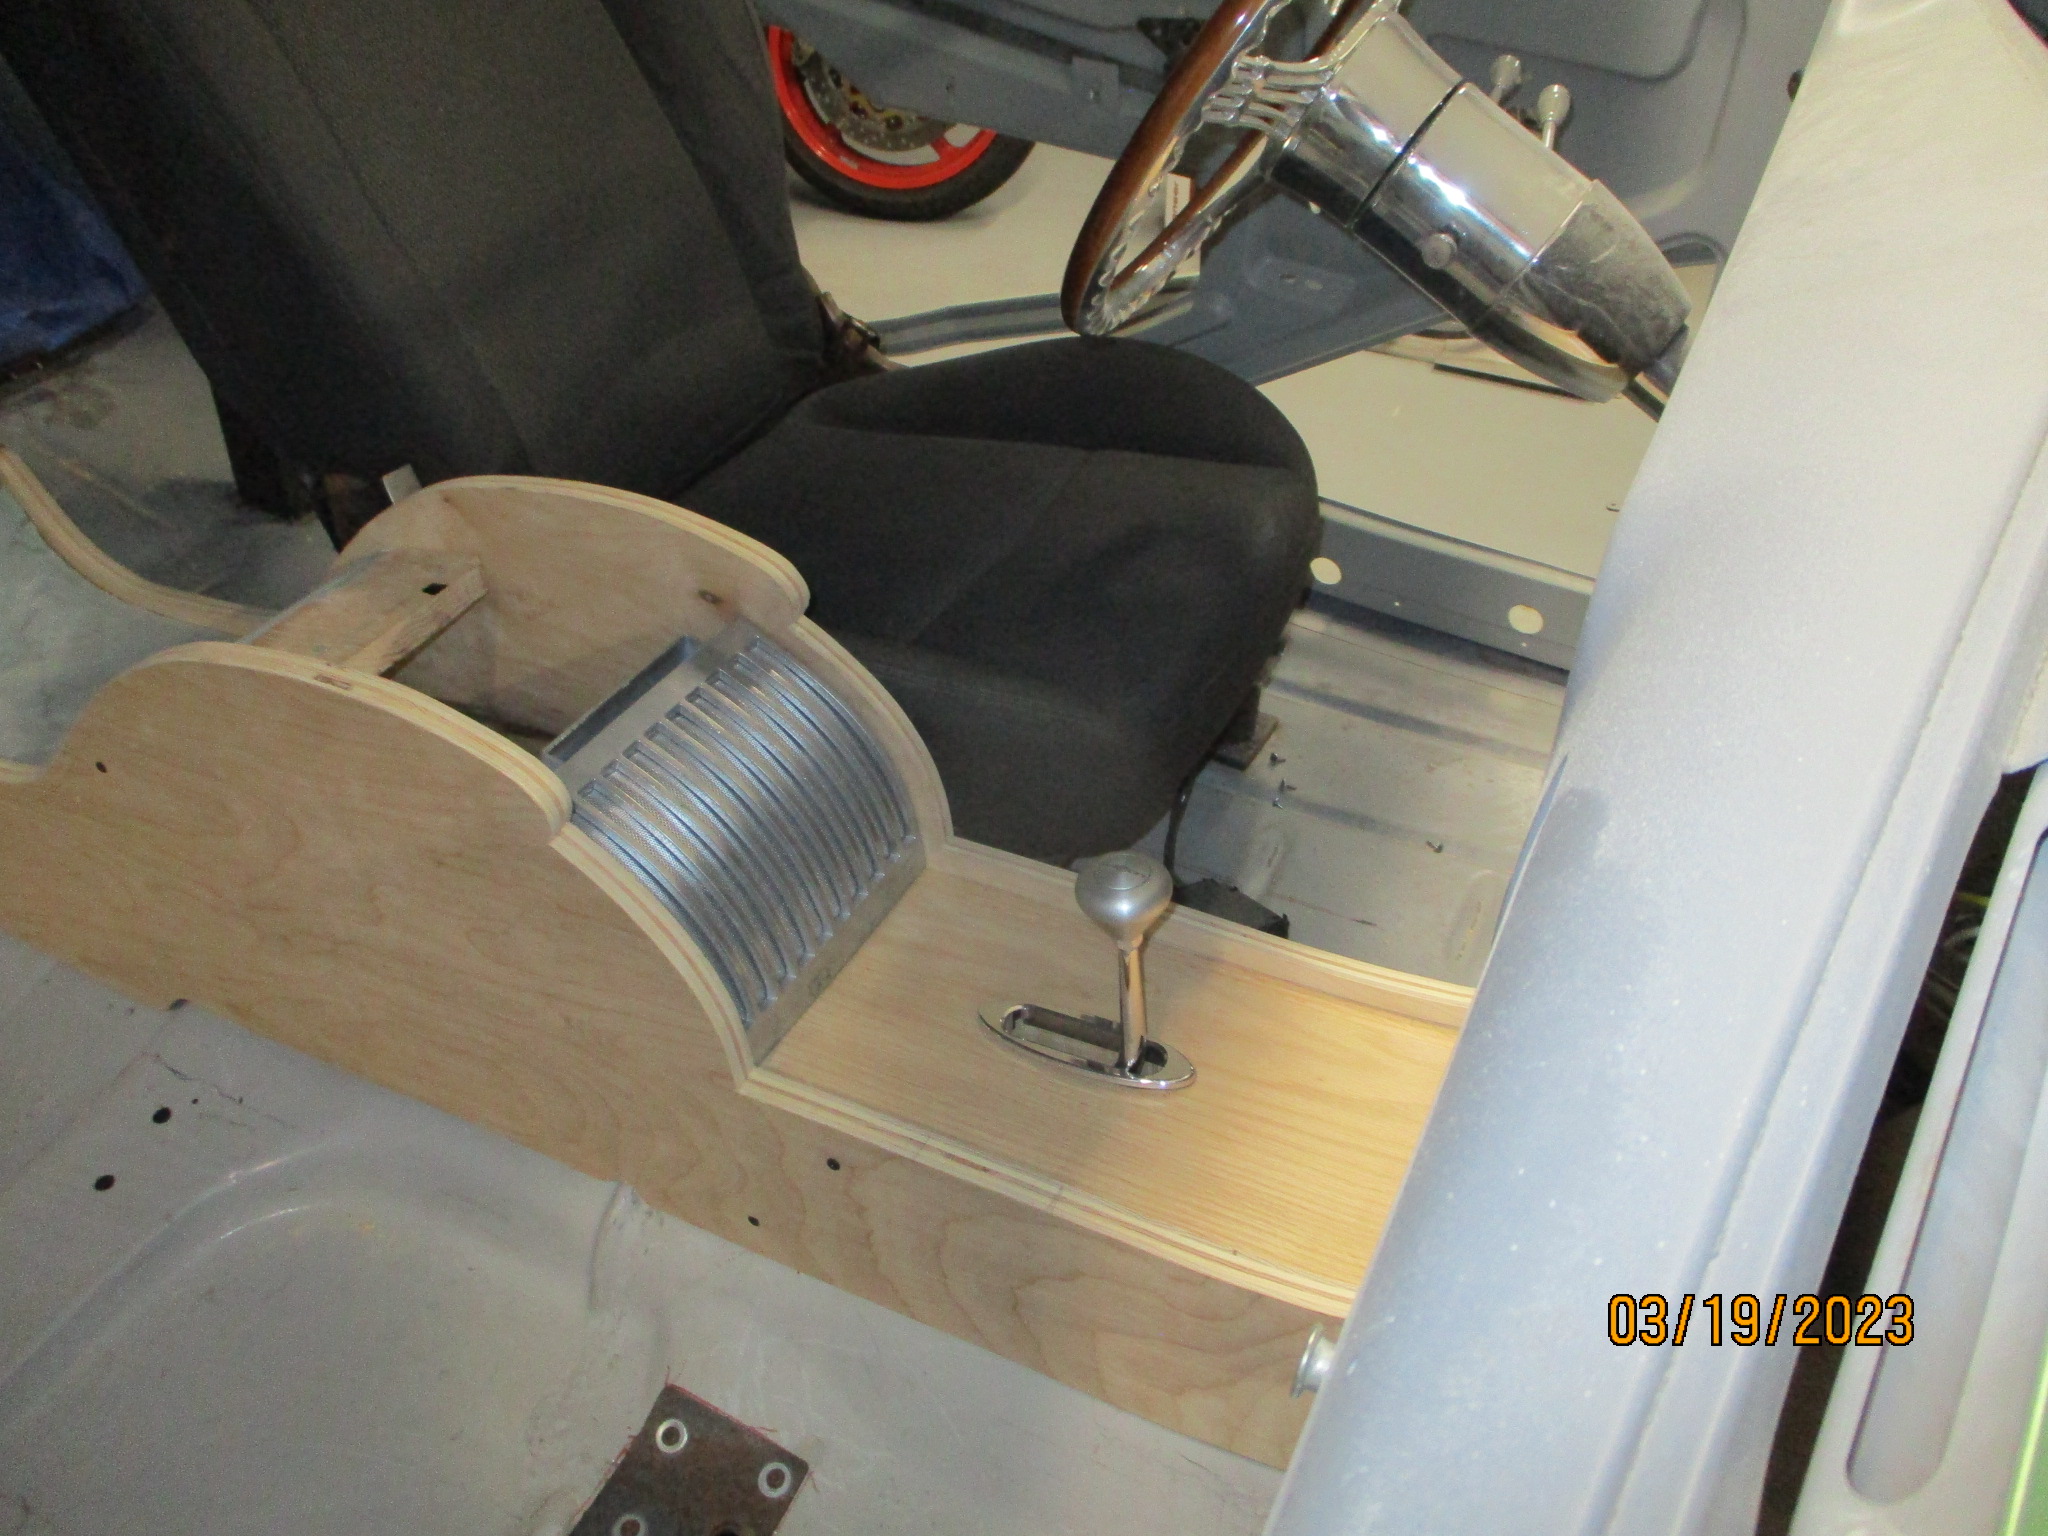
But the A/C controls depth, and mounting method dictated that the center pieces be sheetmetal. So I used my new shrinker/stretcher to make those pieces.

After numerous modifications, it ended up looking quite spiffy.

Since the front A/C evaporator unit will take up about 98% of the glovebox space, the interior storage space will be under the console armrest.